Command line tool usage
Rahti can be used from the command line with either the oc tool (the OKD command line client) or the kubectl tool from Kubernetes. Some features specific to OKD are only available through the oc tool, so this page focuses on oc.
Downloading the oc tool
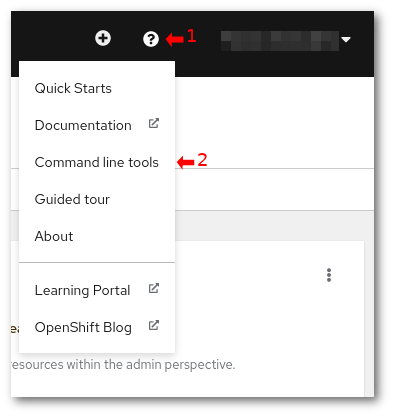
The oc tool is a single binary that only needs to be on your $PATH. Download links for several platforms and operating systems, along with installation instructions, are available on the Command Line Tools page in the web interface. You can reach it from the help menu:
Opening the page shows the available downloads:
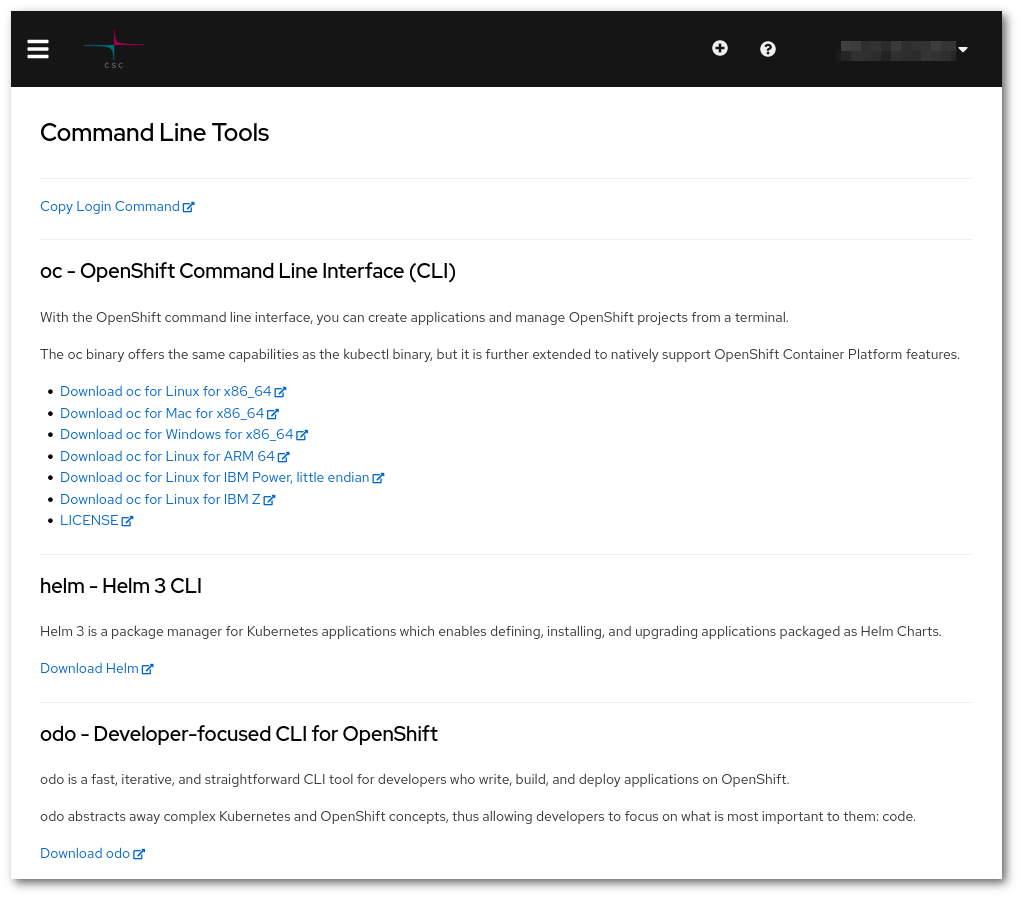
Download the package for your platform, extract the files, and then copy the binary into a directory on your $PATH. See the example below for a linux-based machine.
curl -LO <DOWNLOAD_LINK>
tar -xvf oc.tar
mkdir -p "$HOME/.local/bin"
chmod +x oc
cp oc "$HOME/.local/bin/oc"
export PATH="$PATH:$HOME/.local/bin"
To confirm the installation, open a new terminal, go to any folder, and run:
It should print the list of all available commands.
How to login with oc
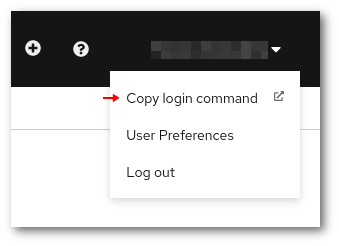
The oc login command is available from the dropdown menu next to your name in the web console. Click your username and select Copy Login Command, then paste the command into a terminal to start using Rahti from the command line. The command looks like:
Multiple terminals
The login session for oc is shared across your terminals, so once you log
in you are logged in for every terminal on that machine.
Helm login
If you are using Helm and you are not logged in, you might see an error like this:
$ helm ls
Error: Kubernetes cluster unreachable: Get "http://localhost:8080/version": dial tcp 127.0.0.1:8080: connect: connection refused
oc resolves it.
Logging in to the registry
To use the Rahti internal container registry, you need to log in to it separately. Once logged in, you can use the docker client to pull from and push to the registry.
Using your personal account
After logging in with oc, generate a token with oc whoami -t and pass it to docker login:
Using sudo
Some Docker setups require running the docker client as root with sudo. In that case the oc login command must also be run with sudo: login information is stored in the user's home directory, so only the user that runs oc login is logged in to Rahti.
As a general recommendation, prefer a "rootless" runtime such as Podman when possible. You can also configure Docker to run as a non-root user. On most Linux distributions this is done as follows.
If you installed docker.io:
If you have installed Docker Snap (> Ubuntu 22):
sudo addgroup --system docker
sudo useradd $USER docker
newgrp docker
sudo snap disable docker
sudo snap enable docker
And then log out and log back to have the group membership re-evaluated.
Using a service account token
You can also use an internal service account to interact with the registry. This is the recommended approach for automated procedures such as a CI pipeline. Every Rahti namespace has three internal service accounts by default (builder, default, and deployer), but it is better to create a dedicated service account and assign it the system:image-pusher role:
oc create serviceaccount pusher
oc policy add-role-to-user system:image-pusher -z pusher
docker login -p $(oc create token pusher) -u unused image-registry.apps.2.rahti.csc.fi
oc create token produces a token that expires. To set the lifetime, pass --duration. For example, oc create token pusher --duration=87600h creates a token valid for 10 years.
CLI cheat sheet
Basic usage:
Examples:
Show projects:
Create a new project:
Switch to project my-project:
Show all pods in the current namespace:
Show all pods in the namespace <my-other-name-space>:
Show all pods that have the key-value pair app: myapp in metadata.labels:
Print the specifications of the pod mypod
Other useful commands
oc createcreates an object. Example:oc create -f file.yamloc replacereplaces an object. Example:oc replace -f file.yamloc deletedeletes an object. Example:oc delete rc myreplicationcontrolleroc applymodifies an object according to the input. Example:oc apply -f file.yamloc explainprints out the API documentation. Example:oc explain deploy.specoc editloads an object from the API to the local editor chosen by the$EDITORenvironment variable. Example:oc edit Deployment mydeploy
Abbreviations
Object types have abbreviations that are recognized in the CLI:
| Abbreviation | Meaning |
|---|---|
is |
ImageStream |
dc |
DeploymentConfig* |
svc |
Service |
bc |
BuildConfig |
rc |
ReplicationController |
pvc |
PersistentVolumeClaim |
* Deployment Config is deprecated
Further documentation
See the upstream documentation for more information about using the command line interface: