Table of contents of user guide
How to get access to SD Desktop with a single register permit
Use case
You need to access SD Desktop. You have a permit from a single register.
Solution
- Create a CSC account
- Create new CSC project
- Fill GDPR document
- Contact CSC service desk
- CSC adds members to your project, please wait
- CSC activates SD Desktop for your project, please wait
- CSC project is ready
- Apply for access to the dataset with SD Apply
- Register processes application, please wait
- Send approved application to CSC
1. Create a CSC account
Warning-label
Team manager
Info-label
Team member
- Go to MyCSC portal
- Log in with Haka. Select your home organization and log in to their identity service. How to get an account without Haka.
- Fill in your information on the Sign up page.
- Set your password using 12 characters or more, containing both upper and lowercase letters and at least one number. No special characters are allowed.
- You will receive your CSC user account confirmation via email.
2. Create new CSC project
Warning-label
Team manager
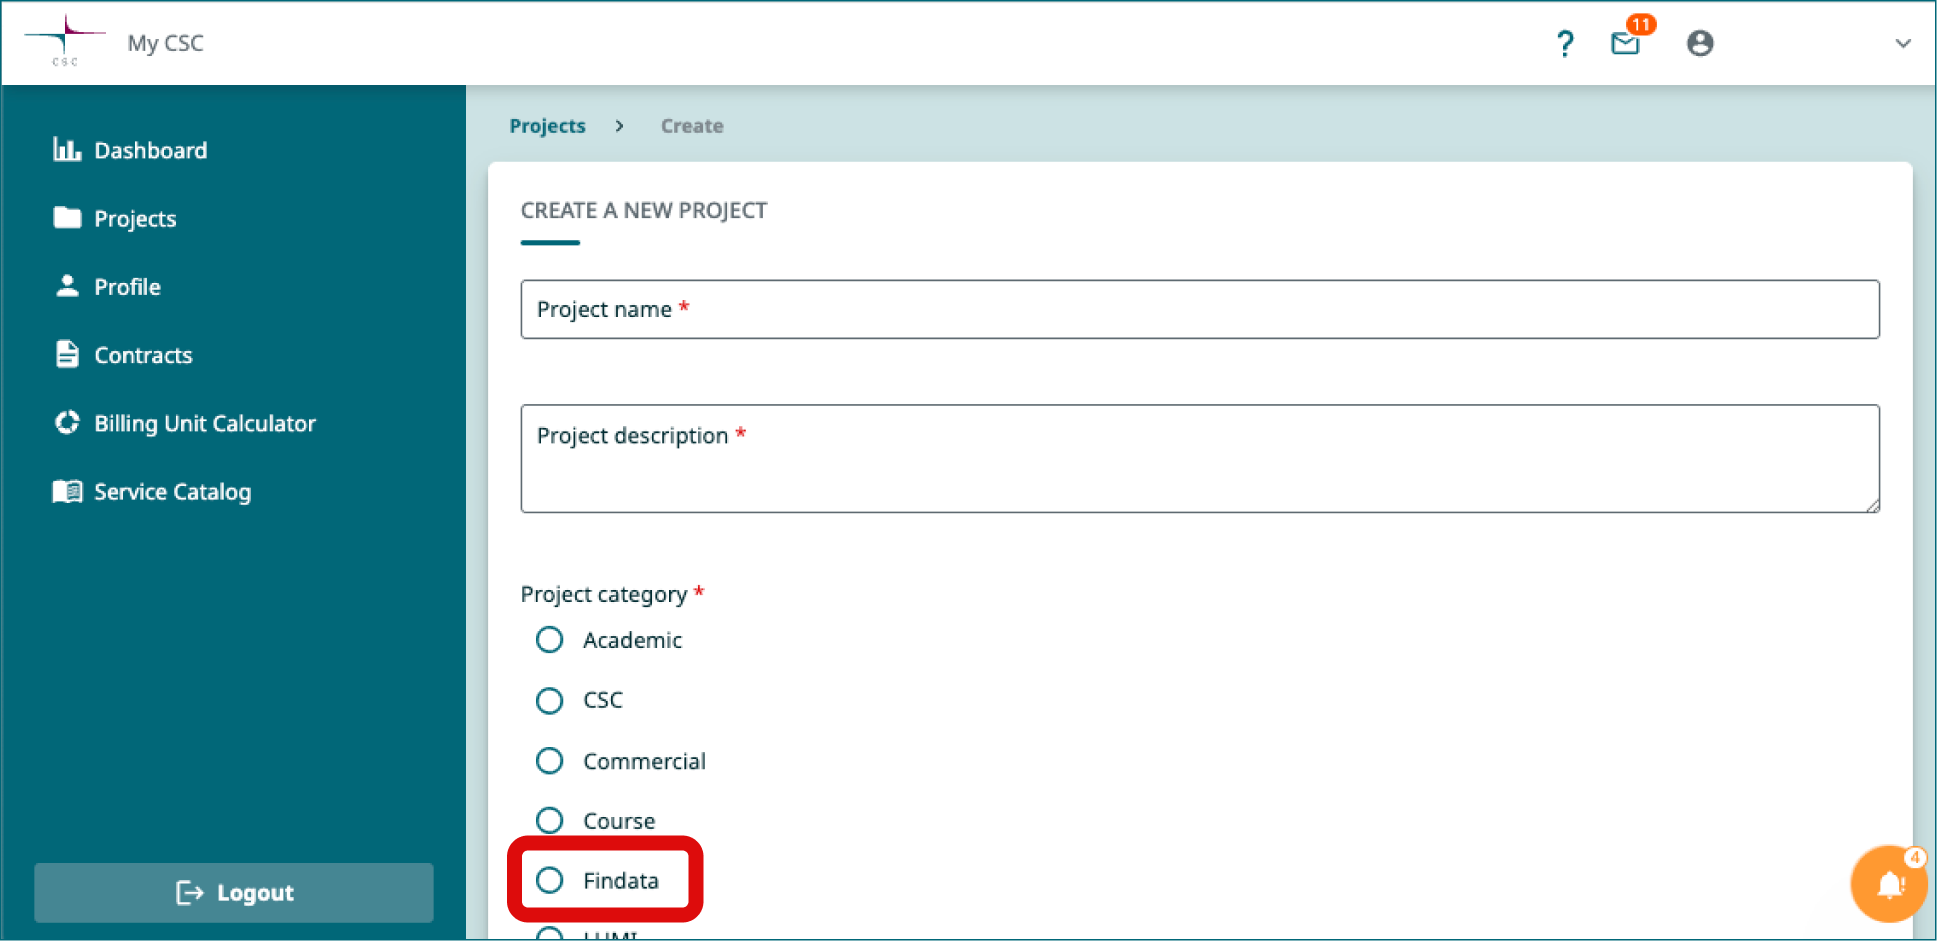
- Go to ”Projects” page (left side menu or a hamburger menu at the top right corner).
- On the top of the page choose New project.
- Fill in the project name and project description. You can edit these later if needed.
- Choose the Project category to be Findata.
- Fill all required fields. Read and accept the terms of use.
- Click Create a project.

3. Fill GDPR document
Warning-label
Team manager
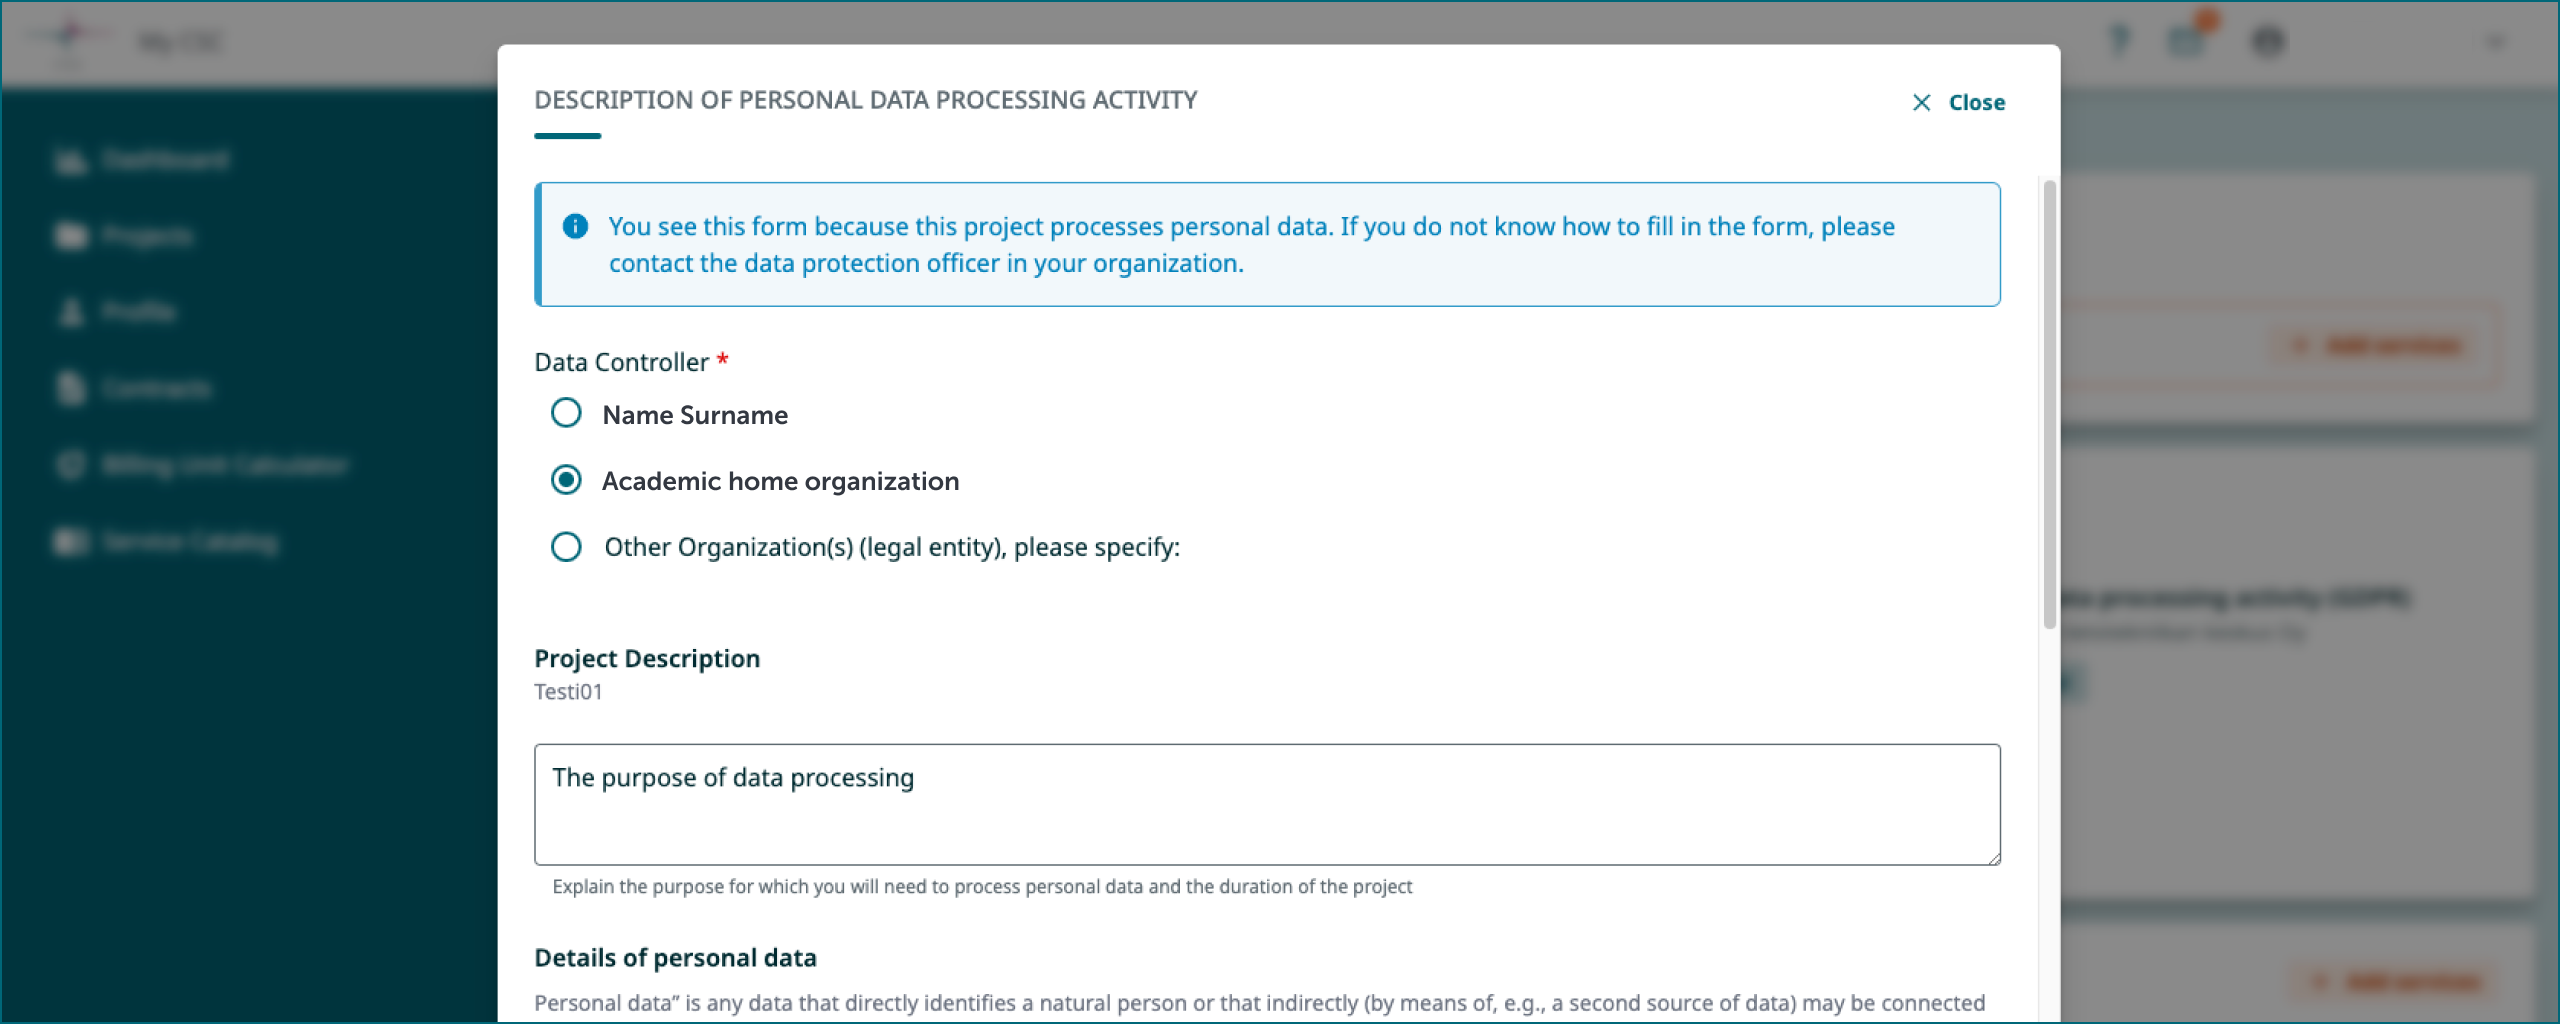
- Since your project handles personal data, you need to fill the GDPR document i.e. Description of processing activity -form.
- The document appears when you create a new project. You can edit this document later.
- Your home organization is the data controller. Read more about the roles and GDPR.

4. Contact CSC service desk
Warning-label
Team manager
- Send email to sensitivedata-support@csc.fi, subject: Sensitive Data, Secondary use.
- Write your project number to the email (e.g. project_1234567).
- Attach a copy of your data permit to the email.
- Write down a list of your research teams' email addresses. Please use same emails that they created the CSC-account with.
- Put your research team as cc.
5. CSC adds members to your project
- Please wait that Sensitive Data Support team adds your research team to your project
- Note! All team members must have a CSC-account, so they can become project members.
6. CSC activates SD Desktop -service for your project
- Please wait that Sensitive Data Support team activates SD Desktop service for your project.
- You will receive an email notification, when everything is ready.
7. Your CSC project is ready
Warning-label
Team manager
Info-label
Team member
- Write down your project number, you might need it later (e.g. project_1234567).
- Now you can log out from MyCSC.
8. Apply for access to the dataset with SD Apply
Warning-label
Team manager
Info-label
Team member
After creating the project in MyCSC, you need to apply for access to the dataset in SD Apply. This is a technical security step and does not affect the permission granted in the data permit.
- You have received a message from the controller that your data is available in the SD Apply service
- Login to SD Apply: https://sd-apply.csc.fi. Log in using the same method as when logging in to SD Desktop (CSC credentials or Haka). Always use the same identity provider when you log in to SD Apply, because all your actions are connected to your login identity.
Catalogue page
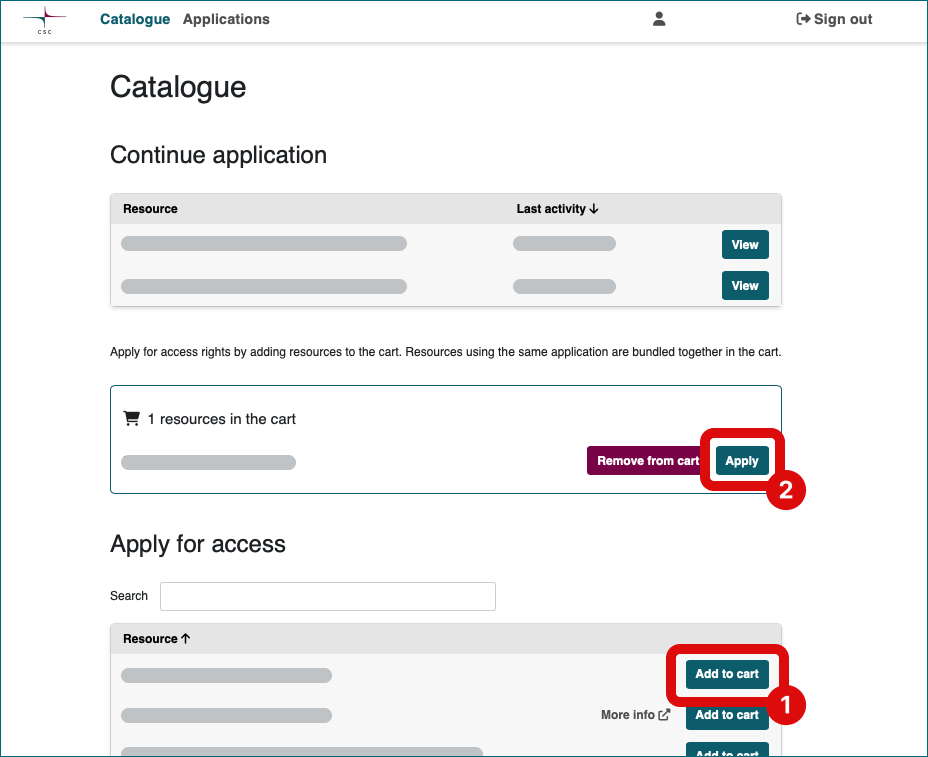
- On the Catalogue page, under Apply for access, find the material you want and click ''Add to cart''.
- The material is now in the shopping cart. Click ''Apply''.

Applications page
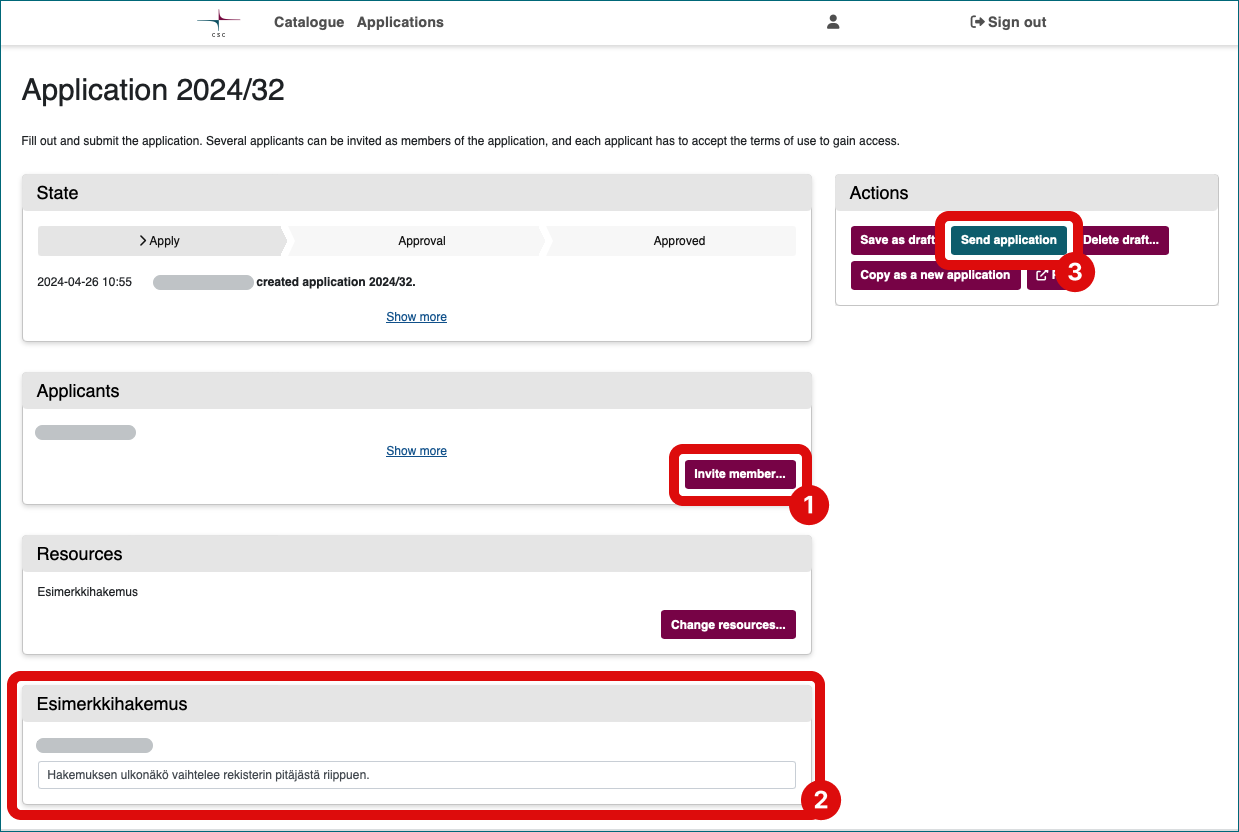
You are now on the Applications page.
- Add your research team members to the application.
- Go to the Applicants section and click ''Invite member''.
- Send invitations to all members of your research group.
- Fill in the application created by the controller. Also accept the terms of use if required by the controller.
- Click ''Send application'' under Actions. Editing or deleting the application is no longer possible after sending the application. However, removing members is still possible.
All persons mentioned in the application must log in to the SD Apply service and approve the conditions for using the application (if the controller agrees to accept the terms of use).

9. Wait for approval from data controller
- After you have sent the application, it will be forwarded to the data controller, who approves or rejects it.
- You will receive an email notification whenever the state of your application changes.
10. Send approved application to CSC
- Login to SD Apply: https://sd-apply.csc.fi.
- Find your application and click ''PDF'' under Actions.
- Send the PDF to sensitivedata-support@csc.fi.