Table of contents of user guide
Exporting data from virtual desktop via user interface
Only project managers can export data
The virtual desktop is isolated from the internet. To export your analysis results, use the Data Gateway application or its command-line version.
Only the CSC project manager can export data. Exported files are automatically encrypted and transferred to SD Connect, where any project members can download them.
When exporting files with Data Gateway, you can:
- select and use an existing SD Connect bucket, or
- create a new bucket directly during the export.
- As an advanced option, you can also export files to a specific folder inside the selected bucket.
1. Export files to a bucket via Data Gateway application
-
Any project member: Open your volume and move all data you want to export to it. In this way the files will be accessible to all the project members, including the CSC project manager that will do the export.
-
CSC Project manager: Launch Data Gateway by clicking icon on the left side of desktop.
- Select SD Connect and click Continue.
- In the next view you are asked to choose a folder for accessible files. Check that Projects folder is selected and click Continue.
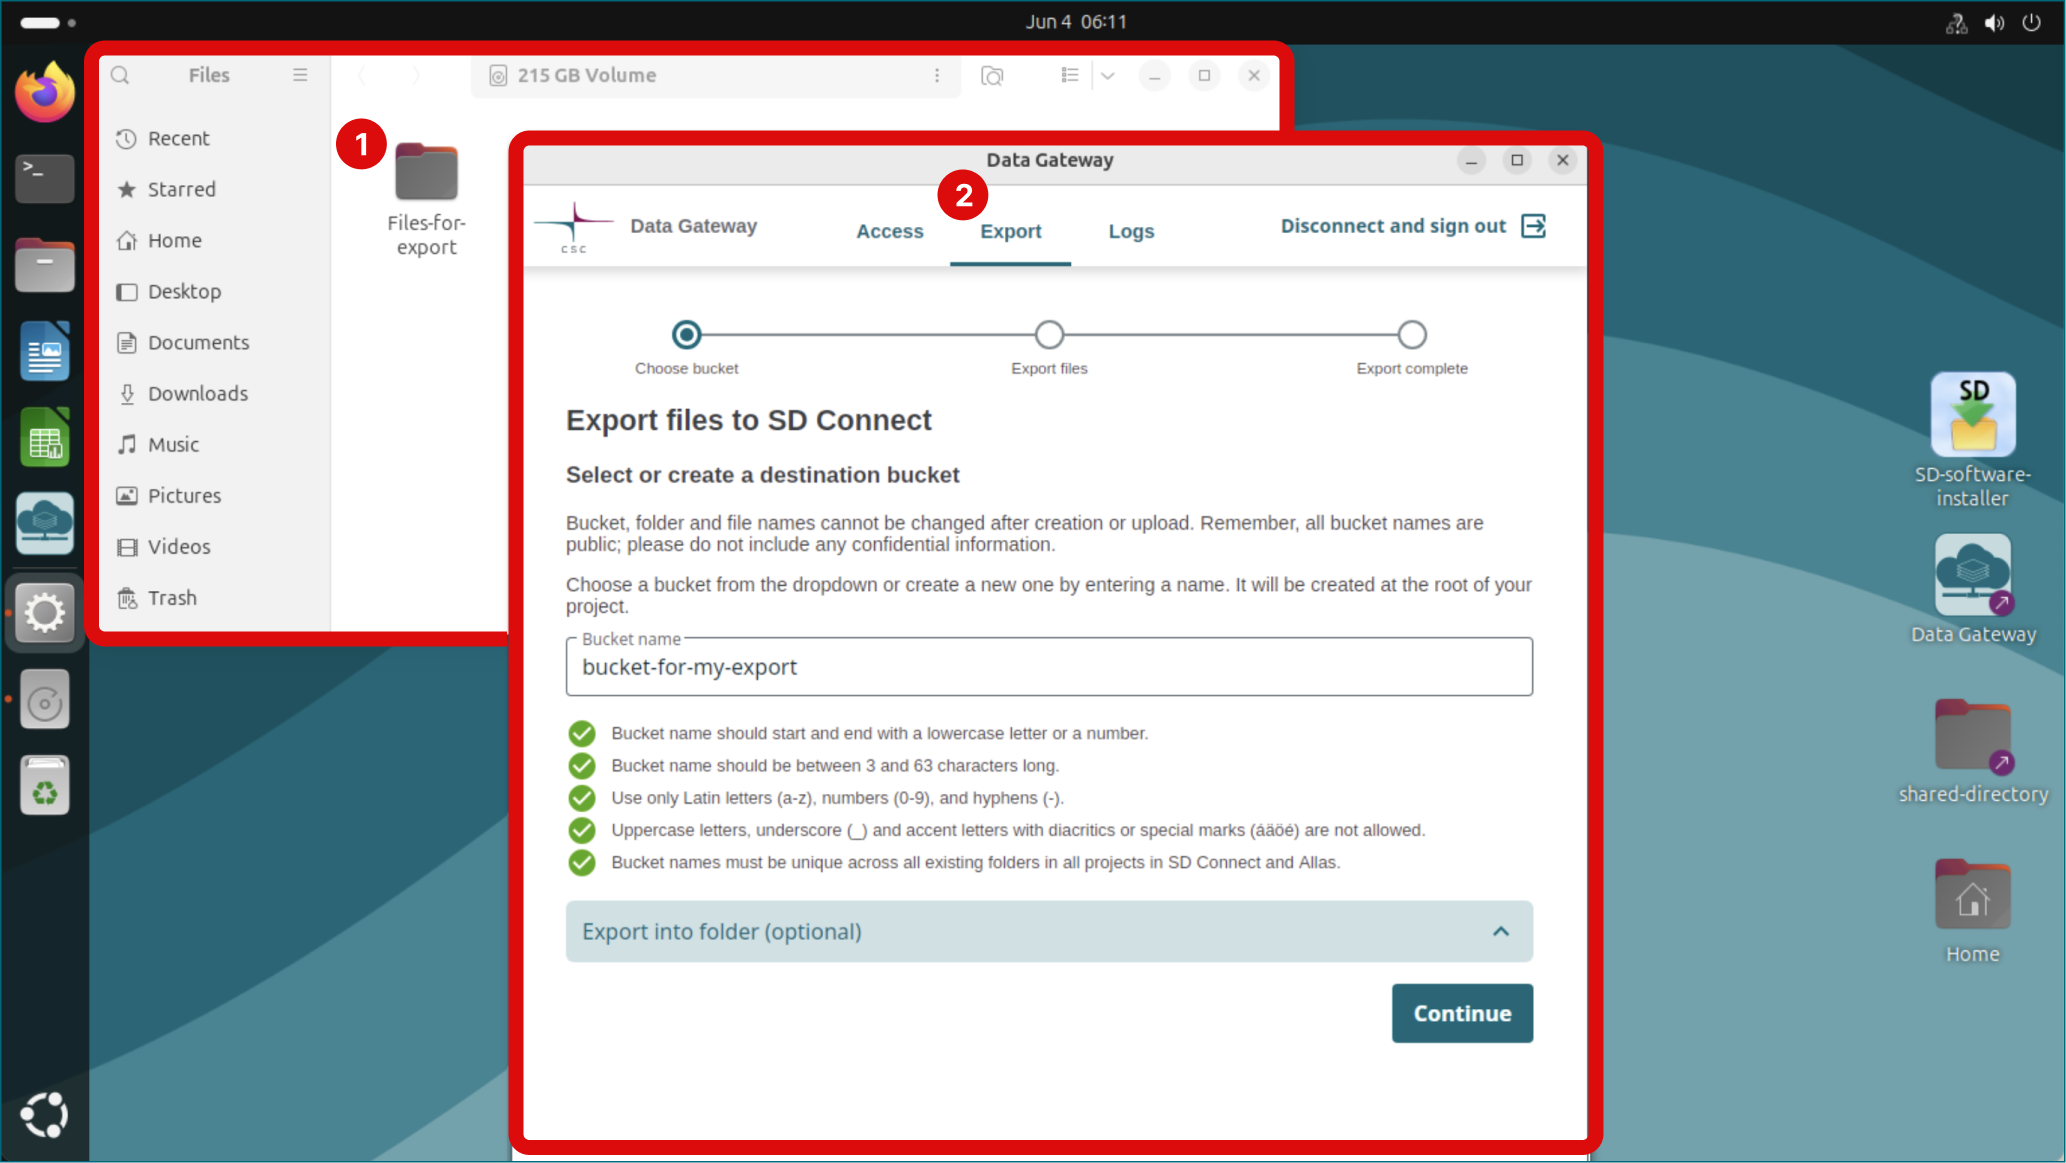
- In the next view click on Export tab. It is available only to the project manager.
-
Files will be be exported to SD Connect. Next create a new bucket or use an existing one via Bucket name field.
- Create a new bucket by writing bucket's name to the field. Follow bucket naming conventions below or via user interface.
- Use an existing bucket by clicking the field and select it from the dropdown.
Bucket naming conventions
Note
Top-level folder (bucket) name can not be modified after their creation with SD Connect. These rules apply only to top-level folders created in the service, not to subfolders or files uploaded from a local computer.
Top-level folder (buckets) names must:
- start with a lowercase letter or a number.
- be between 3 and 63 characters long.
- use Latin alphabets (a-z), numbers (0-9) and dash (-).
- be unique across all existing folders in all projects in SD Connect and Allas. If you can't create a new folder, another project may already use the name you have chosen. To avoid this situation, it is good practice to include project specific identifiers (e.g., project ID number or acronym) in the folder name.
Top-level folder (buckets) names must not contain:
- Uppercase letters, underscore (_) and accent letters with diacritics or special marks (åäöe') are not allowed.
- All folder names are public; please do not include any confidential information.
-
Click Continue.
-
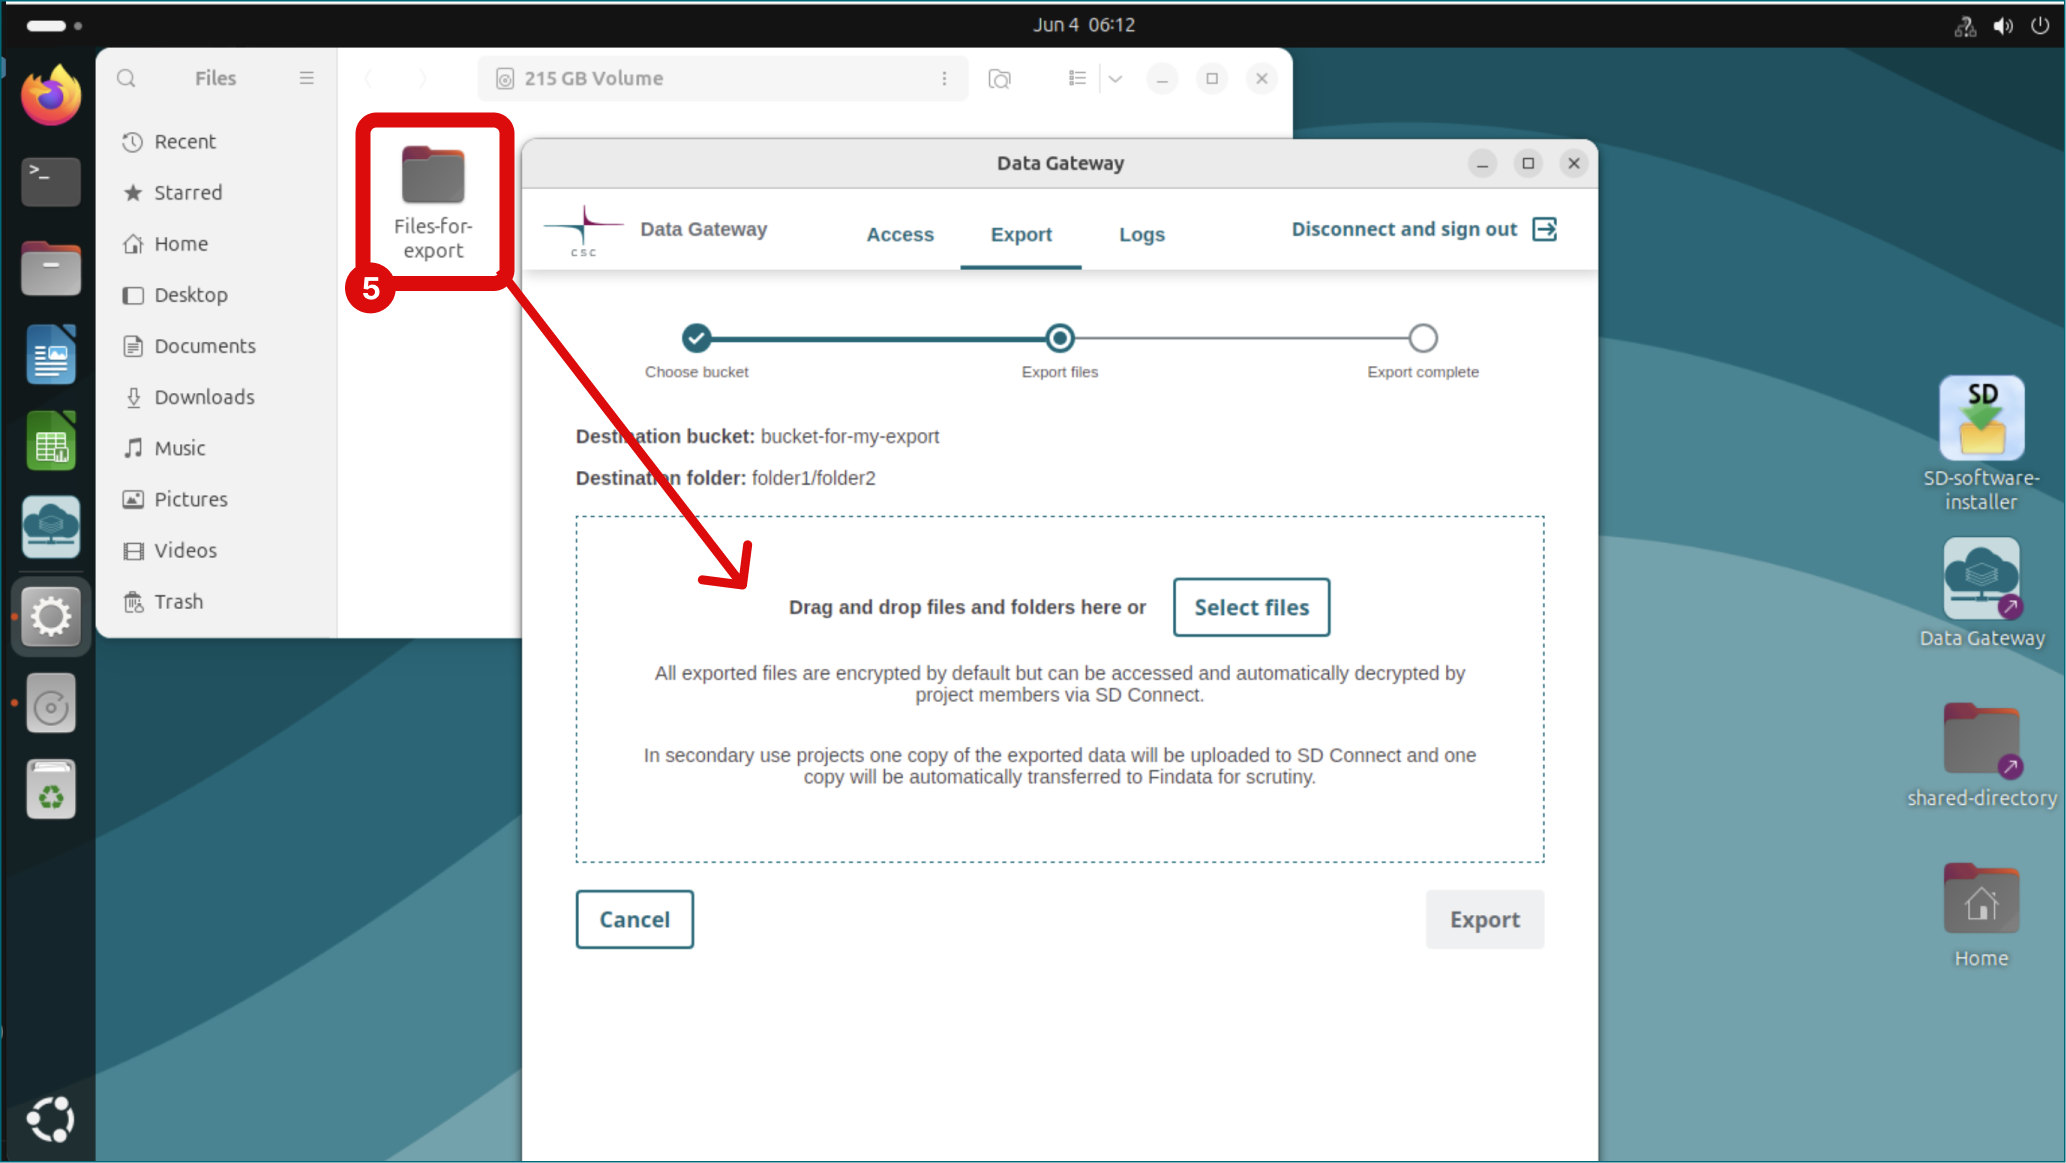
Drag and drop or select files you want to export.
-
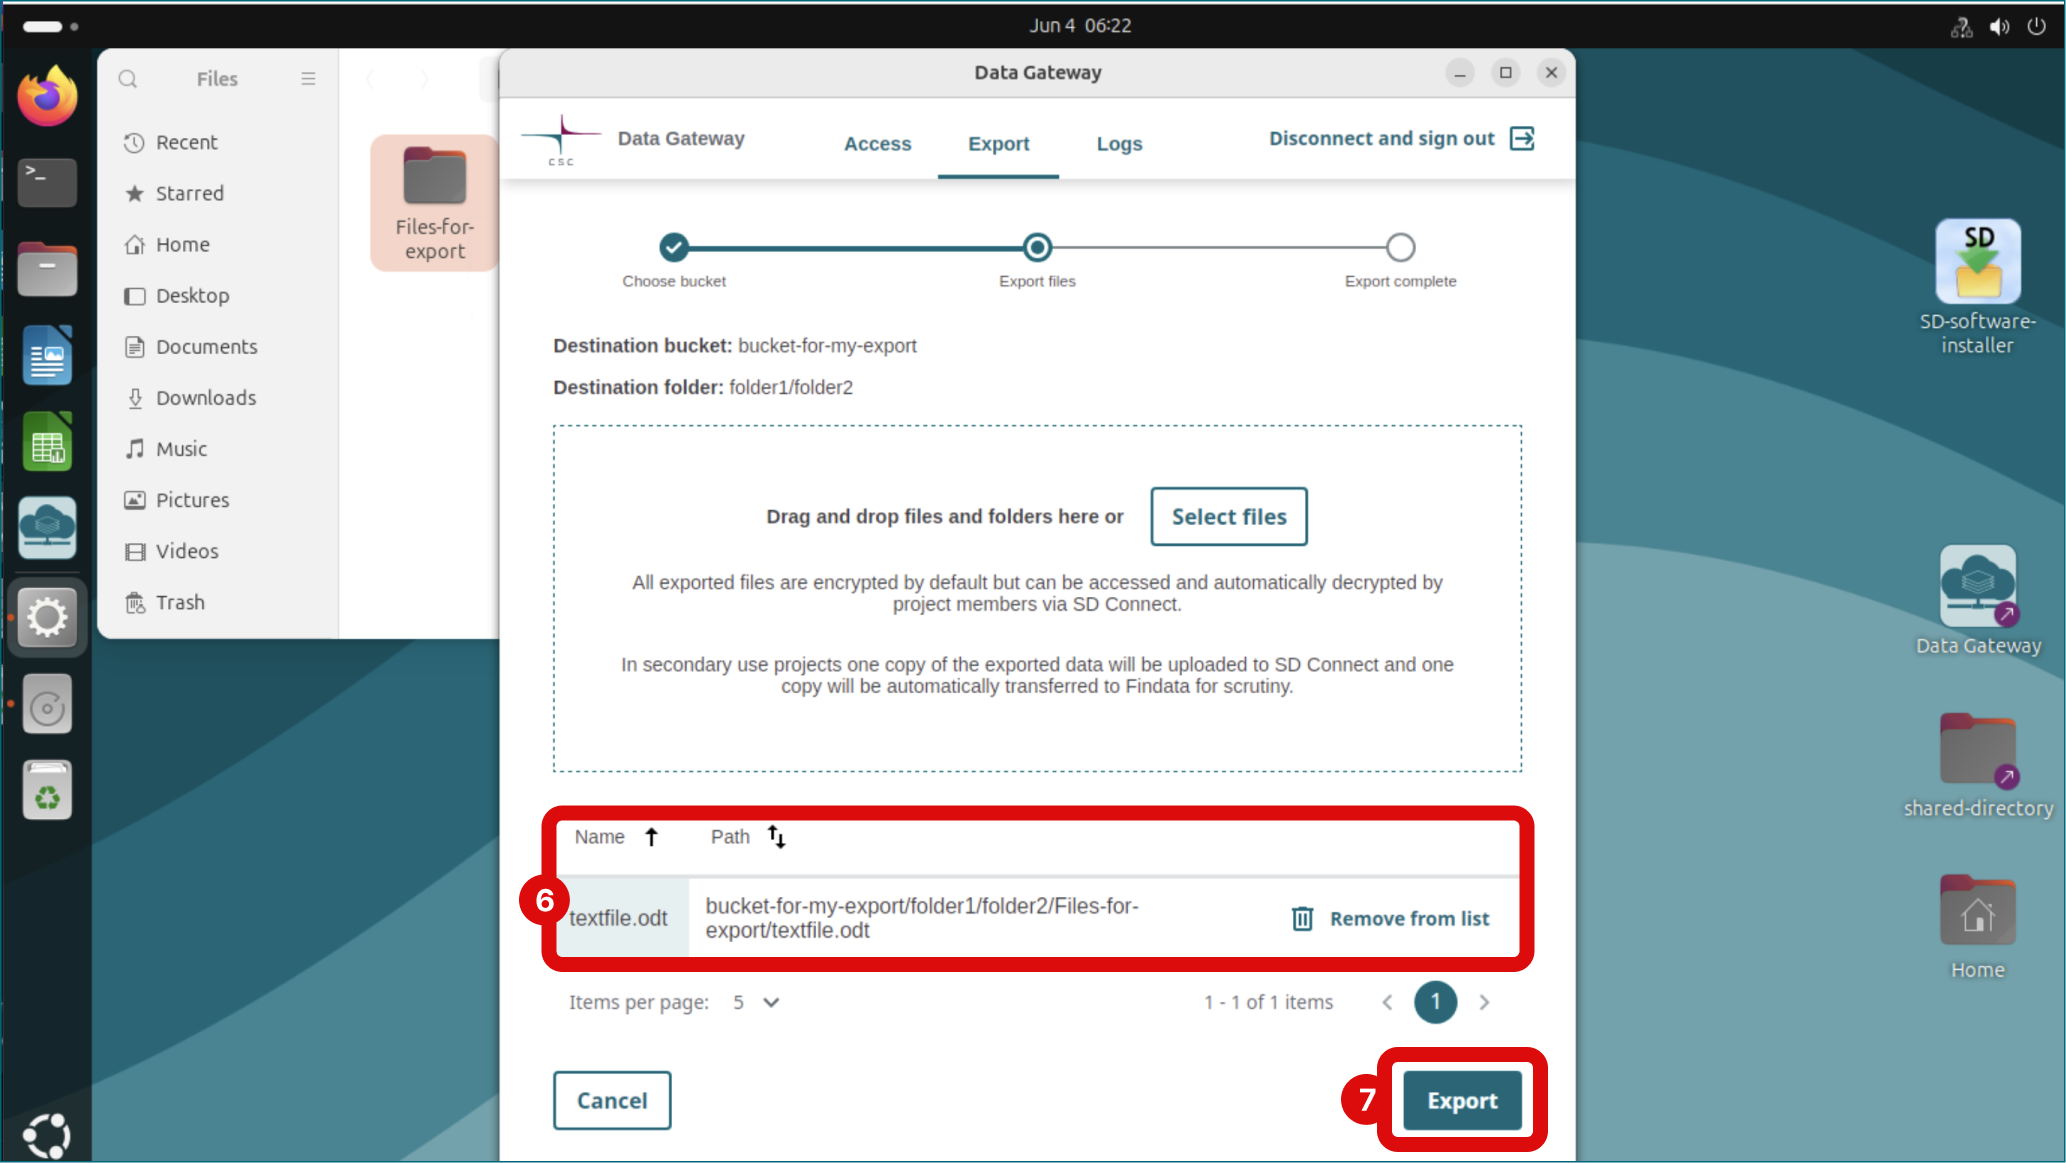
You can see files to be exported from the list and remove them if needed.
-
Finally click Export. Files will be encrypted and exported to the bucket you selected in SD Connect. Please note that files can now be downloaded by all project members via SD Connect.
2. Advanced option: export files to a specific folder inside a bucket via Data Gateway application
Step by step
You can also create folders inside a bucket you create or an existing bucket.
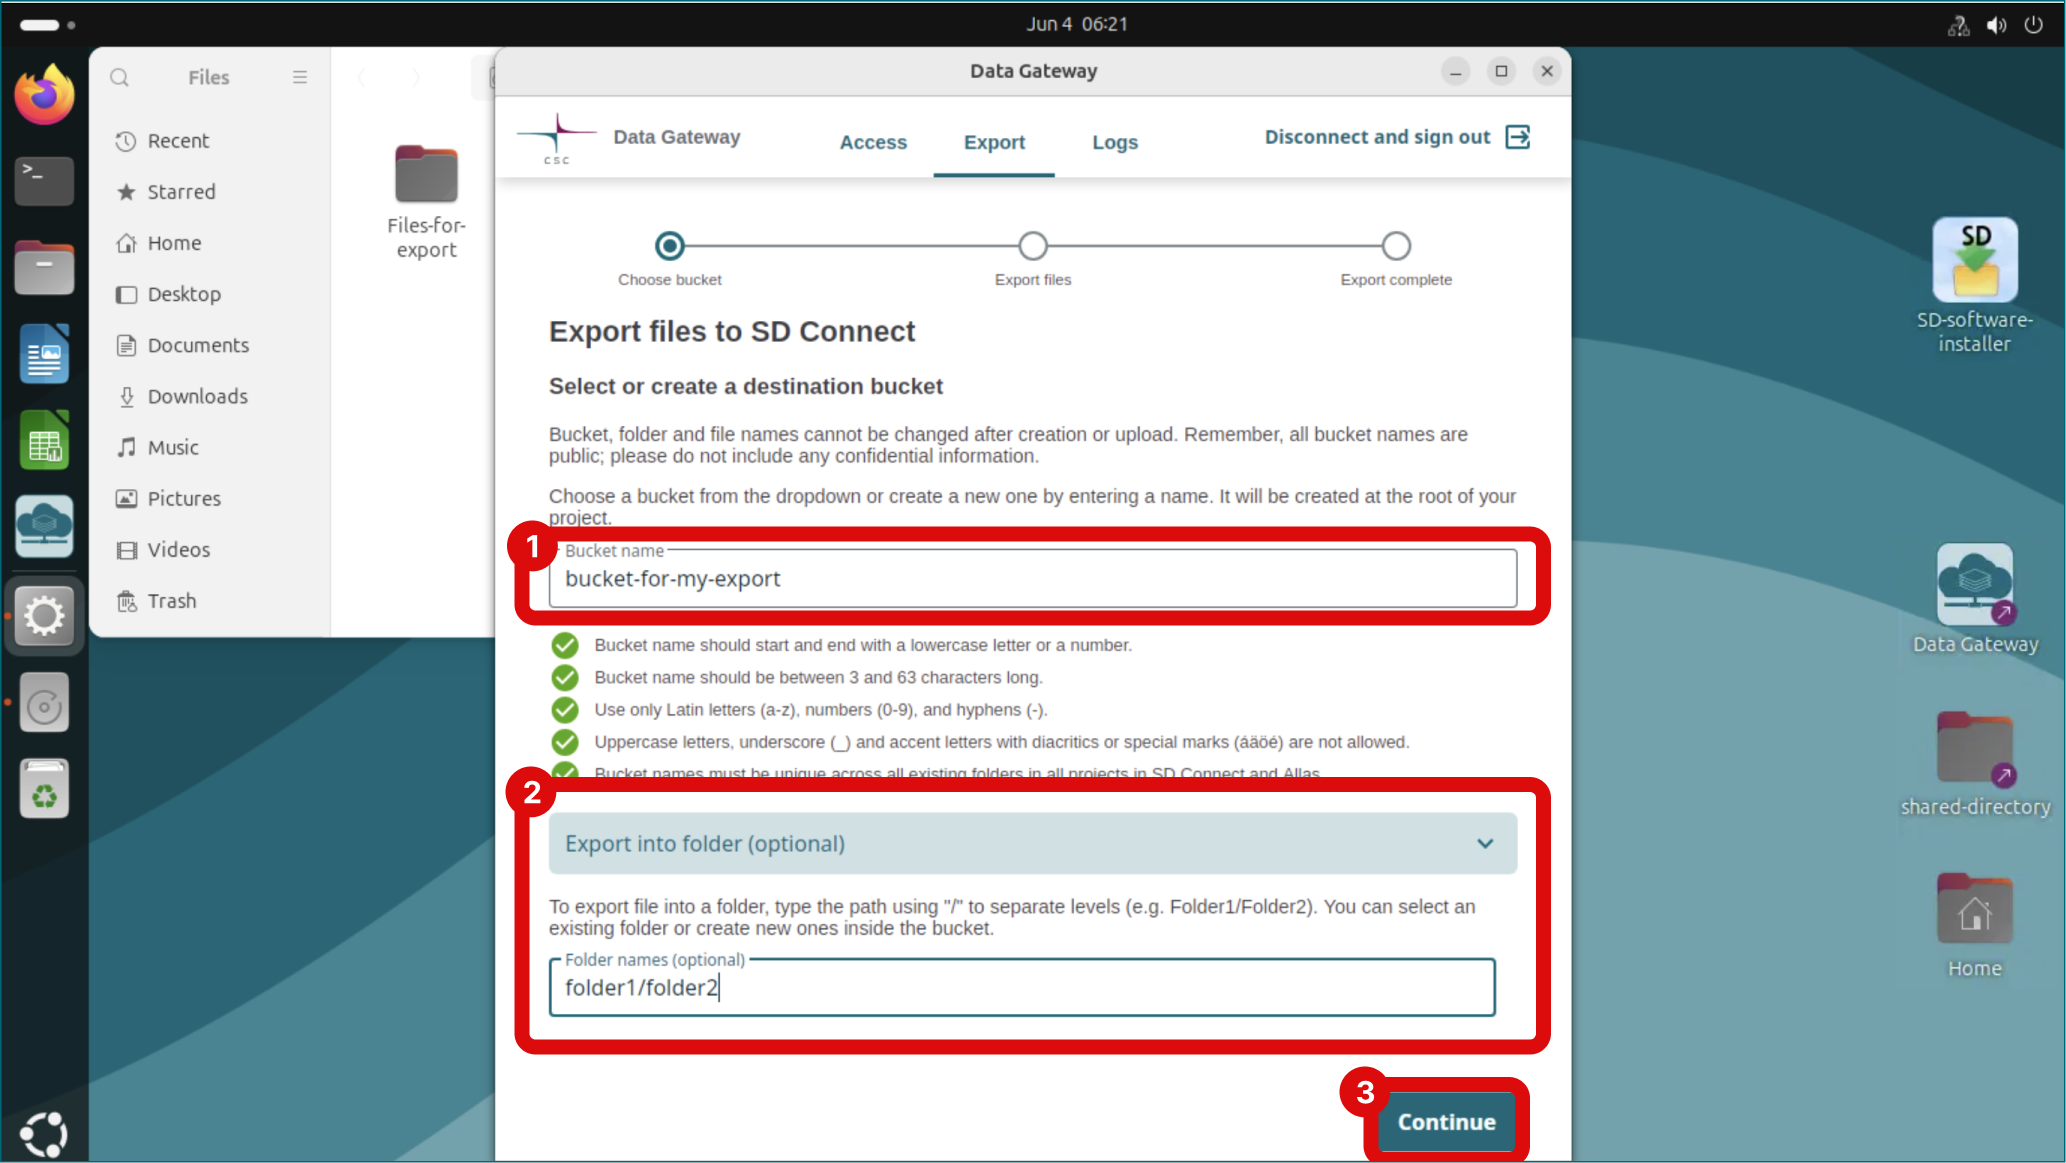
- When you are in Export files to SD Connect window, create a new bucket or select and existing one via Bucket name field.
- Then click open Export into a folder from bottom of the window. Type for example "folder1/folder2" in Folder names field. Your files will be exported to "the bucket you created or selected/folder1/folder2".
- Finally click Export. Files will be encrypted and exported to SD Connect. Please note that files can now be downloaded by all project members via SD Connect.