Table of contents of user guide
How to get access to SD Services: Project manager
Use case
You need access to SD services for processing research data. Whether you are the manager of a research team or working independently, you can use SD Connect to store, share, and transfer research data. Optionally, your team can also analyse the data stored in SD Connect using SD Desktop.
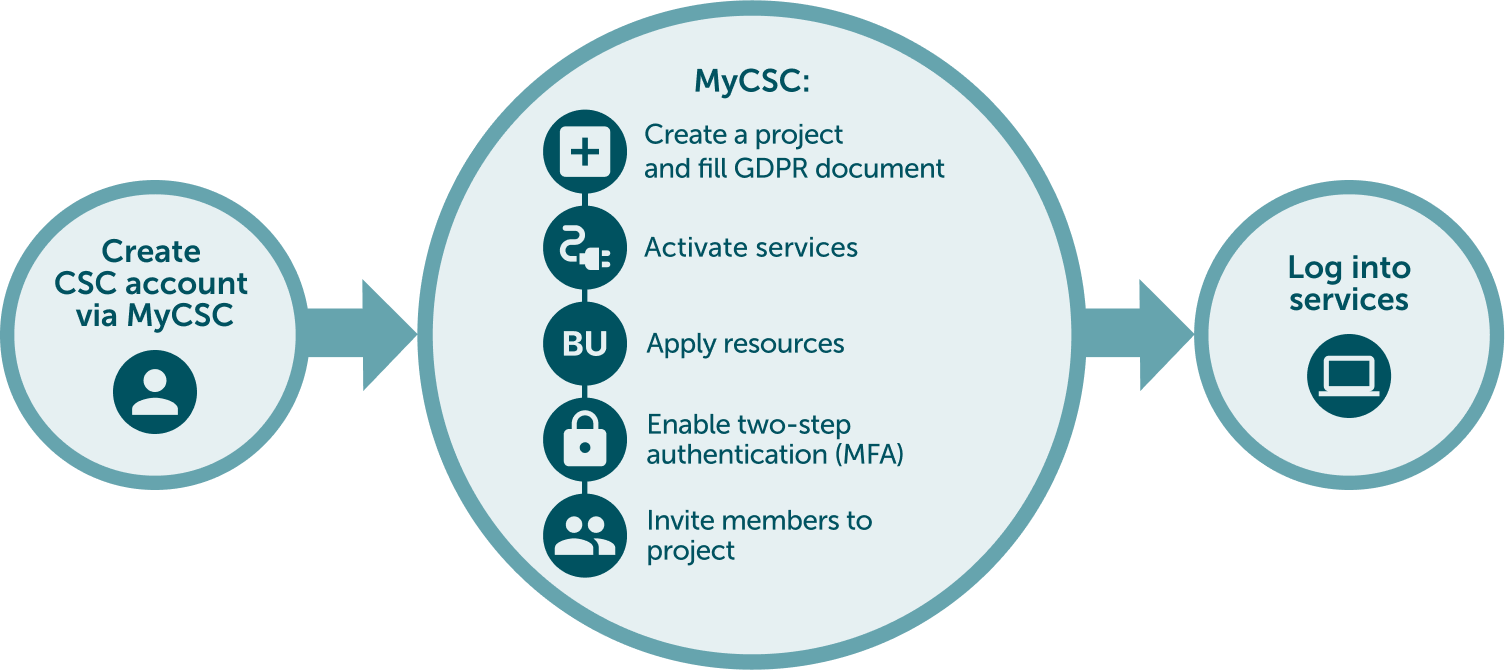
Solution
- Create CSC account
- Create CSC project
- Data protection
- If you have a research team, add them to be your project members
- Project lifetime, Billing Units and Data Retention
- Planning for resources consumption and login
Note
The default lifetime of a CSC project is one year. All data stored in SD Connect or SD Desktop, including files, virtual desktops and volumes, will be permanently deleted 90 days after the project closure/ expiration.
Step by step tutorial
1. Create CSC account
- Go to MyCSC portal
- Log in with Virtu or Haka, based on your home organization's federation. Select your home organization and log in to their identity service. How to get an account without Haka or Virtu.
- Fill in your information on the Sign up page.
- You will receive with instructions how to complete the registration.
- Create a password with at least 12 characters, including upper and lowercase letters and at least one number. No special characters allowed.
- Enable two-step authentication (MFA).
2. Create new CSC project
- Sign in to MyCSC with your Haka or Virtu credentials.
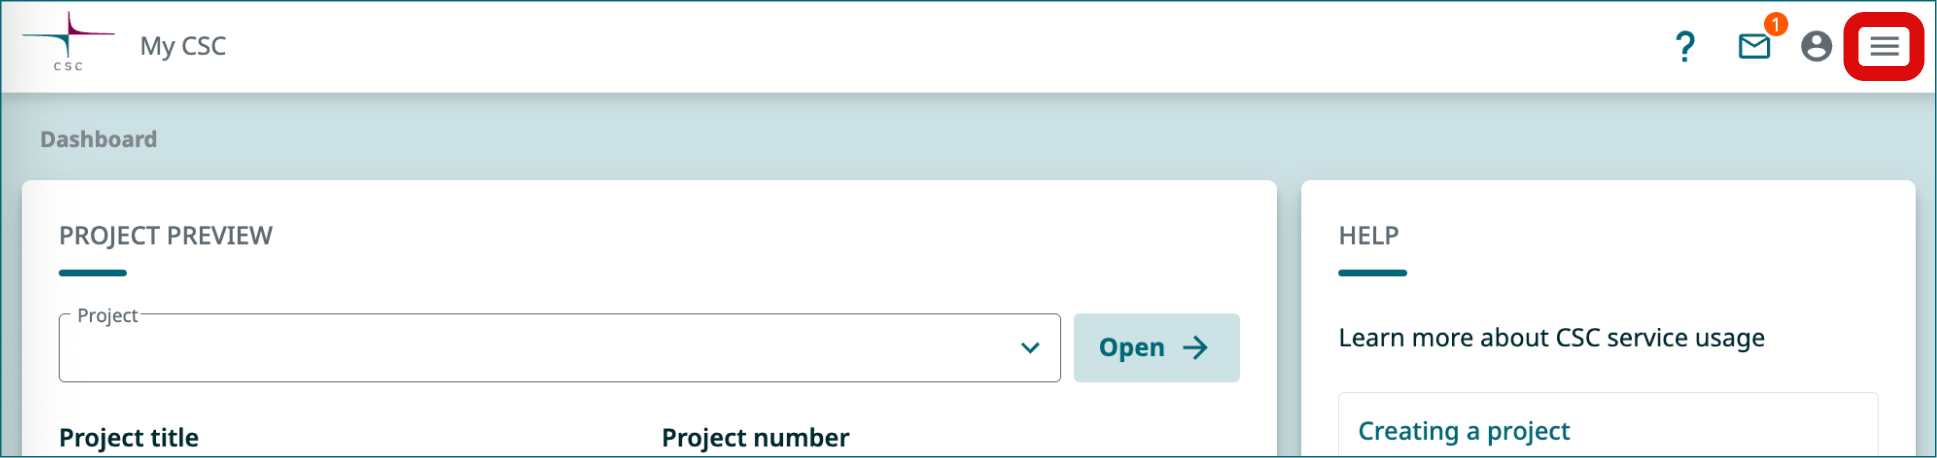
- Go to Projects page (left side menu or a hamburger menu at the top right corner).
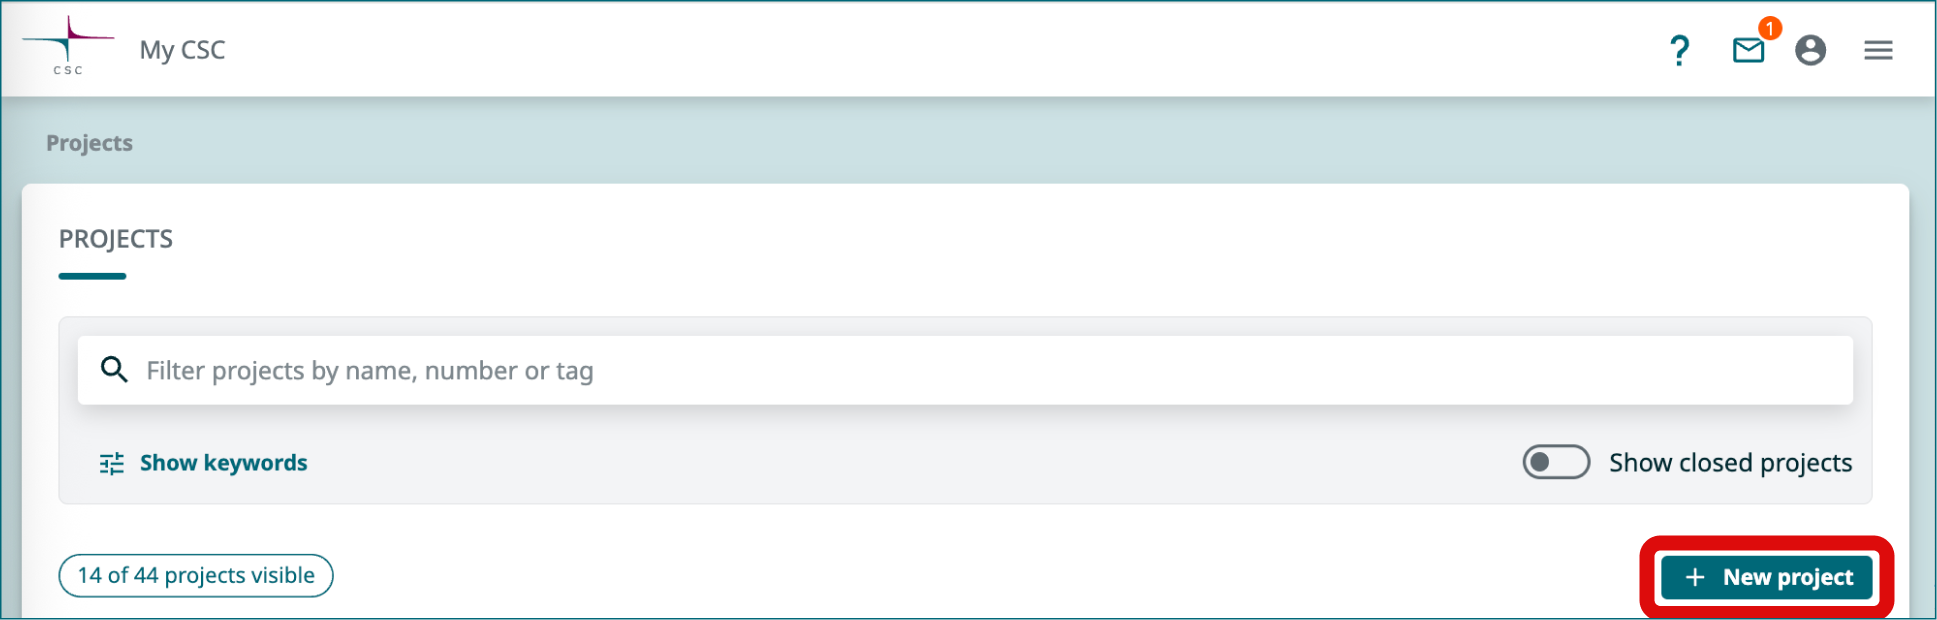
- On the top of the page choose New project.
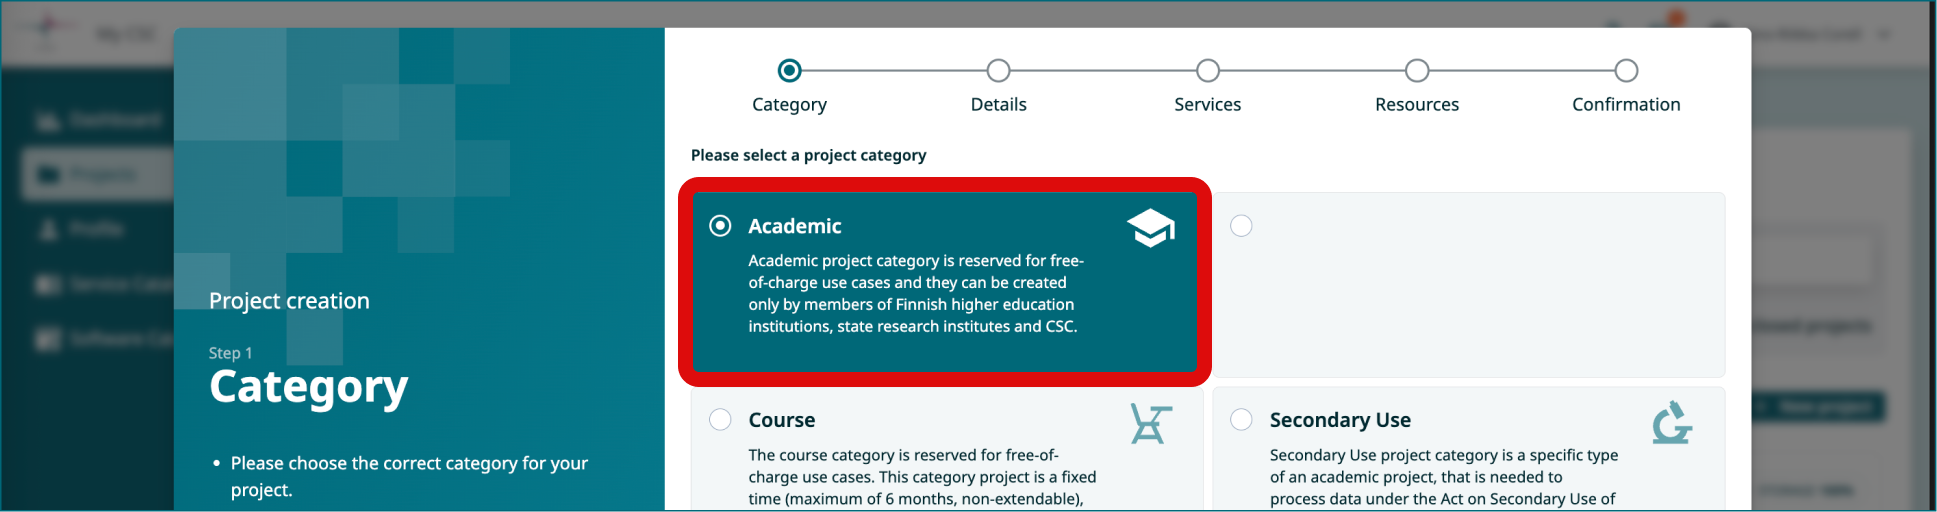
2.1 Choose project category
- In the new window choose the Project category to be Academic (if you are a researcher and a member of Finnish higher education institution).
- Click Next.
2.2 Fill in the project details
- Fill in the project name and project description. You can edit these later if needed.
- If your project involves handling personal data, choose "Yes" for the field: We handle personal data in this project.
- Click Next.
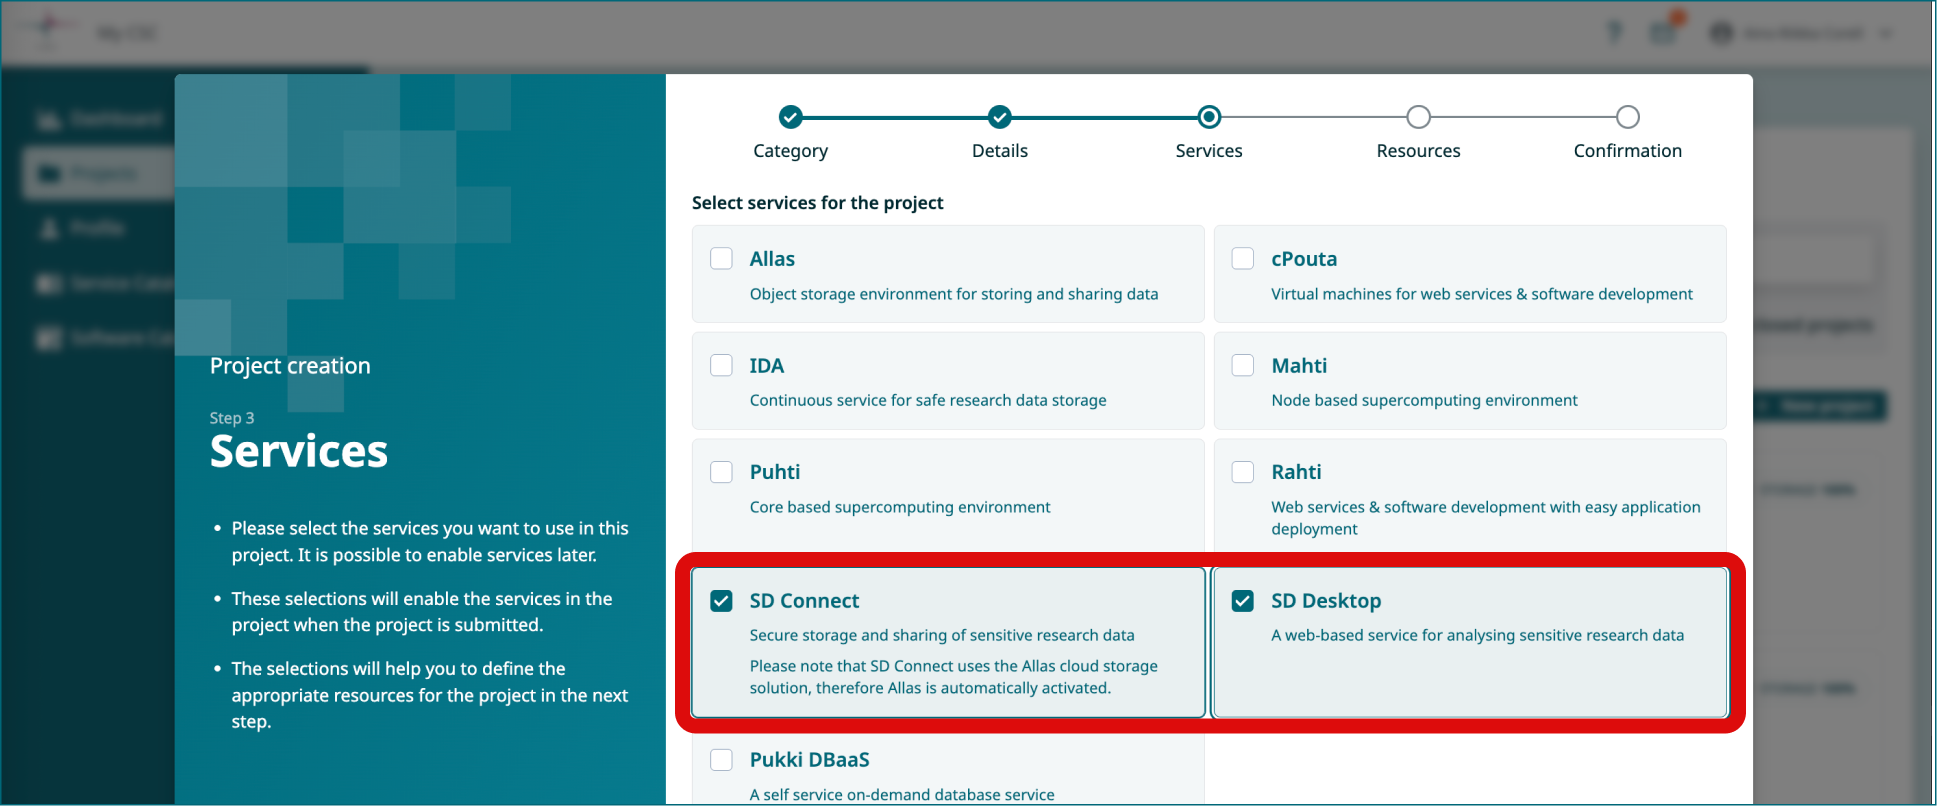
2.3 Activate SD Services for your project
- Select SD Connect. Allas will be added automatically as it is the underlying storage solution.
- Select SD Desktop.
- Click Next.
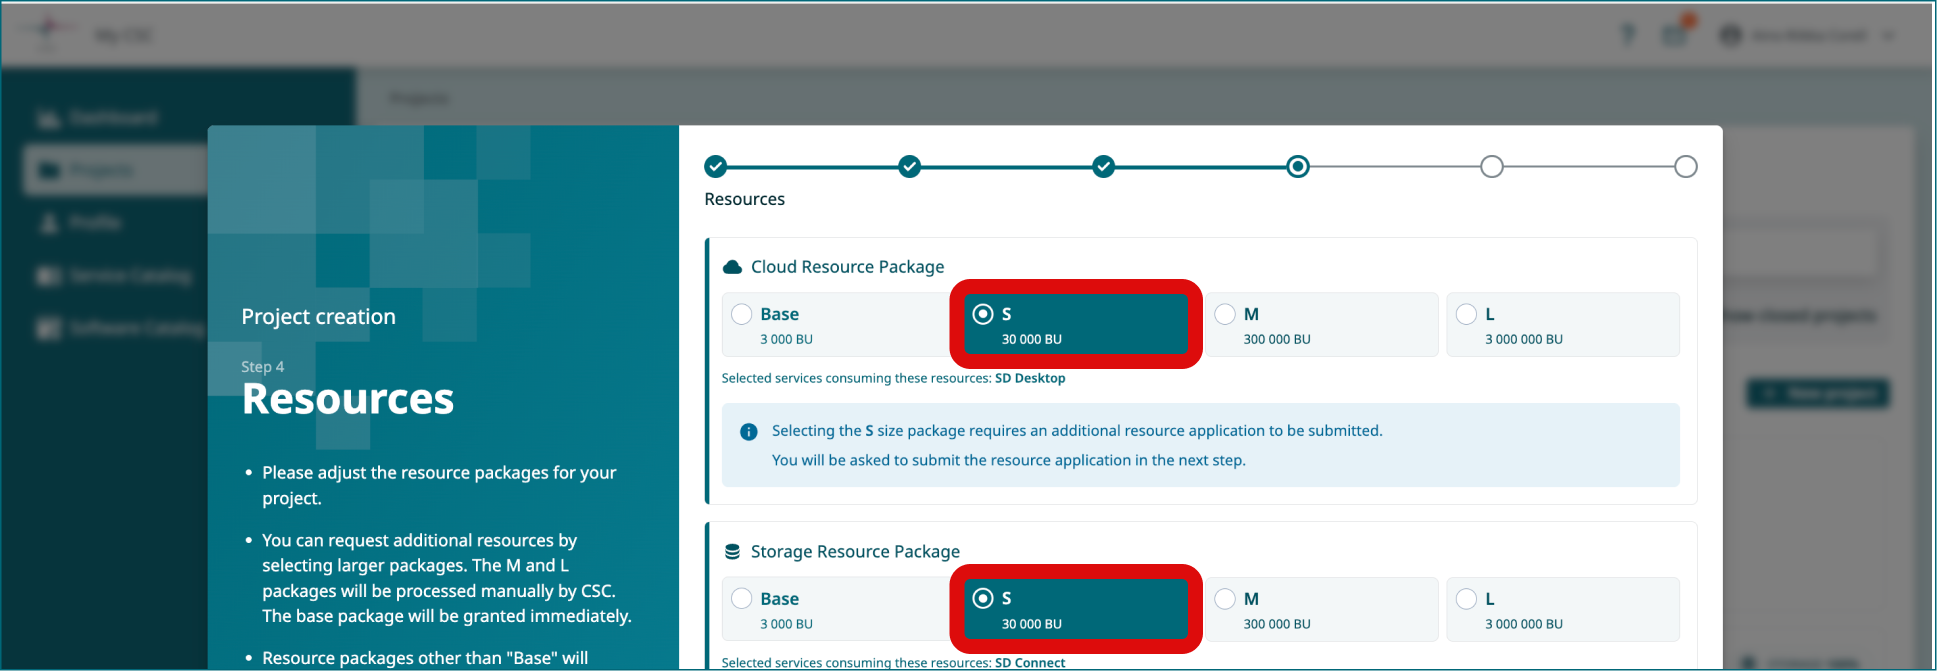
2.4 Apply Billing Units for your project
- Select S 30 000 BUs under Cloud Resource Package.
- Select S 30 000 BUs under Storage Resource Package.
- Click Next.
- In the next view, click Add publications. You can search or add publications manually. If you don't have publications directly related to this work yet, any past publication from your research group will be fine. Click Add.
- Next, you will be asked to add keywords. These will become tags that will help you search for the project. Add a keyword (e.g. research) and press Add.
- Next, you need to fill in two more fields: Short overview of (expected) results and Program, software, methods used. Press Next.
- In the last view, you can review the project description and field of science. Finally, you can click Submit.
2.5 Terms of Use and Data Processing Agreement
In the next view, under Terms of Use for the project:
-
ensure you meet the Prerequisites and Responsibilities to be a CSC Project Manager. For research projects, the Project Manager should be an experienced researcher (e.g., postdoc, group leader, professor, or doctoral researcher employed by a research organization). Note for Students: If you are a student, please have your supervisor create the CSC project or contact CSC Service Desk (subject: sensitive data) for assistance. It is not possible to access SD Services with a student account.
-
Read and accept the General Terms of use for CSC's Services for Research. Note: this will include the CSC’s Personal Data Processing Agreement (DPA)
-
Click Submit.
-
Wait for your project is being created. When project is ready, you'll be redirected to project page.
3. Data protection
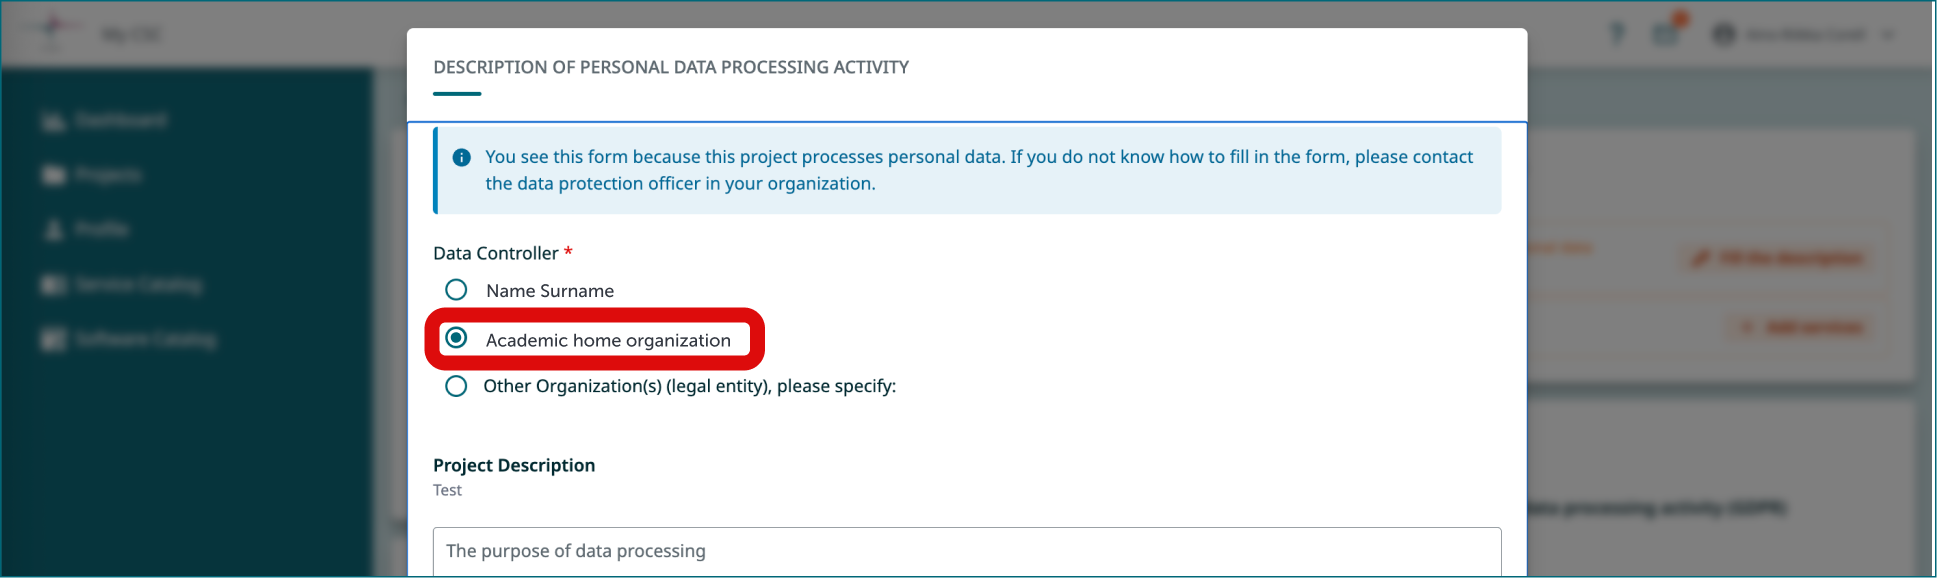
3.1 Description of Processing Activity (GDPR) form
When you first access your project, you’ll be prompted to complete the Description of Processing Activity (GDPR) form if your project handles personal data. This form requires key details such as the types of data collected (e.g. sensitive personal data), how it is used and secured, and the data controller (usually your home organization). The form will be linked to your CSC project and guide CSC in managing the data. You can edit the document later if needed.
3.1 Data Transfer Outside the EEA
When transferring personal or sensitive data outside the EEA, ensure you have the appropriate legal basis and comply with relevant data protection legislation. Be mindful of this when sharing sensitive data with collaborators via SD Connect or SD Desktop.
3.2 Contact your organization’s legal office
If you need assistance with the above points or support to verify if SD services are suitable for processing your research data, contact your organization's data protection officer or legal service. You can provide them with supporting documents such as:
- Technical and Organizational Measures (TOMS)
- Service descriptions of SD Connect and SD Desktop
- The CSC Data Processing Agreement (DPA)
- The GDPR form (Description of processing activity ) that can be downloaded from your CSC project
- The CSC Data Policy
- Service Level Agreement
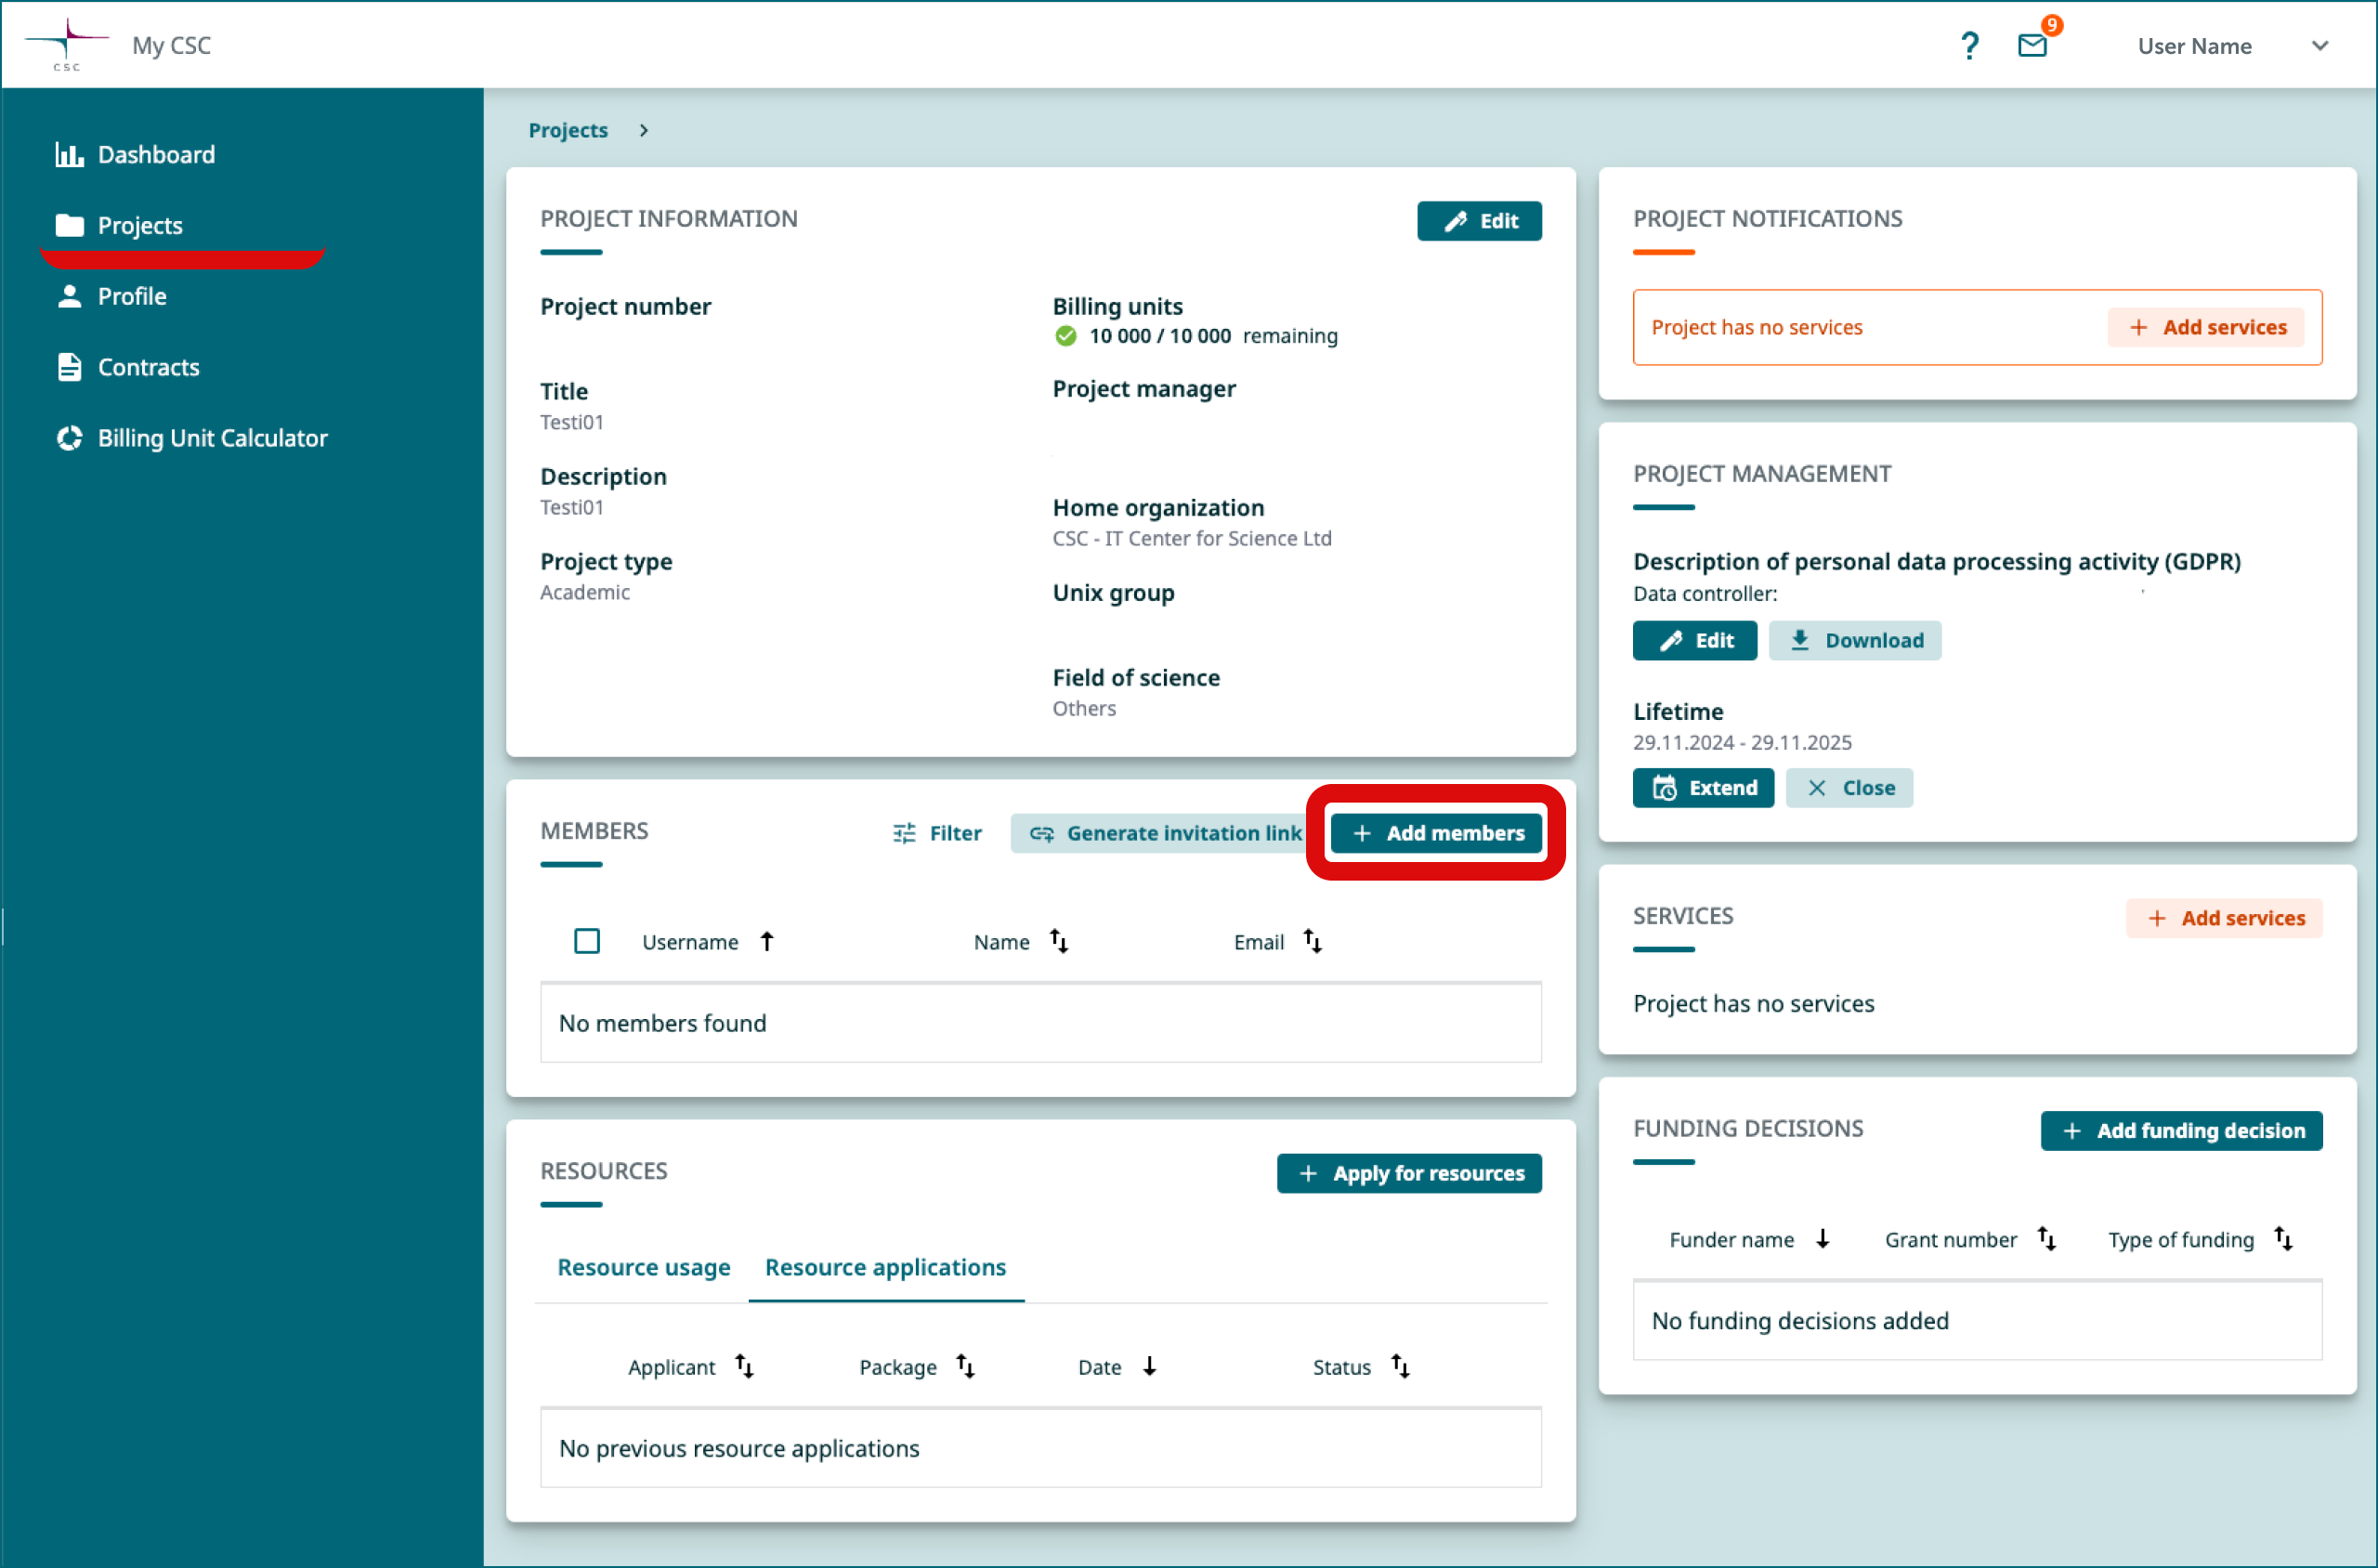
4. If you have a research team, add them to be your project members
- Go to project page and select the correct project (left side menu or hamburger menu).
- Add members from Members window. Click Add members.
- In the new window you can search and add members from your own organization.
- If you need to add members from other organizations you can create an invitation link by clicking Invitation link.
- Generate link and use it in email or webpage.
- People can apply a membership for your project by clicking the invite link.
- After that you have to approve them to be member of your project in MyCSC through Members window in Membership applications tab.
Note
Each CSC project members must also create a MyCSC user account (this happens when they apply membership to your project) and activate the MFA.
5. Project Lifetime, Billing Units, and Data Retention
5.1 Default project lifetime
The default lifetime of a CSC project is one year, after which the project is automatically closed and all data is deleted.
5.2 When your project runs out of Billing Units
When an academic CSC project runs out of Billing Units, project members have 60 days to apply for more. If Billing Units balance remain negative after those 60 days, the project will be closed and all data is deleted.
To prevent this, the project manager should:
- Apply for more Billing Units via MyCSC. This can be also done by a project member.
- Extend the project’s lifetime via MyCSC. This can be done only be the project manager.
When your project is running low on Billing Units or nearing expiration, email notifications are sent from MyCSC. Please keep your contact details up to date.
5.3 Closing project
Once your research is complete, the project manager can close CSC project via MyCSC.
-
After your project is closed
- Access to SD Connect and SD Desktop services will be disabled.
- All data stored in SD Connect or SD Desktop, including files, virtual desktops, and volumes, will be permanently deleted 90 days after the project closure/ expiration.
- Once data is deleted in line with CSC's data retention policy, it cannot be restored or recovered.
6. Planning for resources consumption and login
Now that your CSC project is ready, you can start planning how many resources (Billing Units) and how much storage (quota) your project will need for the next six months. You can learn more in the next section. You can also delegate this task to one of the CSC project members and you can start directly using the services (links to related user guides):
SD Connect:
SD Desktop: