Networking in Pouta
Every cPouta project comes with a default network and router configuration enough for most purposes. Most often, you don't need to worry about the network or router configuration and you can create virtual machines using the defaults.
In the situation that your project is missing a default network you will not be able to create a virtual machine. And if you are missing a router, you will not be able to assign ports* in your machine for example to a floating IP.
If you find you in the need of creating a network and or router, you can recreate the default settings via the web interface with the following instructions.
A port is a connection point for attaching a single device to a network.
Create a network
-
Open cPouta and navigate to Network > Networks. Click on Create Network button on the upper right. A new window will open.
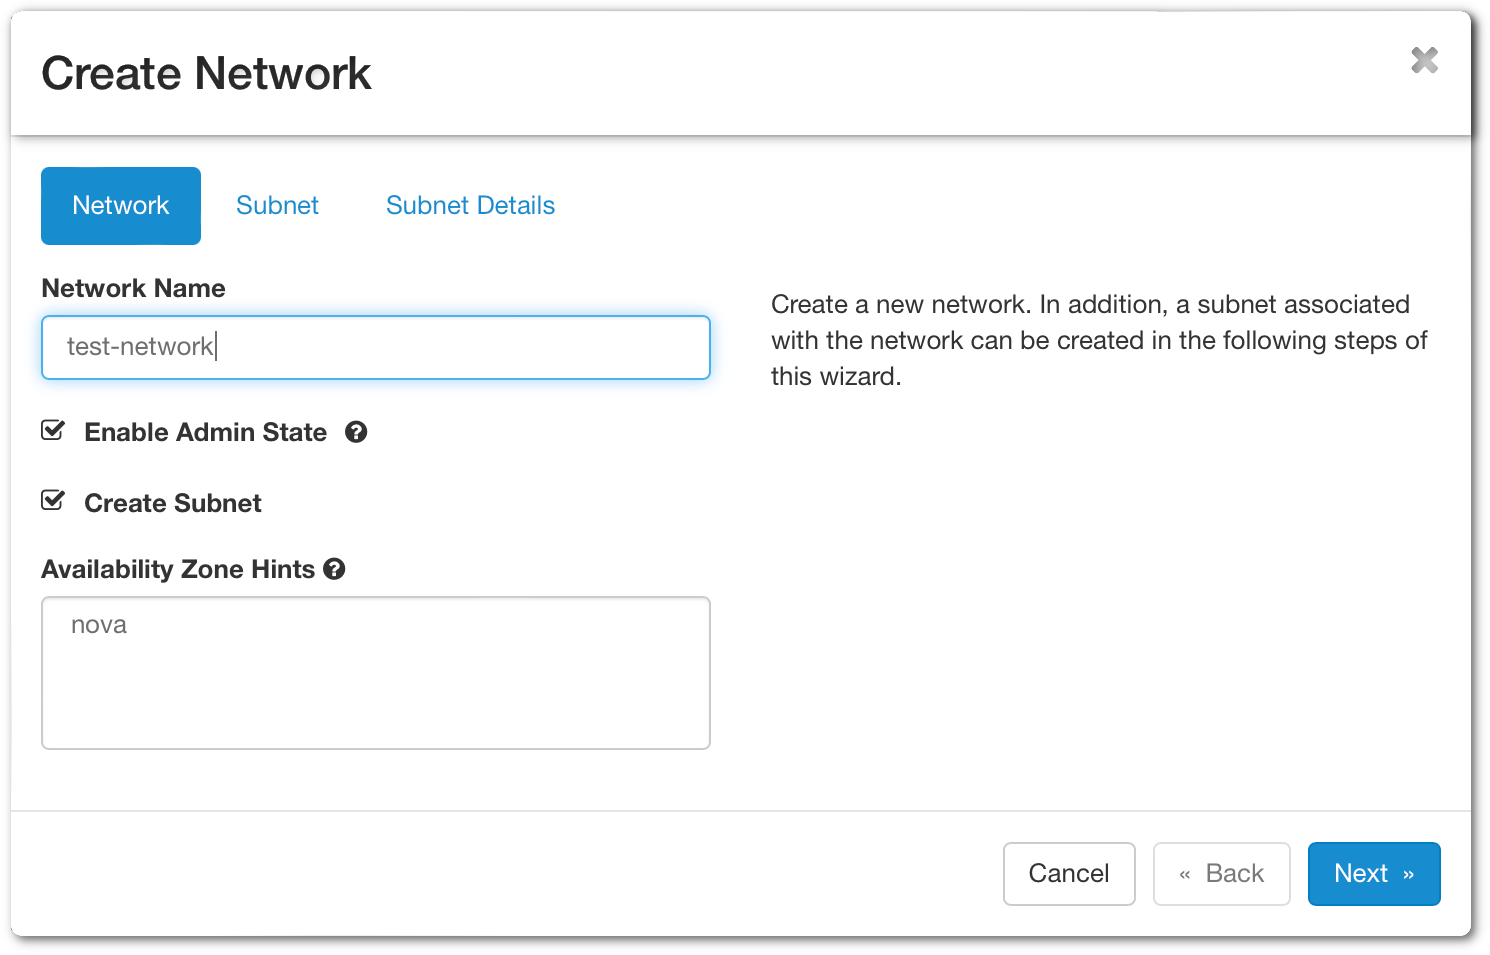
- Network Name - Specify a name for your network.
- Enable Admin State - Enable the network.
- Create Subnet - Leave check if you want to create a subnet.
- Availability Zone Hints - Leave "nova" by default.
-
When done, click on Next. It will open the next tab regarding the subnet.
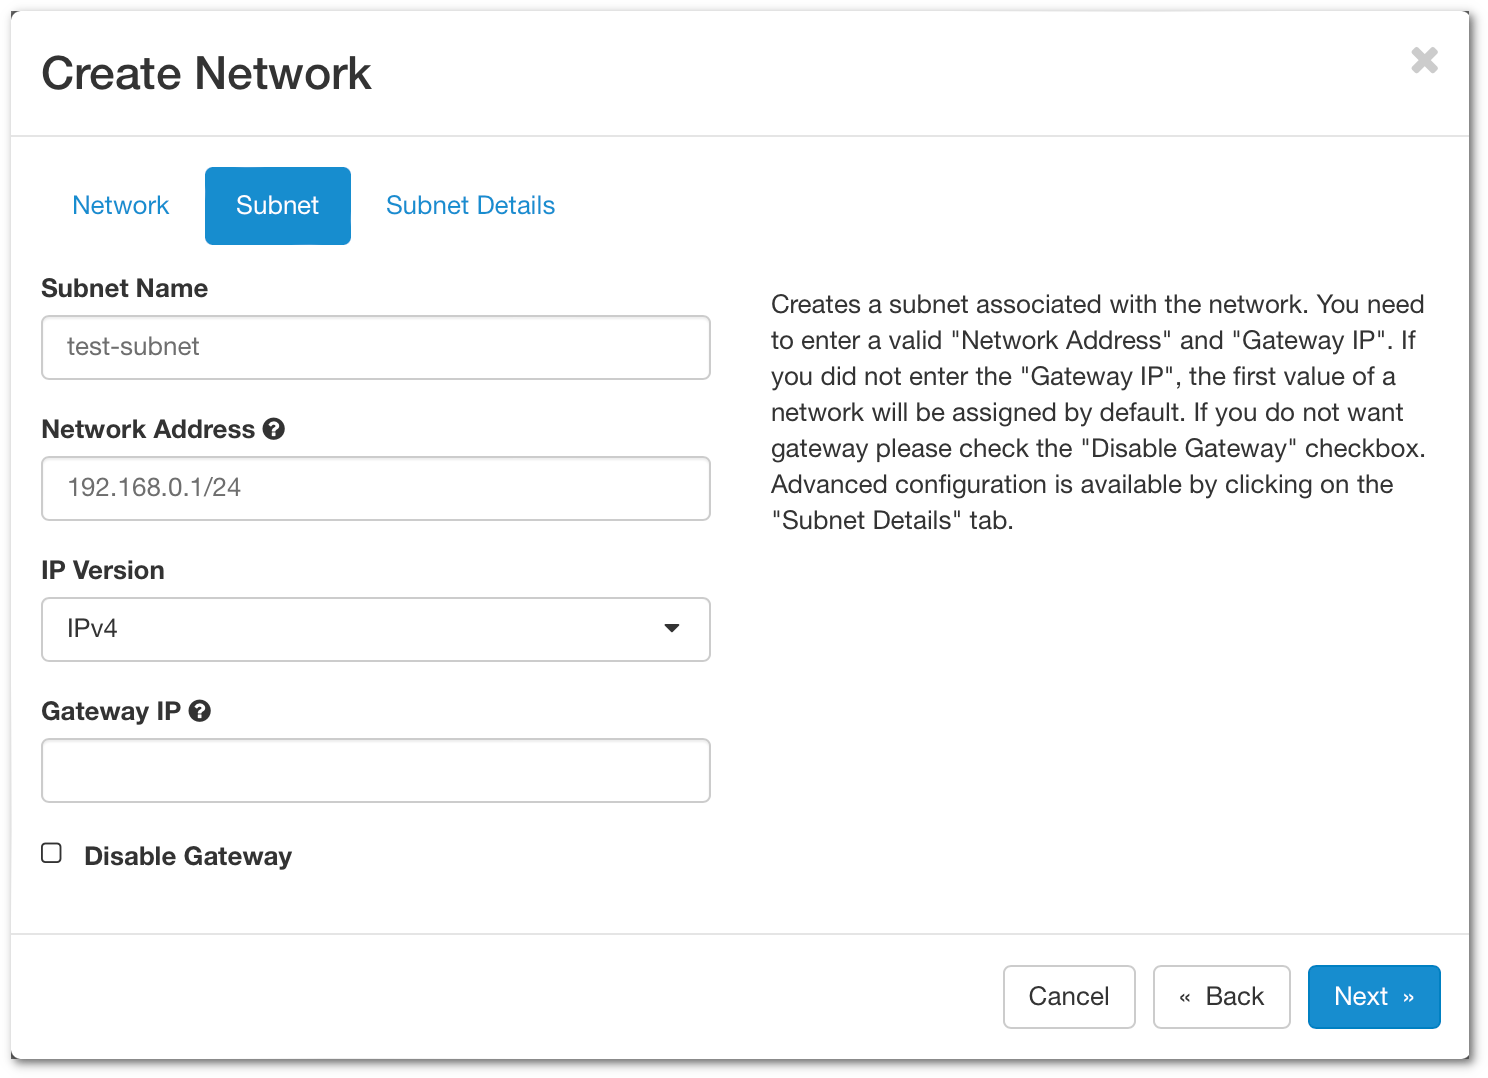
- Subnet Name - Specify a name for your subnet
- Network Address - Specify a network in CIDR format. Here a link that could help you to calculate the network address.
- IP Version - You can leave IPv4
- Gateway IP - Optionally you can choose the gateway IP. If it's not filled in, one will be chosen automatically.
-
You can click on Next.
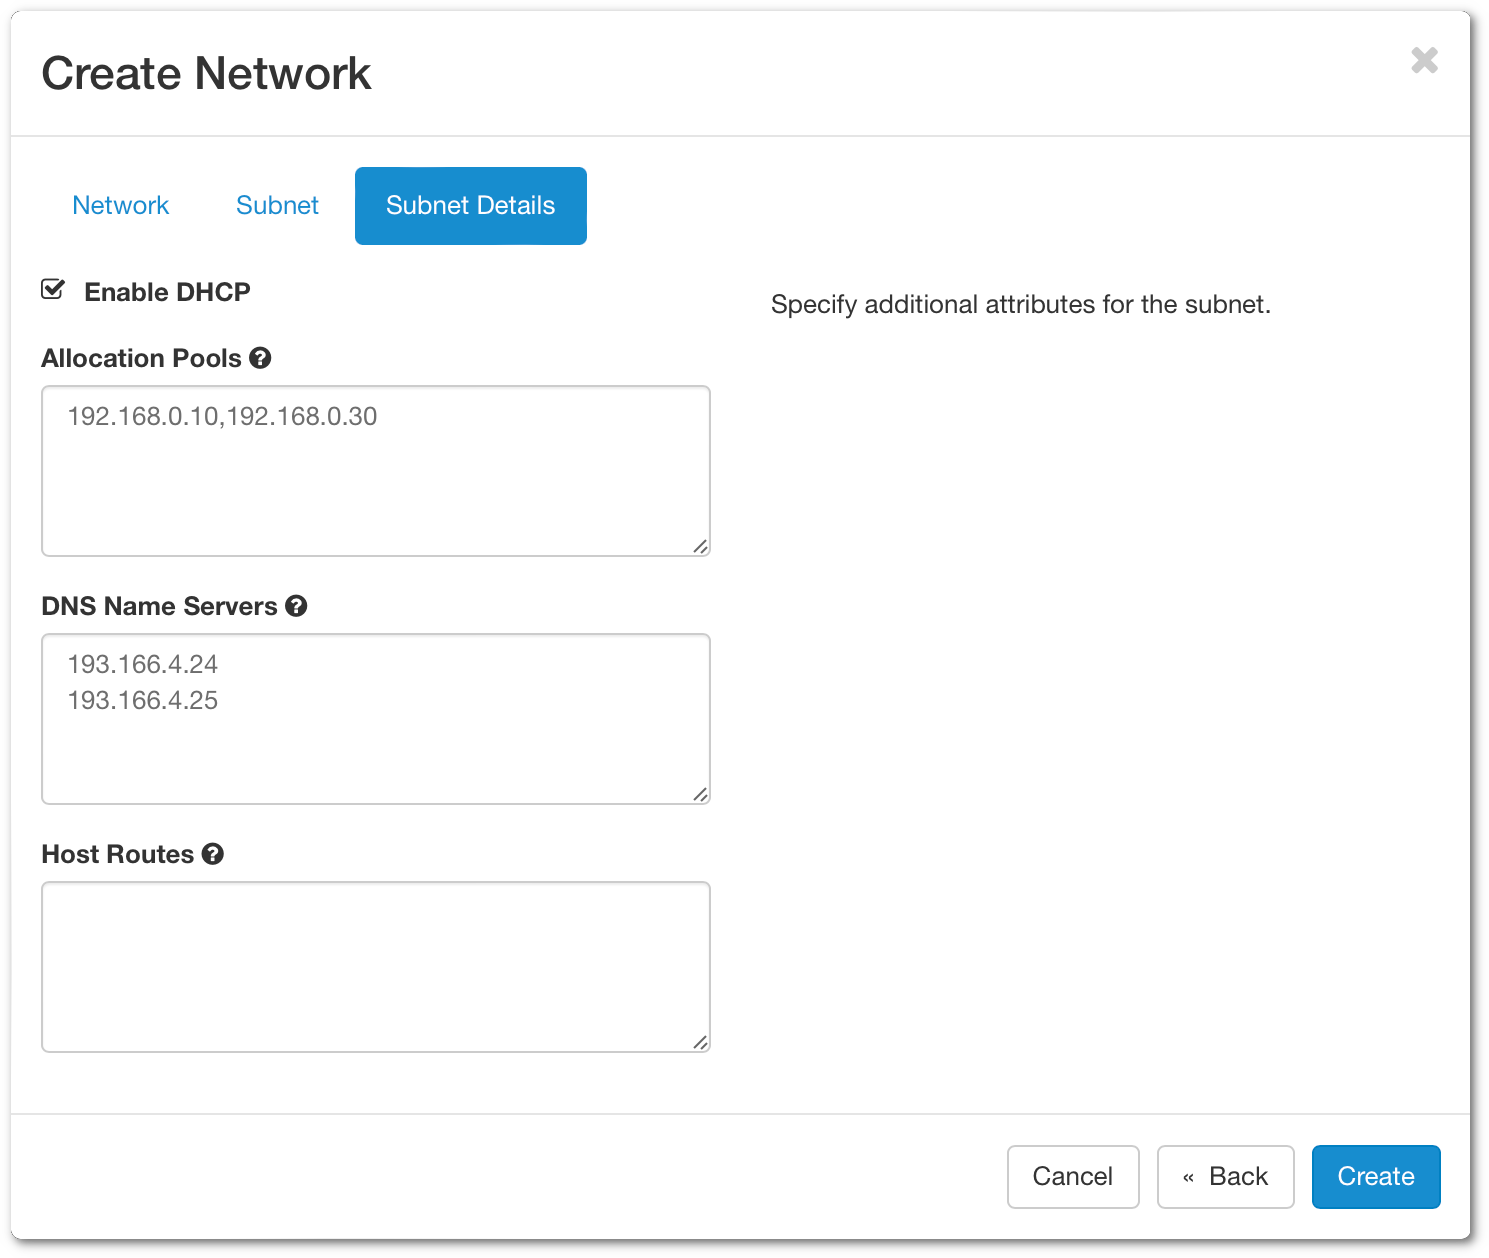
By default, Enable DHCP is activated.
- Allocation Pools - Choose the IP range that will deliver the IP for the DHCP
- DNS Name Server - Enter 193.166.4.24 and 193.166.4.25 (See screenshot above)
-
In the end, you can click Create and you should see your network in the list.
Create a router
A router will bridge the connection from external to the private network
-
Navigate to Network > Routers. Click on Create Router on the upper right. A new window will open.
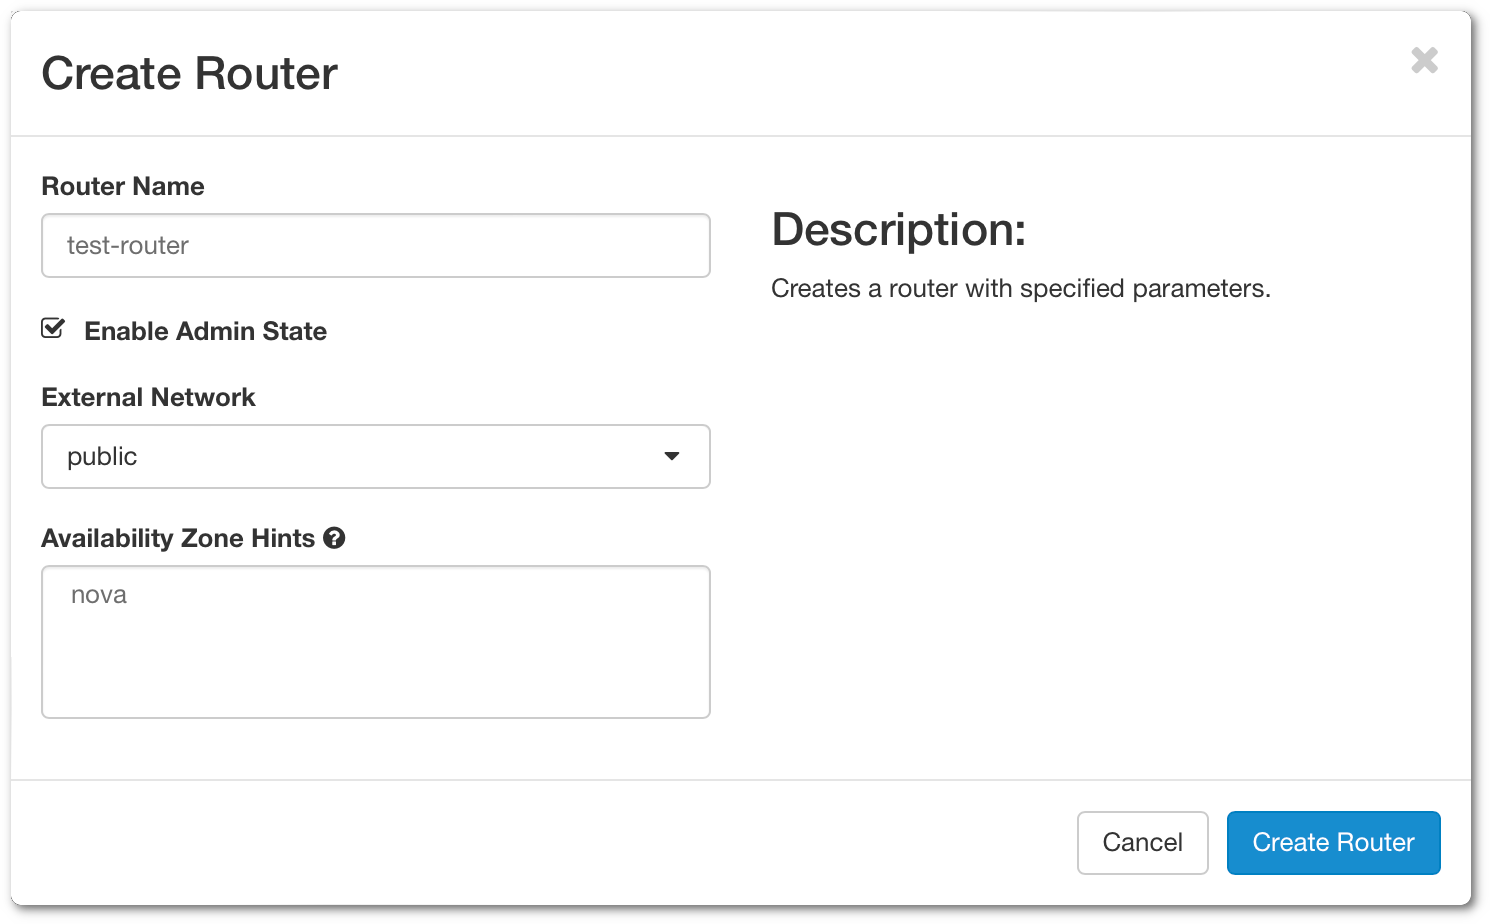
- Router Name - Specify a name for your router
- Enable Admin State - Enable the router
- External Network - Choose which external you want to use for the router
- Availability Zone Hints - Select your availability zone.
-
After filling in the necessary fields, you can click on Create Router
-
Now that you have the router created, you need to attach it to your internal network to allow communication with the external. Click on your router newly created and go to the tab Interfaces. Click on Add Interface

- Subnet - Select the network you want to attach.
- IP Address - This option is not mandatory, if you don't add an IP address, the gateway IP will be selected.
-
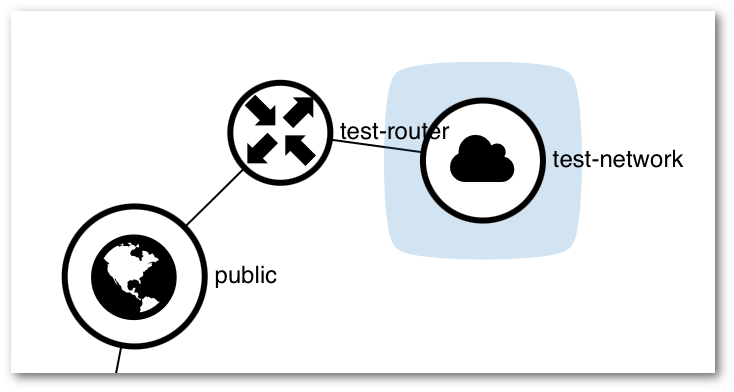
Now you attached your interface to the router and able to connect to the external network. You can see a graph by clicking on Network > Network Topology and select the tab Graph
Info
If you want to access your instances from an external network, you need to associate a floating IP.
A floating IP sticks with your instance until you decide to release it.
- If you want to use the CLI command:
$ openstack network create test-network
$ openstack subnet create --dns-nameserver 193.166.4.24 --dns-nameserver 193.166.4.25 \
    --network $(openstack network list -f value -c ID -c Name|grep test-network|cut -d " " -f1) \
    --subnet-range 192.168.0.1/24 --allocation-pool start=192.168.0.10,end=192.168.0.30 test-network
$ openstack router create test-router
$ openstack router set --external-gateway public test-router
$ openstack router add subnet test-router test-network
Security groups
Security groups are sets of firewall rules which limit access to your machines. A virtual machine can use one or more security groups. And one security group can be assigned to one or more Virtual Machines. A security group can hold one or more Rules. These firewall rules are made on the OpenStack layer and you may have additional firewall rules within your virtual machine. In case of connectivity problems, you should make sure both the security group and the virtual machine's internal firewall are correctly configured.
A security group can be edited or created in any moment of the Virtual Machine life-cycle. Any change applied to a security group assigned to a Virtual Machine, will be applied instantly to the Virtual Machine. There is no cost associated to security groups.
-
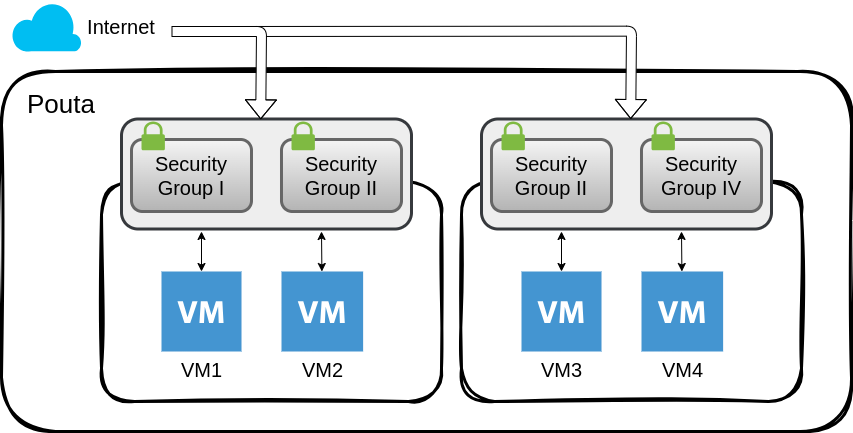
The recommendation is to aim for a set of Groups and Rules that are organized in a way that helps understanding the objective of each of them. Each service should have its own security group and both the name and description should be clear of what this Group provides and opens access to (destination ports) and from (source IPs).
In the example above we have 3 security groups other than the
defaultone, two internal for monitoring and management, and one public for the service we offer to our users.Instance view
The instance view shows all the configurations of a VM, including all the security groups added to it, and the configuration of each of them. It is very useful to debug network connections issues and confirm the security of a VM.
-
The
Defaultsecurity group comes with rules that allow internal communication between virtual machines that are members of the security group: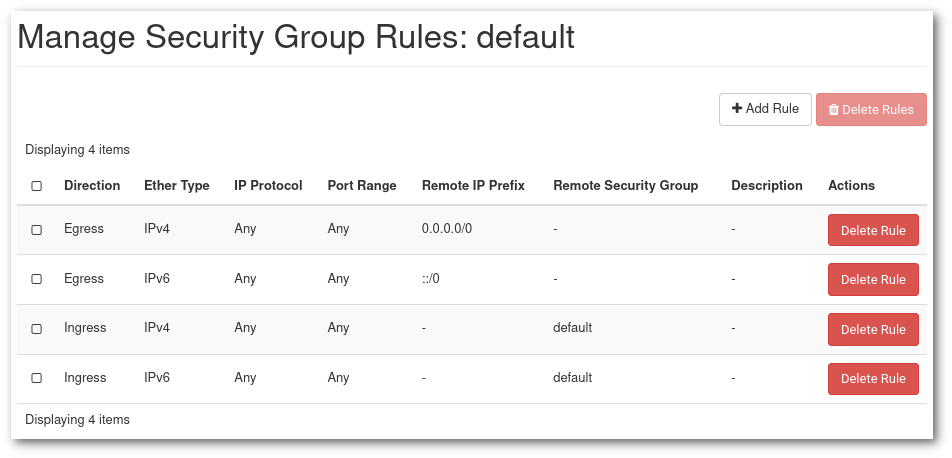
Do not modify the default security group
Meanwhile it is allowed to edit the default security group, it is not advisable. Some of the initialization procedures rely on the default security group configuration.
In the
defaultsecurity group, the first two rules allow for traffic to exit (Egress) to AnyIPorPort. The last two rules, allow communications among any member of thedefaultsecurity group also for anyIPorPort. This means that by default any VM is able to contact anywhere in the public internet and among themselves. This can be restricted for more secure than average environments, but it should be done with the understanding of the requirements.
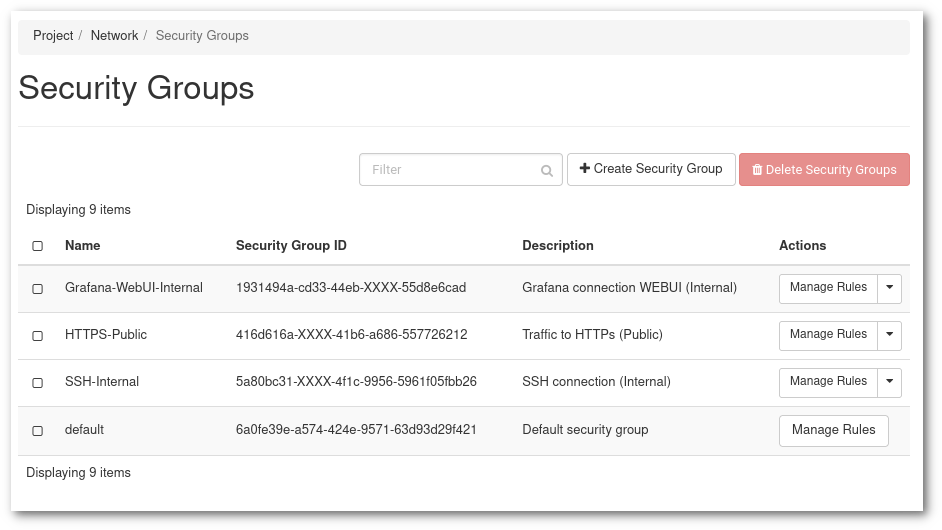
Create a security group
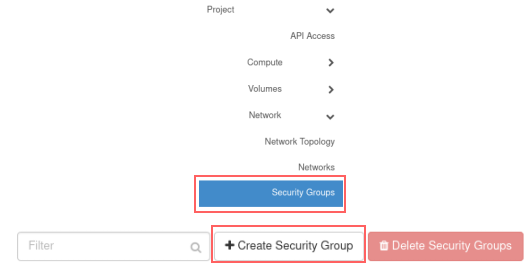
1.First go to the Security Groups management page in Pouta. For a new empty project, only the default security group will be there.
-
Click in + Create Security Group
-
The "Create Security Group" page will appear. Provide a Name and a Description.
-
Then click in Manage Rules, and in the view that is displayed, click Add Rule.
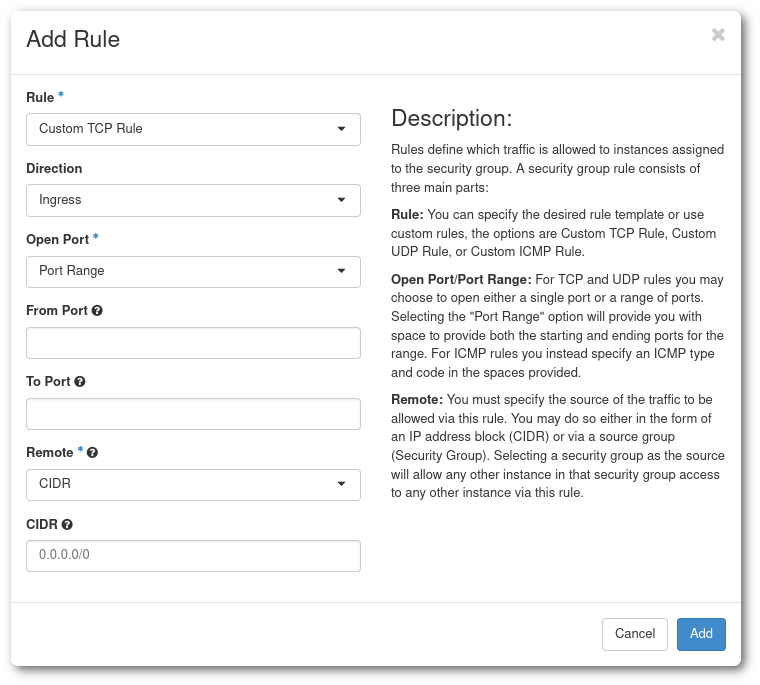
- Rule has several options:
- There is a list of protocols (DNS, HTTP, IMAP, ...), they provide an somewhat simpler way to create a rule. For example the
SSHprotocol only requires to input the CIDR that will be allowed by this rule. - The 3 more generic and configurable options are Custom TCP Rule, Custom UDP Rule and Custom ICMP Rule, they are the ones that allow the most fine tuning of the firewall options.
- Finally the All ICMP/TCP/UDP open all ports for a given protocol to a given CIDR. They are only advisable for tests and when the list of allowed IPs is restricted and controlled.
- There is a list of protocols (DNS, HTTP, IMAP, ...), they provide an somewhat simpler way to create a rule. For example the
- Description is not compulsory, but advisable for complex Security Groups with several Rules. For example, when adding several IP ranges, the description should state what are these IPs associated with (office network, VPN, ...).
- Direction can be Ingress or Egress. In principle , most rules will be Ingress rules as by default Egress is open.
- Open Port can be single Port, Port Range, or All ports.
- Port or Port Range is self explanatory. If you do not know which port to open, an alternative option is to use one of the predefined protocols in Rule.
- CIDR or Classless Inter-Domain Routing is a way to specify ranges of IPs. You can specify a single IP by adding the
/32suffix (188.184.77.250/32), or a whole Class C subnet with the suffix/16(188.184.77.250/16).
- Rule has several options:
A security group can hold as many rules as needed.
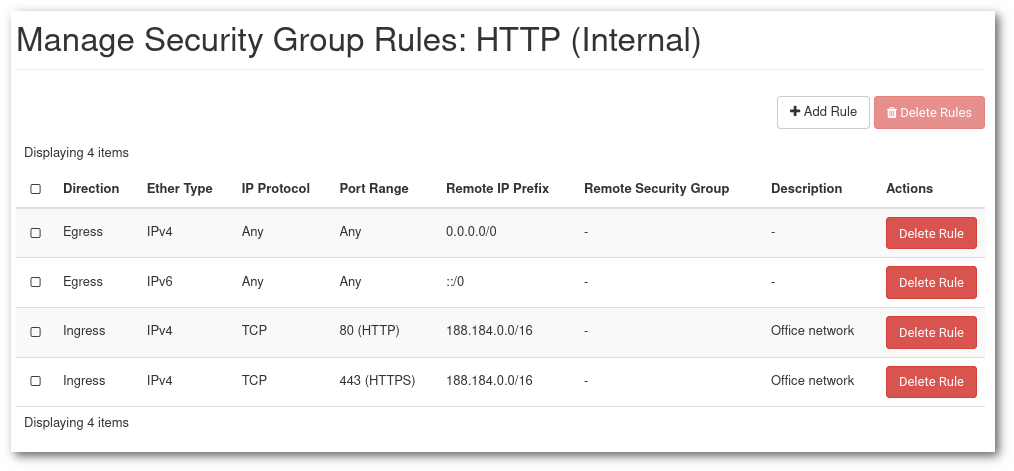
In the example above we have the opening of ports 80 (http) and 443 (https) to the subnet 188.184.0.0/16 ([188.184.0.0 to 188.184.255.255]).