Table of contents of user guide
Deleting files and folders
On this page:
Any project member can delete data from SD Connect, including individual files and subfolders. To prevent accidental data loss, deleting the contents of a bucket and deleting the bucket itself are separate steps. A bucket can be deleted only after all its contents have been removed.
1. Deleting a file
-
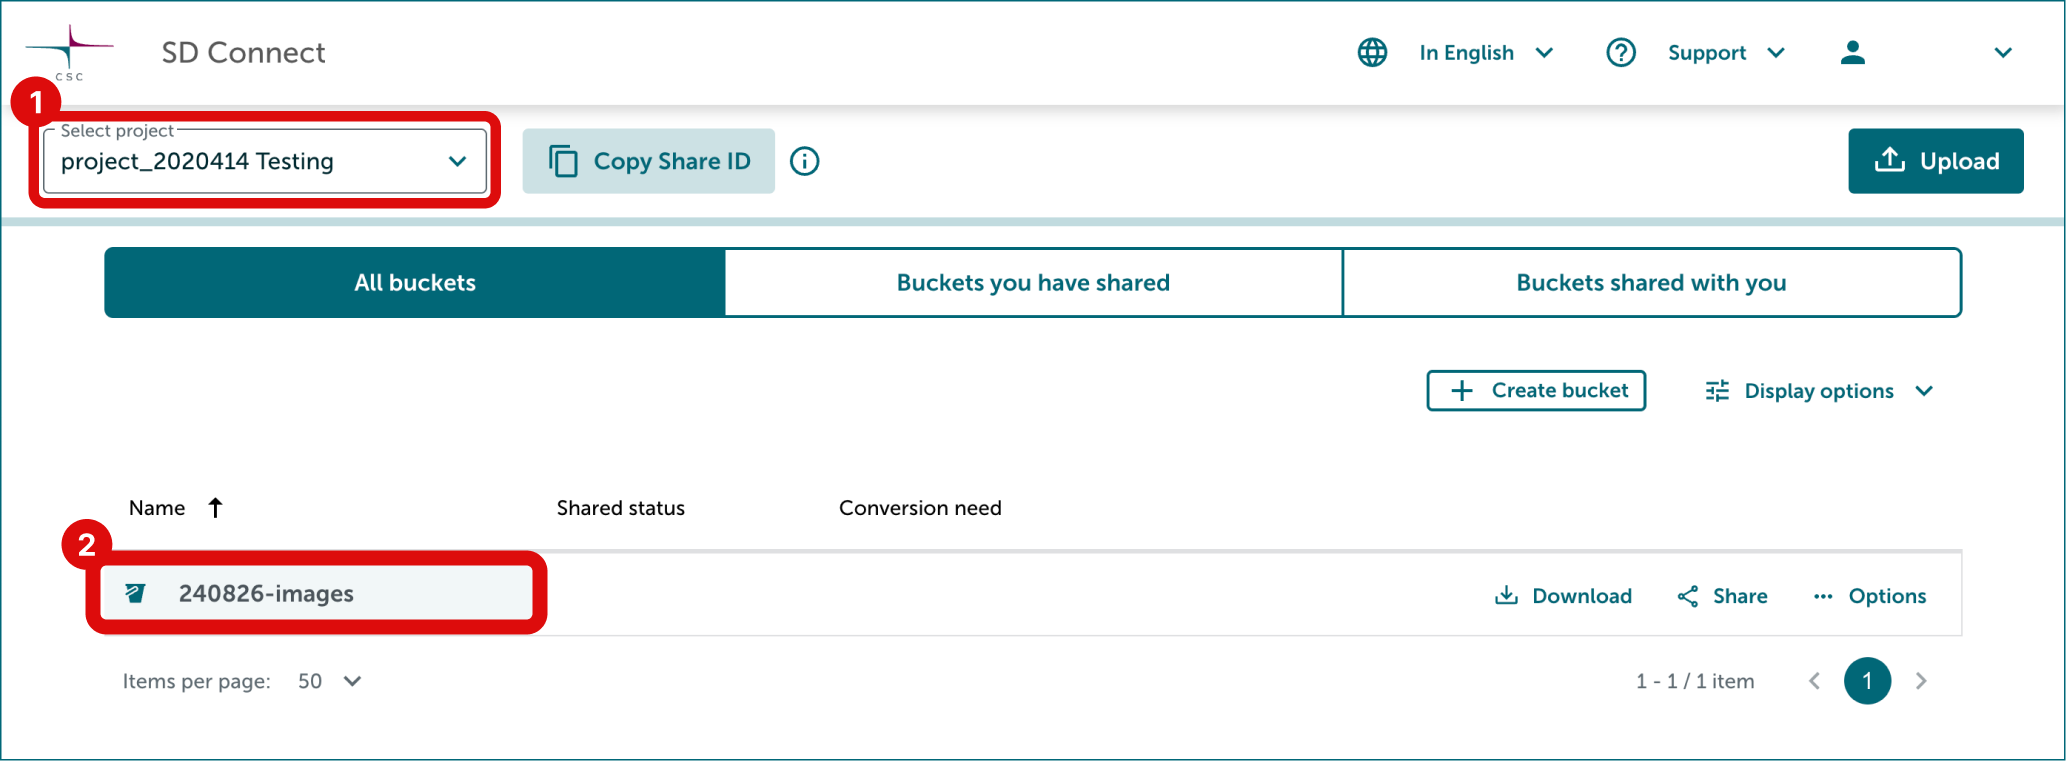
Select the correct project and bucket.
-
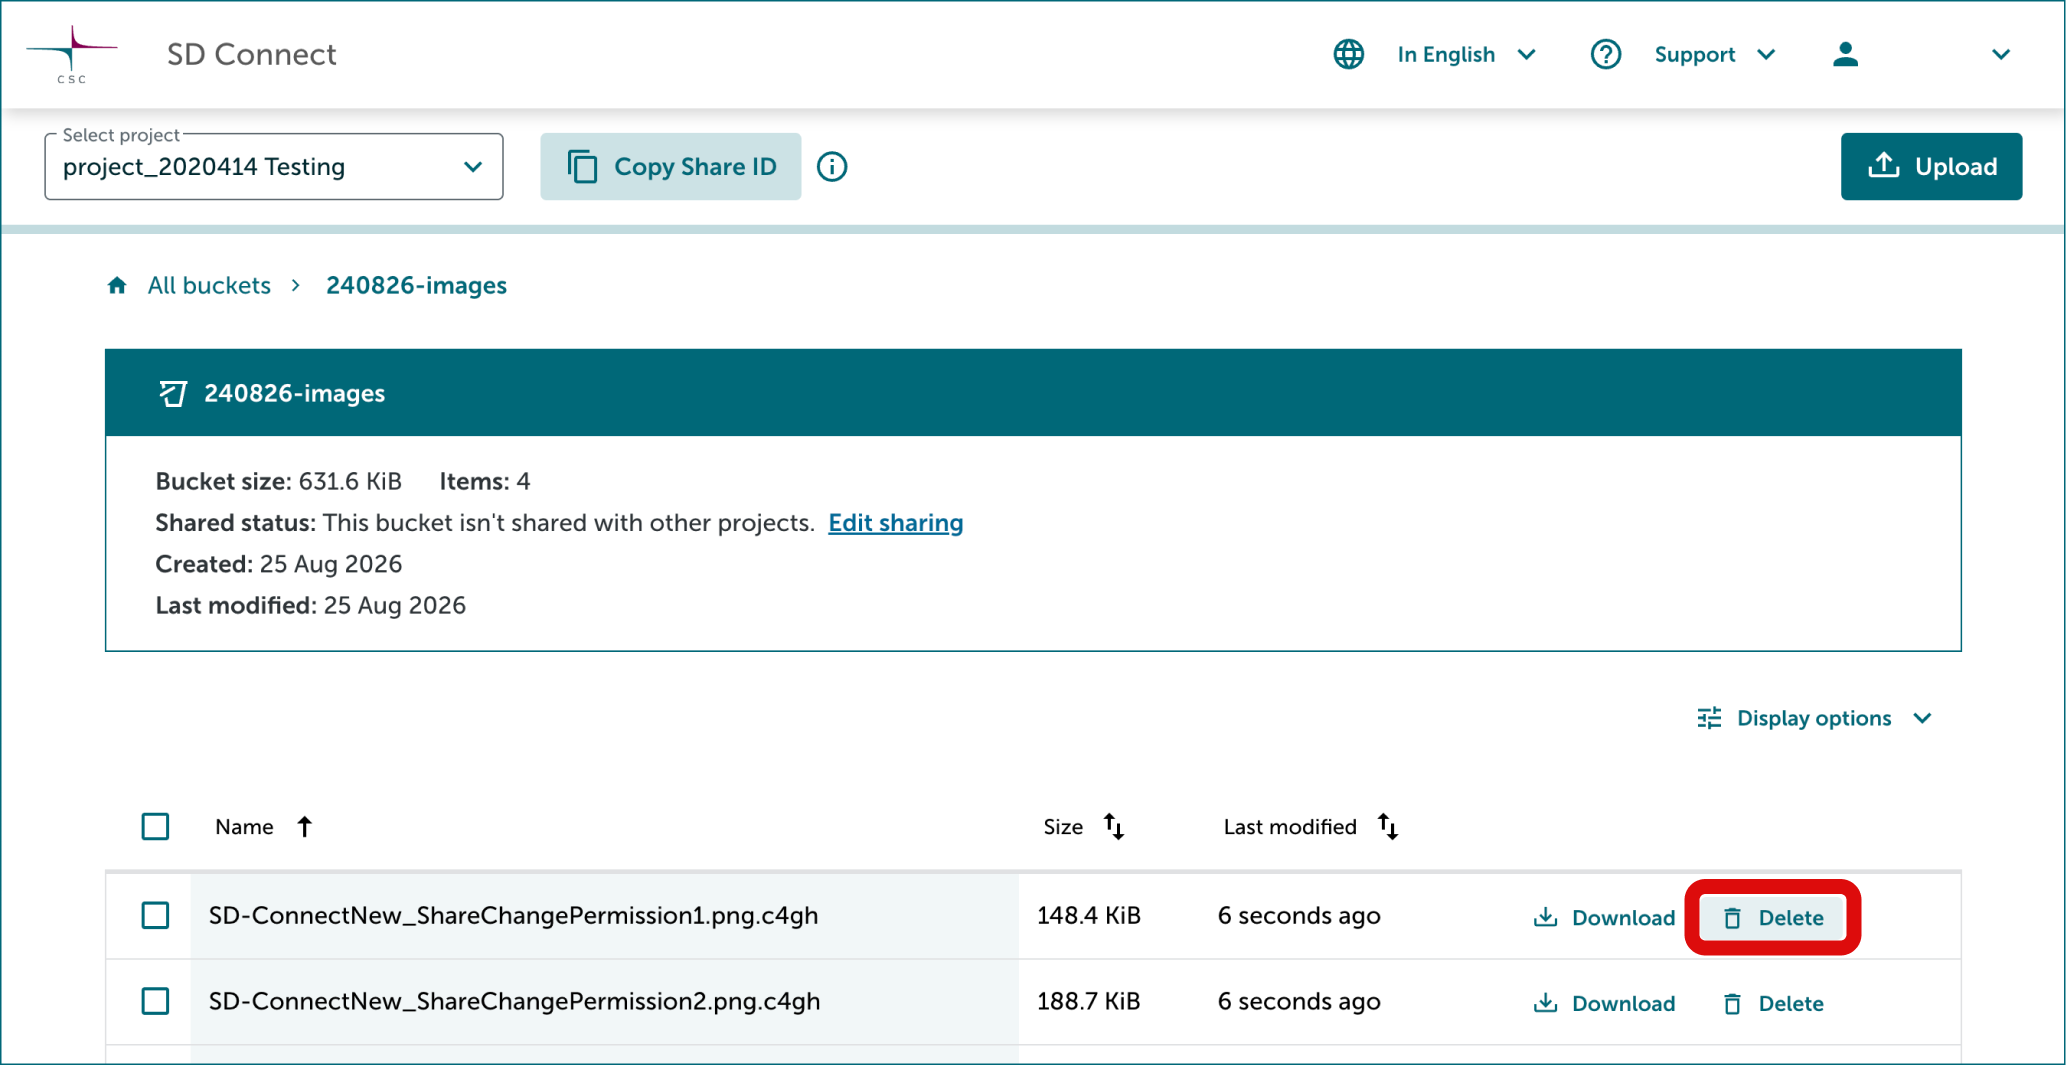
Click Delete on right side of each file you want to delete.
-
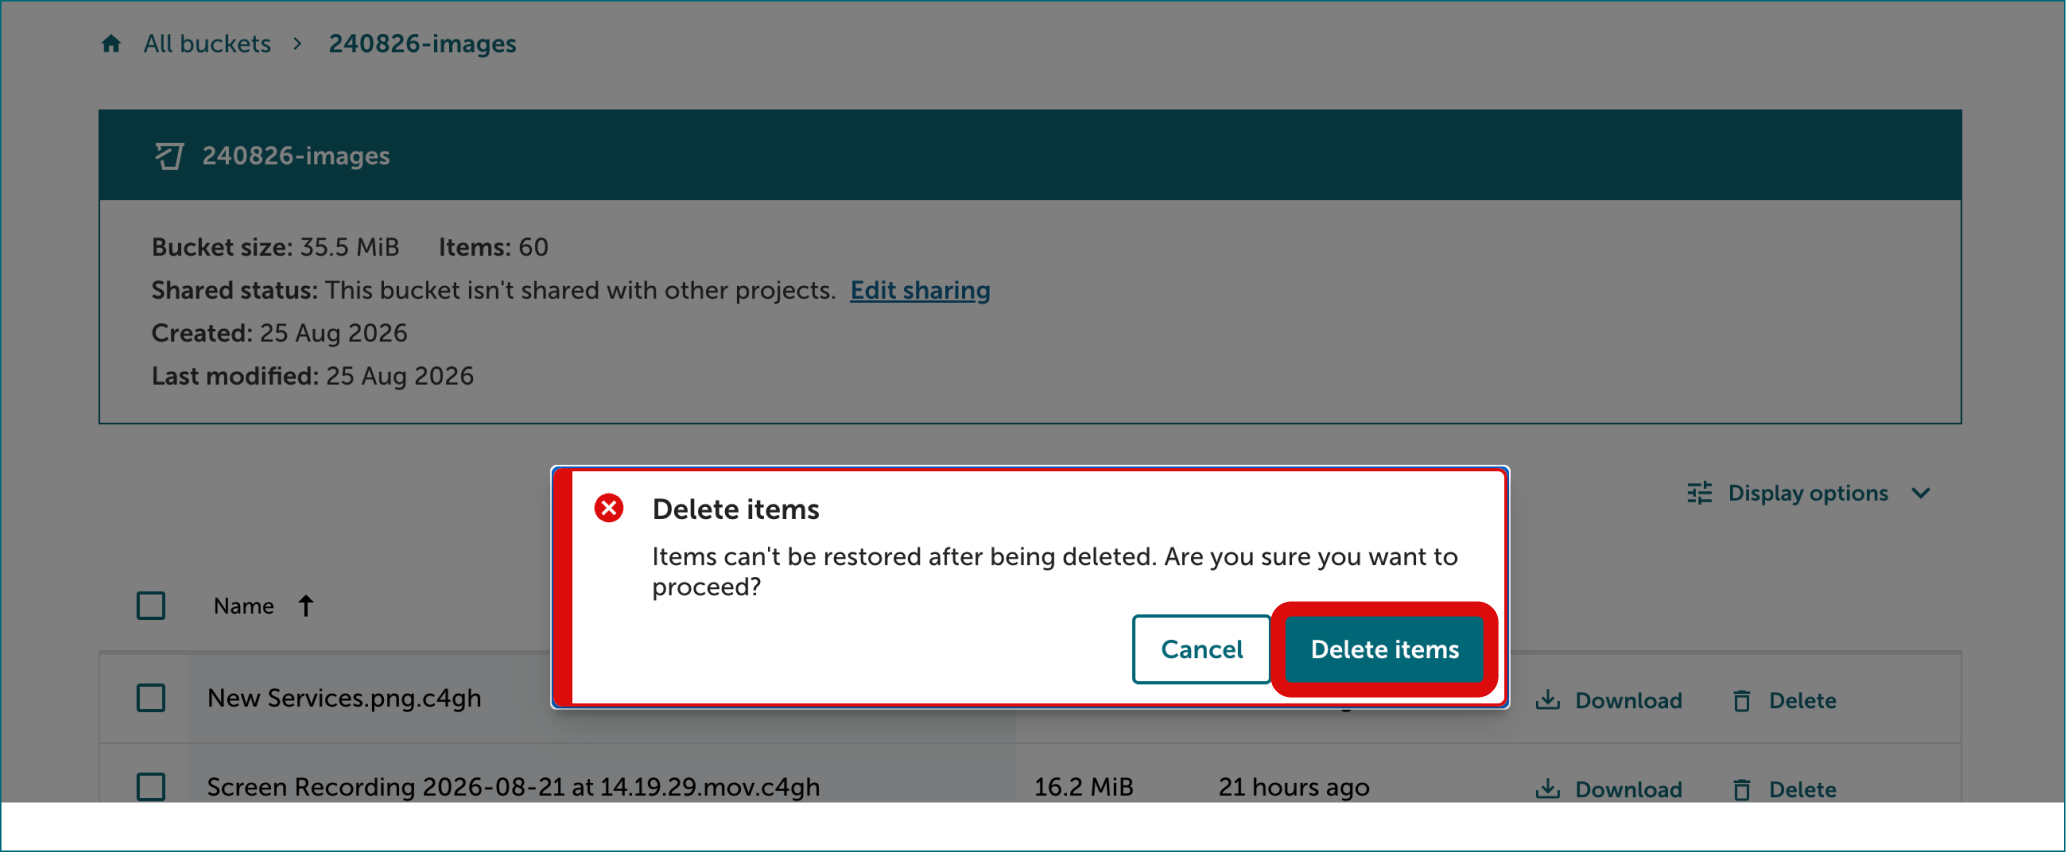
Confirm by clicking Delete items from the notification.
2. Deleting multiple files
- Select the correct project and bucket.
-
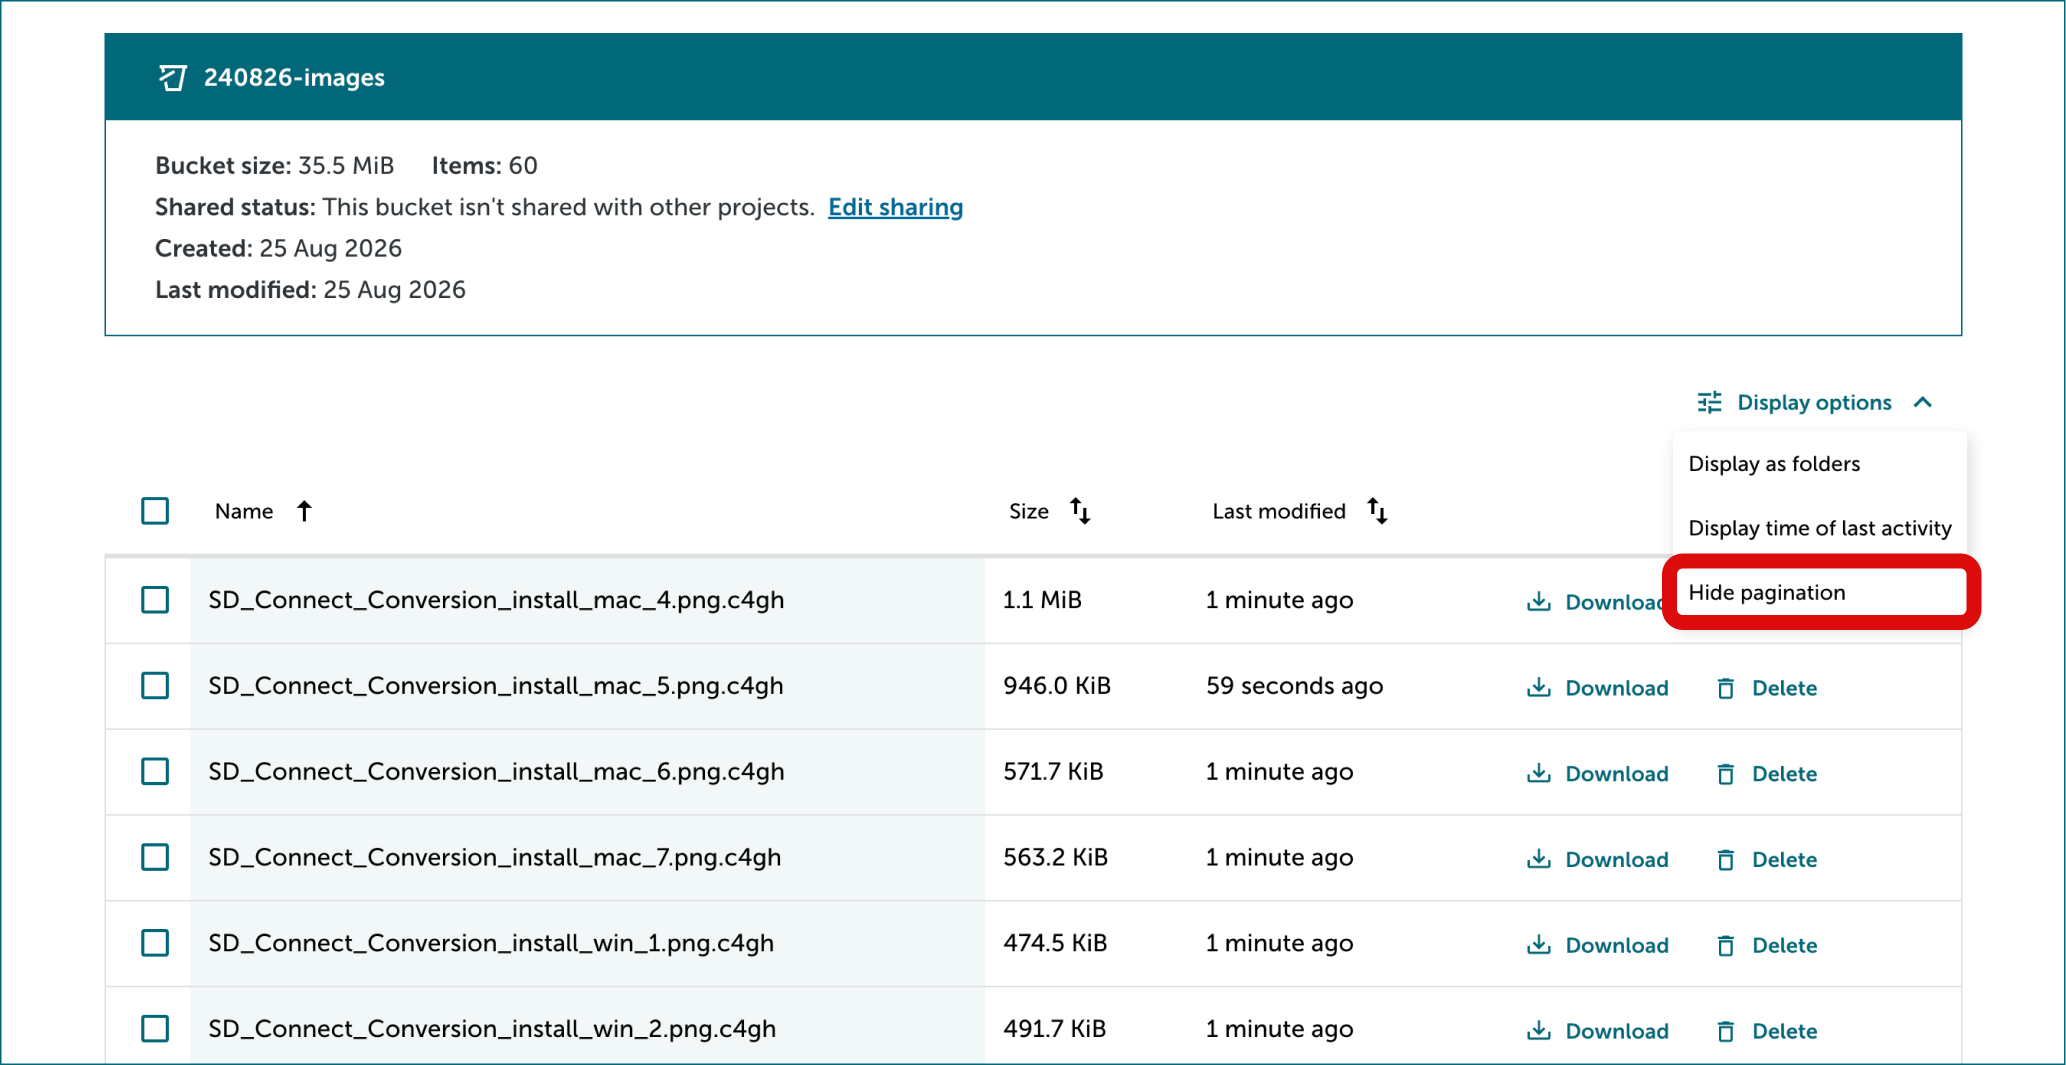
Select Display options from top right corner of file list. Then select Hide pagination from the same menu. Now all files are displayed on one page.
-
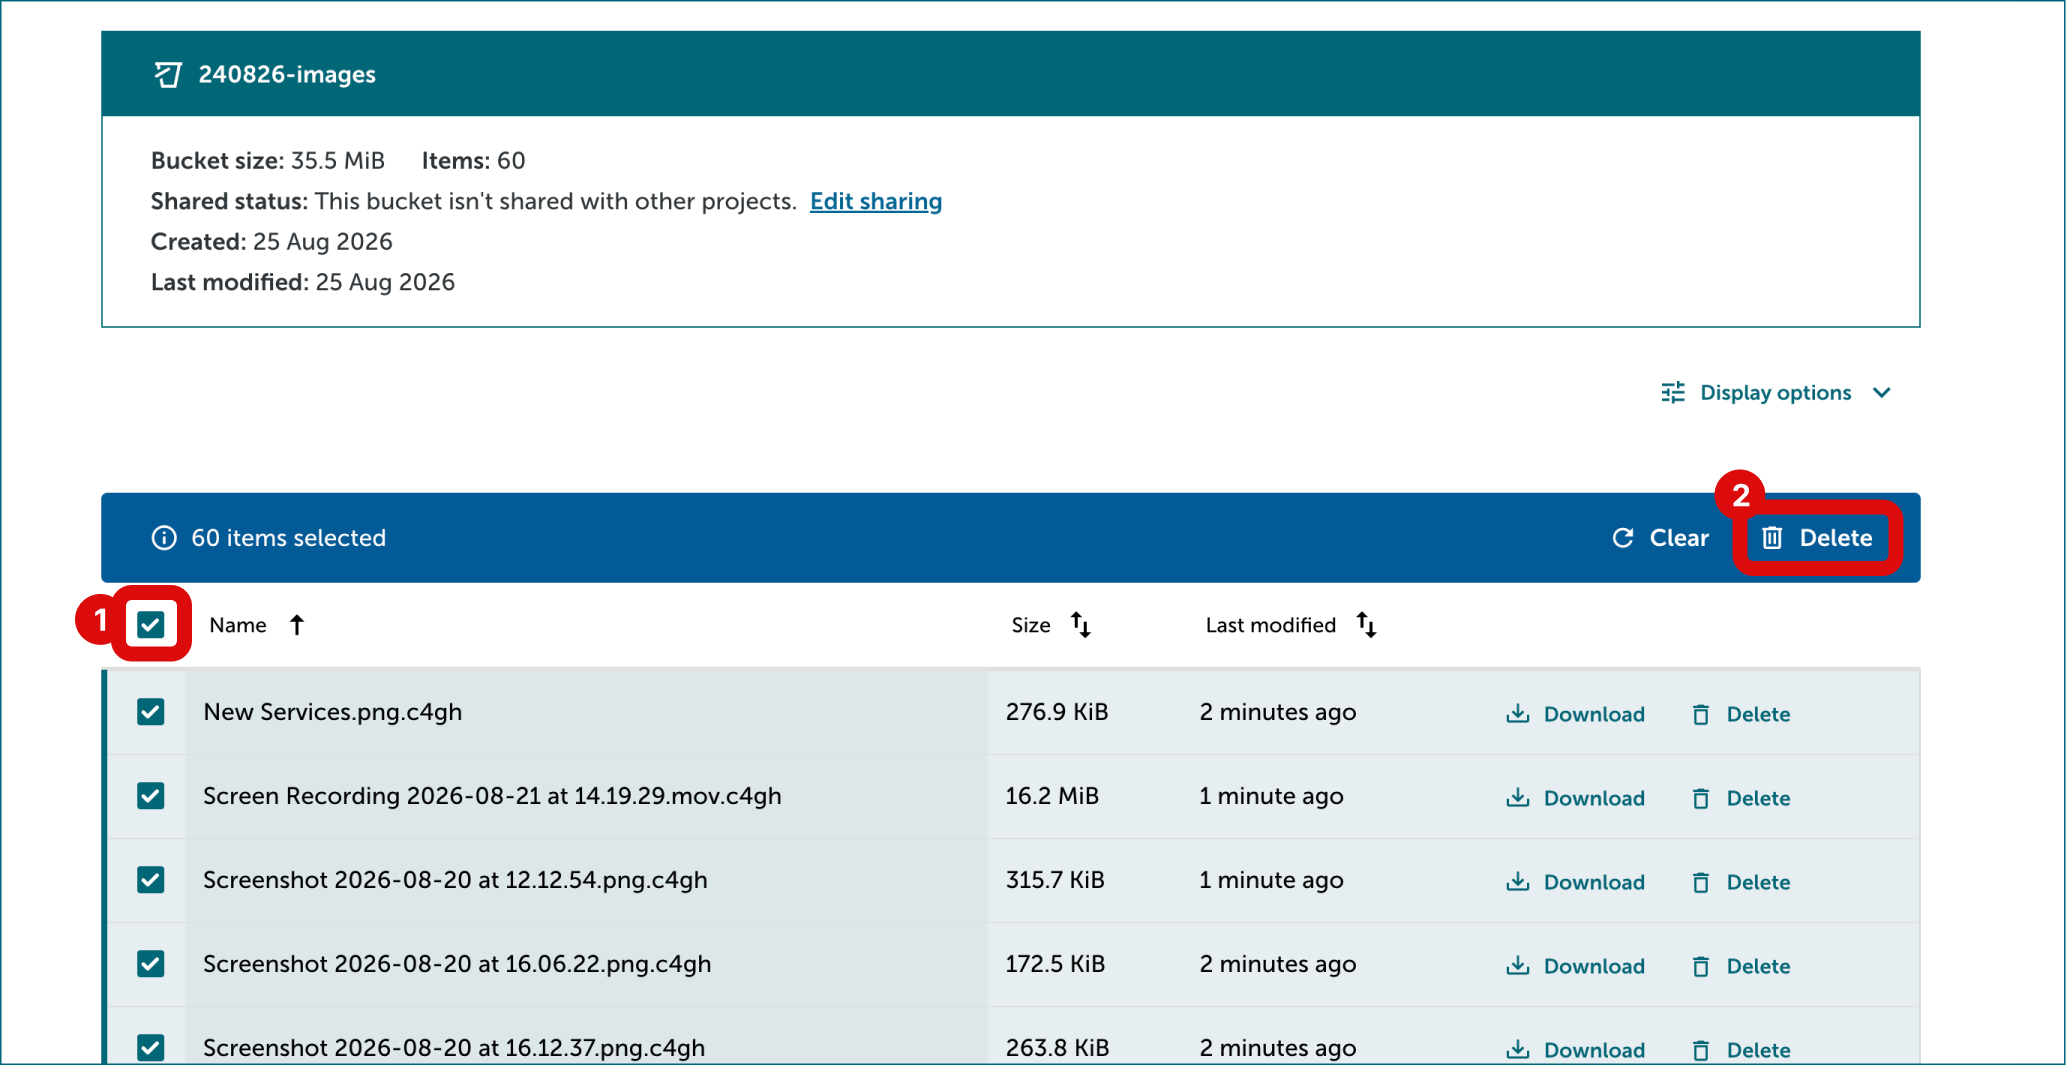
Select checkbox on top left corner of the file list. Click Delete from the toolbar appearing on top of file list.
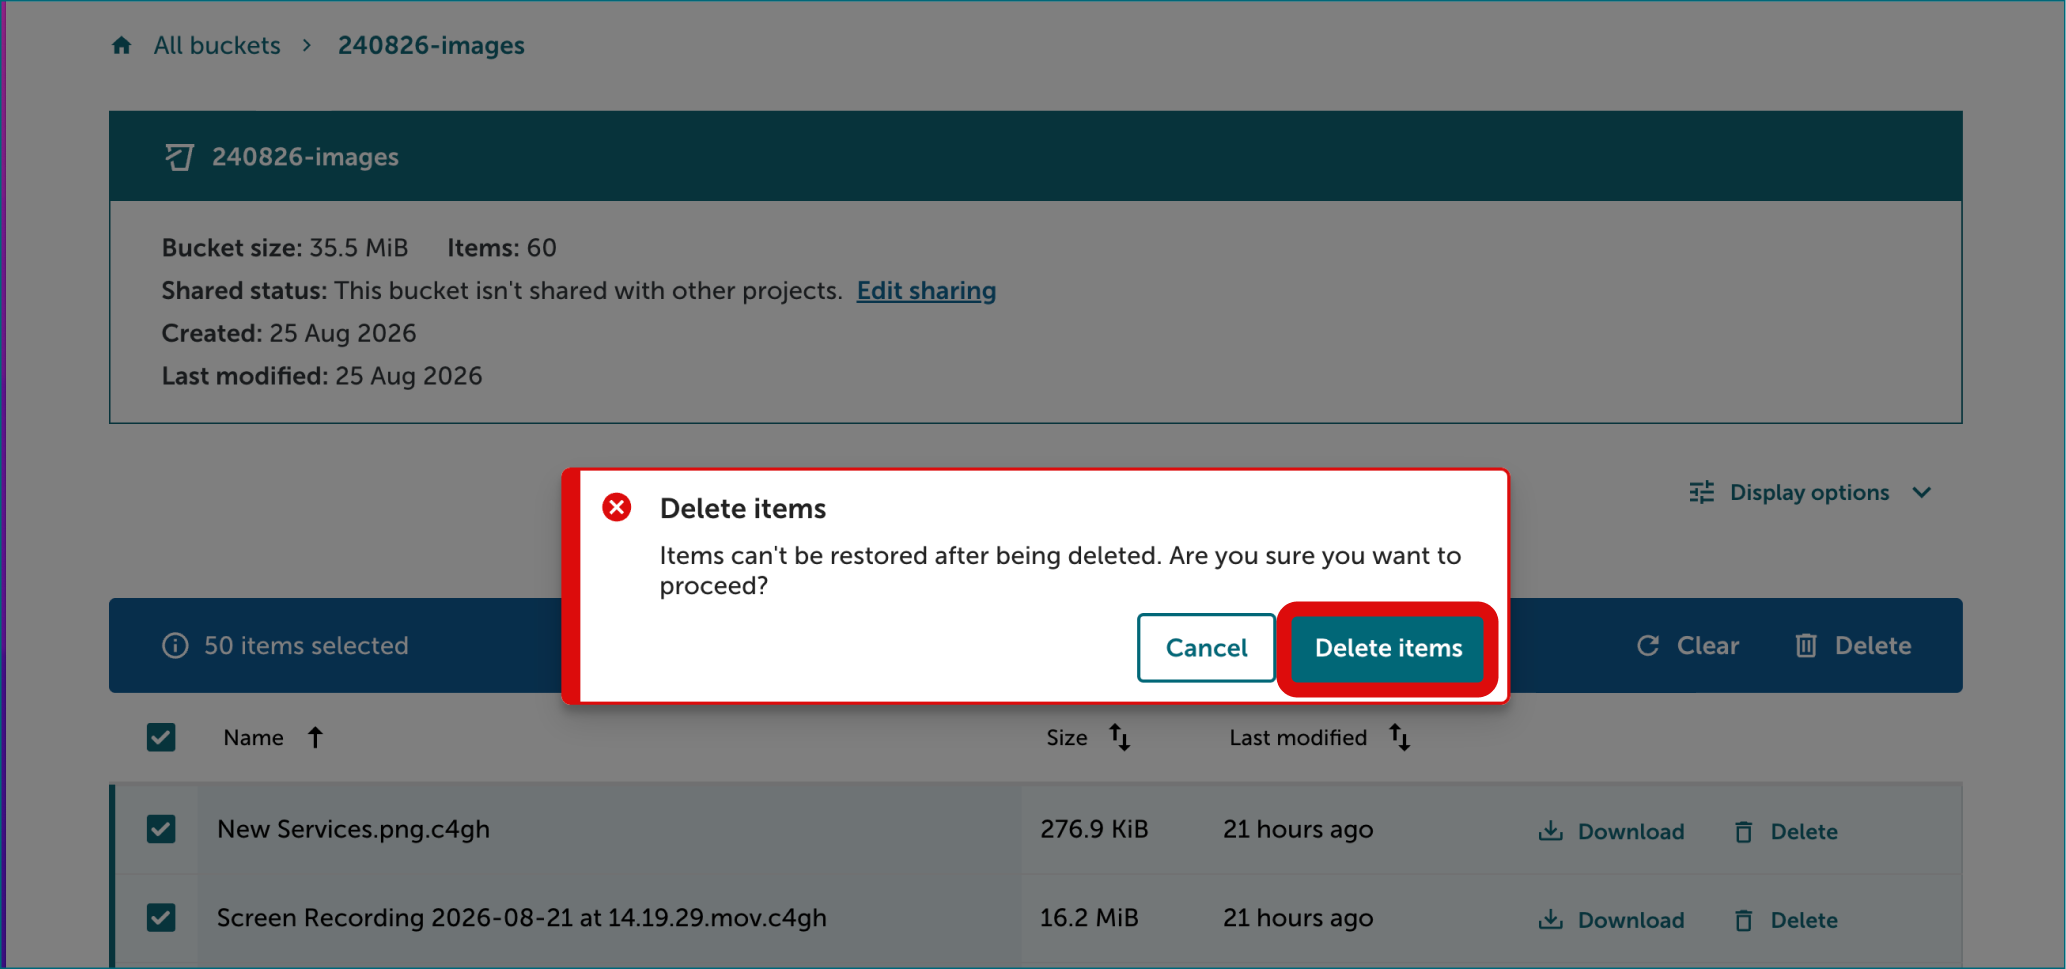
- Confirm by clicking Delete items from the notification.
3. Deleting subfolder
- Select the correct project and bucket.
- Find correct subfolder and open it.
- Delete all files inside the subfolder, see instructions. Subfolder is deleted automatically when all files in it are deleted.
4. Deleting a bucket
- Select the correct project and bucket.
- Delete all files inside the bucket. Bucket must be empty before it can be deleted.
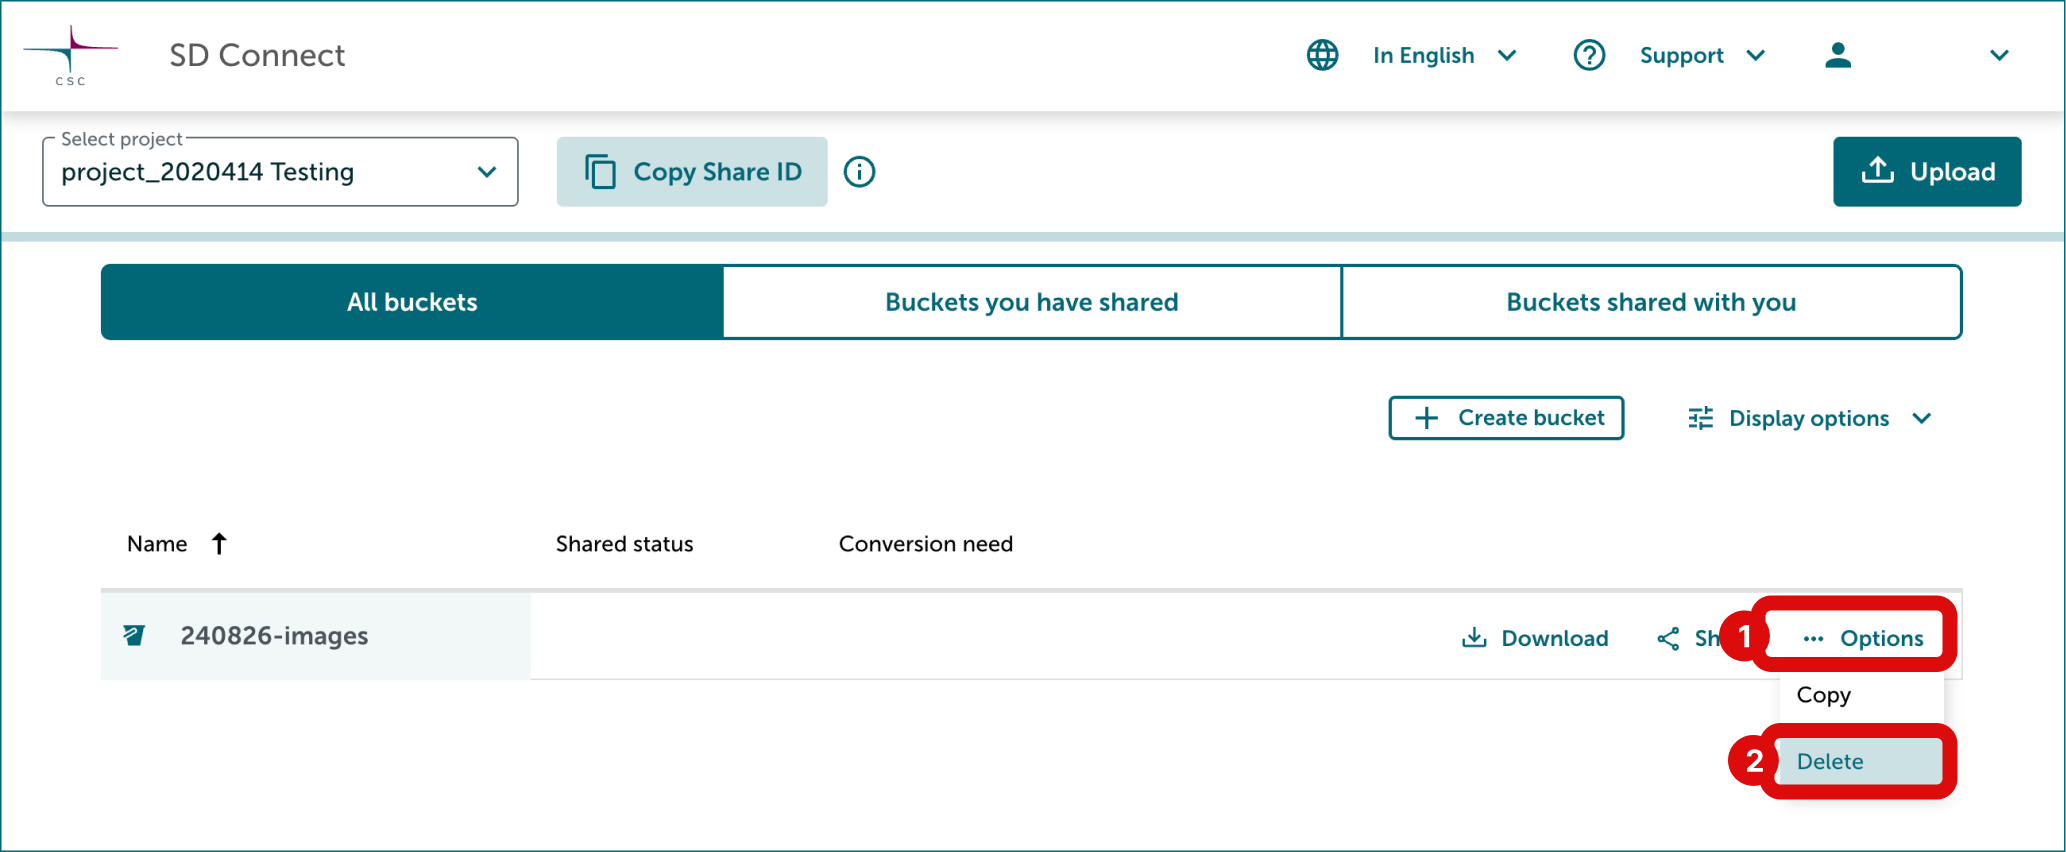
- Return to All buckets view. Select Options, then Delete, on right side of the bucket.