Using Allas with Cyberduck
For Windows and Mac, Cyberduck provides a graphical user interface to Allas.
The instructions below describe how to open a Swift-protocol-based Cyberduck connection to Allas. With this setup, Cyberduck is compatible with rclone, Swift and a-tools. Cyberduck can be configured to use S3 protocol too, but that option is not discussed here.
In the end of this page there is a list of functions that Cyberduck offers for data management. Please use Cyberduck web site for more detailed information and instructions.
1. Install Cyberduck.
2. Navigate to the Cyberduck main menu and choose Bookmark | New Bookmark (Ctrl-Shift-B).
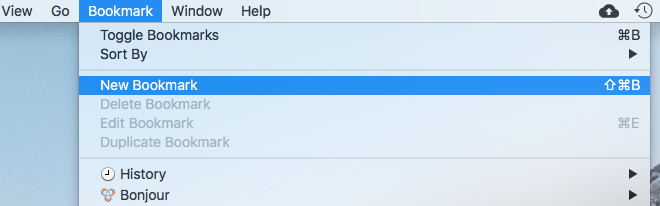
Figure Creating a new bookmark
3. In the first dropdown menu, choose OpenStack Swift (Keystone 3). ( if your Cyberduck does not have this option available, you need to update it to a more recent version)
4. As the Server, type pouta.csc.fi and choose the Port 5001.
5. In the section Project:Domain:Username, type (without spaces) the desired project's name, add ":default:" and your Pouta username (this is the CSC user account you use in CSC supercomputers and cPouta). Thus, it should be in the format projectname:default:username, e.g. project_123456:default:john.
6. Type your CSC password in the Password field. You can close the bookmark by clicking X on the upper right corner of the pop-up window.
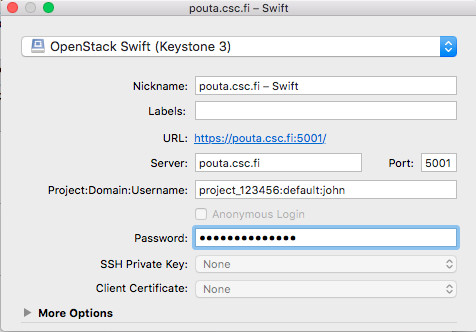
Figure Entering information for a bookmark
7. Navigate to the top left corner to the icons under Open Connection and choose the Bookmarks icon (second from the left).
8. Next, right-click the created bookmark and choose the option Connect to server.
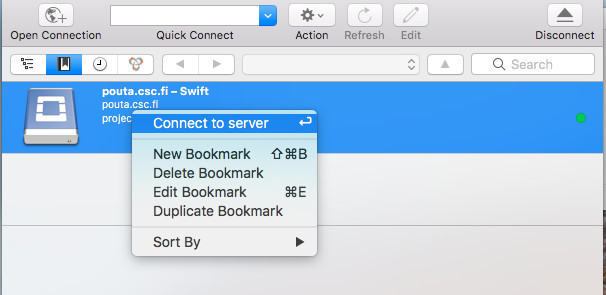
Figure Connecting to the server
Now you should be able to see the content of your project (which might be empty).
Cyberduck functions
Cyberduck offers some basic functionalities for managing data in the object storage:
- Create buckets
- Upload objects
- List objects and buckets
- Download object and buckets
- Edit objects
- Edit metadata
- Share objects
- Remove objects and buckets
The Cyberduck user interface is quite easy to use. The data management options can be displayed by either right-clicking the bucket/object or choosing the bucket/object and then clicking the Action button on the menu bar. To navigate back to the previous directory, use backspace.