Getting started with machine learning at CSC
This tutorial is part of our Machine learning guide.
You have some machine learning code in Python running on your laptop, but it's really slow. You've learned that moving to GPUs and CSC's supercomputers might be the answer but the documentation seems a bit daunting.
CSC's computing environment is well-documented at docs.csc.fi, but for a newcomer it might be a bit difficult to know how to get started. This guide will show you, step by step, how to get your codes and data to the Puhti supercomputer and running on GPUs. It is part of our Machine learning guide.
CSC has several supercomputers: Puhti, Mahti and LUMI. In this guide we will focus on using Puhti as it has the widest selection of software, and has a web user interface, making it very easy to access.
When you are moving your code from your laptop to the Puhti supercomputer, it's important to acknowledge that Puhti isn't just a "faster laptop". Because of the fundamental difference in scale, some things work quite differently in a supercomputer. So be prepared to take a step back and relearn some things about how computing is done. We consider this a reasonable price to pay for getting access to Finland's most powerful GPU resource for researchers!
Note
While this guide tries to explain every step carefully, it is still recommended to have at least a basic familiarity with the Linux command line, as you will need to use that for a few of the steps. You can, for example, take a look at the first section of our Linux basics tutorial.
Step 1: Get a CSC user account
First of all, you need to get a CSC user account, if you don't have one already. If you work or study at a Finnish university just go to the MyCSC portal at my.csc.fi and click "Get Started". Select Haka-Login and your university from the pull-down menu. After that you should be able to log in with your normal university credentials. Fill in your information on the Sign up-page. Once you're done, you should get a confirmation email.
For more information, and special cases, check our separate "How to create new user account" documentation.
Step 2: Join an existing project, or create a new one
Second, you need to belong to a computing project. This is because CSC needs to keep track of how our resources are used, and computing projects are the mechanism for that.
If you are part of a research group, ask your professor or group leader if you already have a CSC project that you can join. If that is the case the manager of the project (most likely the professor) can add you to the project via the MyCSC portal. Check our more detailed documentation on how to add a new user to a project
Otherwise, for example if you are working on your own doctoral thesis project, you can create your own project. To create a new project, go to My CSC and log in as in Step 1 above. Choose My Projects and click the New project button. Give your project a name, and describe briefly the research you are doing. "Academic" is probably the appropriate category in most cases. For more information, check our "Creating a new project" documentation.
Once your project is created you also need to add Puhti access to your project. See Adding service access for a project for more information on that.
Make a note of the unix group of the project, which is typically something
like project_2001234. In the remainder of this document we will use
project_2001234 as a placeholder whenever we are referring to the unix group
of the project, but remember to always replace that with your actual project
number.
Step 3: Log in to Puhti
There are many ways to access Puhti. The traditional way is via an SSH client giving you a purely text based command line access to the Linux system running on Puhti. However, here we recommend the Puhti web interface accessible via a web browser at puhti.csc.fi. Log in with the username and password created in Step 1 of this guide.
Note
If you have just created your account minutes ago, it might be that it hasn't yet been activated on Puhti. Just go get a coffee, or beverage of your choice, and try again in a few minutes! ☕
After logging in, you will see the Puhti web interface, which looks something like this:
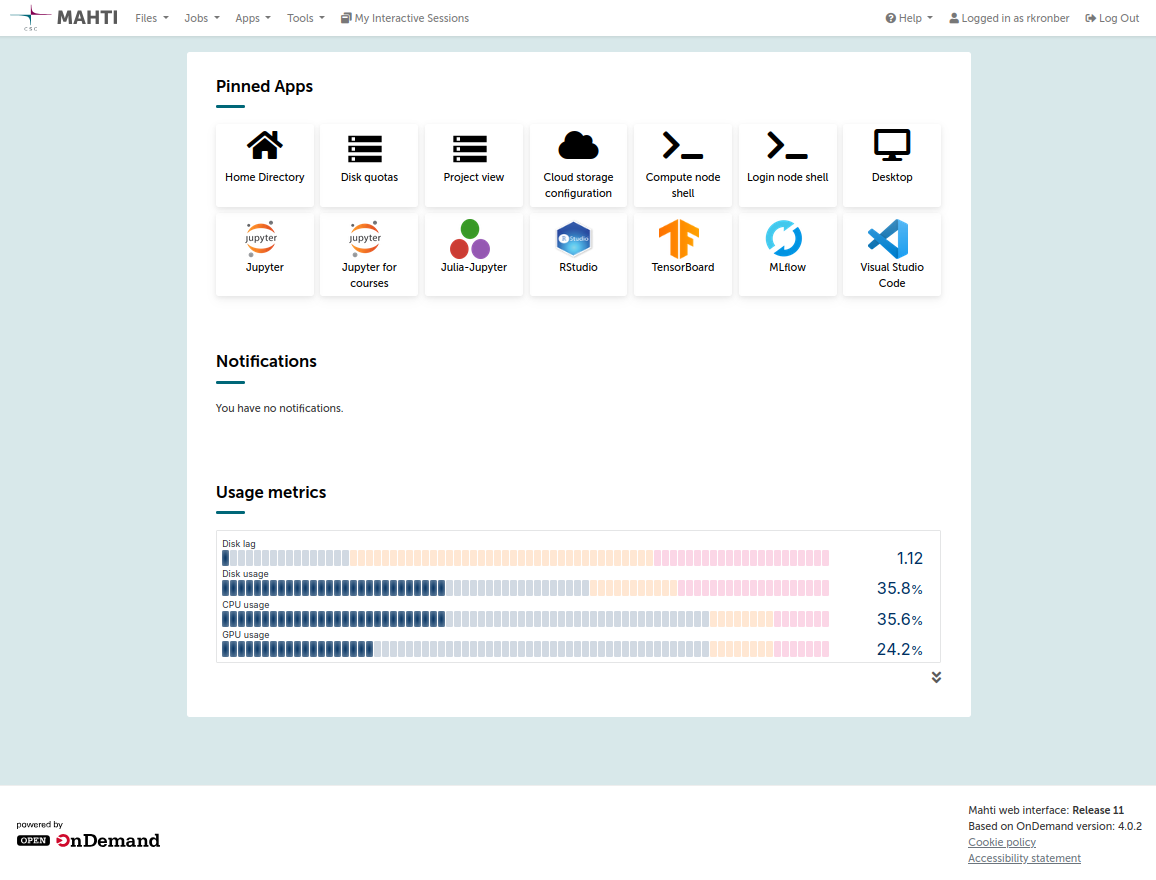
If you are unfamiliar with Puhti's web interface (based on Open OnDemand), take some time to familiarize yourself with its functions.
For now, the main things to check are:
-
The Files menu, it should show several disk areas for your use: your personal Home directory and
projapplandscratchdirectories for each of your projects. -
The Tools → Login node shell to start a terminal session on Puhti. From here you can run Linux commands.
Step 4: Copy your code to Puhti
It is recommended to keep your code in the projappl directory of the project
to which your code belongs, for example /projappl/project_2001234/. You can
navigate to this location in the Files browser in the Puhti web interface.
If you have code on your own computer, one option is to use the "Upload" button, in the upper right corner in the Files browser.
In our case we will clone the code from a GitHub repository, and for that we need to open a terminal session. Click "Open in Terminal" in the Files browser or start the Login node shell from the Tools menu. Then type the following commands (and press ENTER at the end of each line):
cd /projappl/project_2001234  # needed only if your didn't navigate to correct directory
git clone https://github.com/mvsjober/pytorch-cifar10-example
This should create a copy of the code from the given GitHub repository to the Puhti drive. You can now enter the newly created directory, either from the terminal, or via the Files browser.
Note
Here we have provided some example code for training a simple neural network on CIFAR10 data. You can of course replace that with your own code, for example from your own computer.
In the Files browser you can view a file by simply clicking on it. In particular
check the main source code in cifar10_cnn.py. Towards the end of the file you
can see the command line options. Notice that --data_path is a required
option, it is the path to where the dataset is stored.
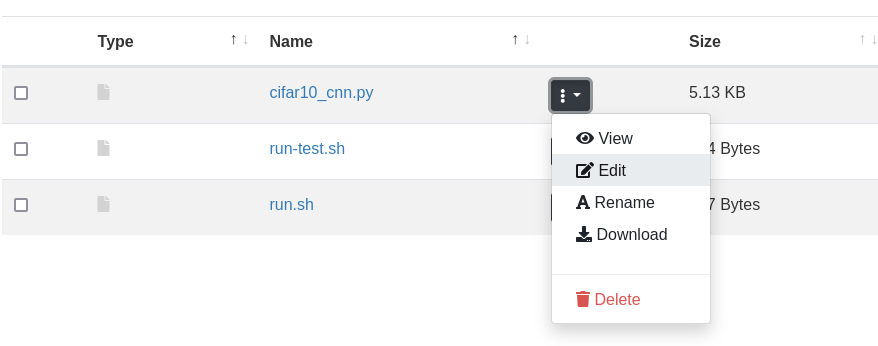
In the Files browser you can edit a file by clicking on the file-specific menu (three dots) and selecting Edit, as shown below.
Step 5: Copy your data to Puhti
It is recommended to keep your training data in the scratch directory of the
project, for example /scratch/project_2001234/. Remember that the scratch
will be regularly cleaned, so don't keep anything important there. Datasets
should typically have another more permanent location, such as in
Allas for storing during the project's life-time.
You can navigate to /scratch/project_2001234/ in the Files browser in the
Puhti web interface. Here we will fetch the dataset from a public Allas bucket
with wget. The wget command can be used to download any files which has a
URL address.
Type the command to download the dataset (launching the terminal as in Step 4 if you haven't already done that):
cd /scratch/project_2001234  # needed only if your didn't navigate to correct directory
wget https://a3s.fi/mldata/cifar-10-python.tar.gz
The downloaded file is a compressed archive of the CIFAR10 dataset in a Python-friendly format.
Next you could extract the archive, but in this example we have opted not to do so. We will instead extract the files to the fast local drive at the start of each job. More on this in the next section.
Step 6: Check what Python libraries you need
Before running your code, you should check what Python frameworks or libraries
you need. If you are using code that you have downloaded from the Internet,
there will usually be some installation instructions or a requirements.txt
file which tells what Python libraries are needed. Keep in mind, that often
you should not follow the installation instructions exactly as they often assume
that you are installing on a personal computer.
CSC provides many pre-installed Python environments for popular frameworks and libraries. It's usually a good idea to use these as a starting point, even if they don't contain all the packages you need. Check the list of data analytics and machine learning modules provided on CSC's supercomputers.
For example PyTorch and
TensorFlow have their own dedicated modules, while
Python Data is a general module containing many
data analytics libraries such as numpy, SciPy, Scikit-learn, Dask, JupyterLab
and many others. These software environments can be activated with the module
load command. See the specific documentation pages listed above for more
details.
If you find a module that has most of what you need, but a few packages are
missing, you can easily install them yourself (to your home directory) with the
pip install --user command. See our Python documentation for more information
on how to install packages
yourself.
If you have more complex software needs which are not easily covered by our existing modules, it is always possible to create your own Python environments. If you are unsure what to do, you can always contact our service desk.
Step 7: Create your first batch job script
Puhti is a supercomputer cluster, which means that it's a collection of hundreds of computers. Instead of running programs directly, they are put in a queue and a scheduling system (called "Slurm") decides when and where the program will run.
To run a program in Slurm we need to define a batch job script. This is just a text file with a set of Slurm options defining the resources we need for our program and the actual commands needed to run it. You can read more about defining batch job scripts in our separate documentation page.
In the file run-cifar10.sh in our code directory, you can find an example
batch job script:
#!/bin/bash
#SBATCH --account=project_2001234
#SBATCH --partition=gputest
#SBATCH --nodes=1
#SBATCH --ntasks=1
#SBATCH --cpus-per-task=10
#SBATCH --mem=32G
#SBATCH --time=15
#SBATCH --gres=gpu:v100:1,nvme:10
module purge
module load pytorch
tar xf /scratch/project_2001234/cifar-10-python.tar.gz -C $LOCAL_SCRATCH
srun python3 cifar10_cnn.py --data_path=$LOCAL_SCRATCH/cifar-10-batches-py
This will run a job in the gputest partition, with 10 CPU cores, 32GB memory
and one NVIDIA V100 GPU. The job's maximum run time is 15 minutes. In fact, 15
minutes is the maximum run time that you can request in the gputest partition
as it is meant for short testing runs only. Finally, the nvme:10 text in the
gres options requests 10GB of the fast local drive (called "NVMe").
Below the #SBATCH options, you can see the actual commands. Our script does
three things:
- Load the
pytorchmodule (and first purges any other previously loaded modules) - Extract the CIFAR10 dataset from the archive found in the scratch drive to
the fast local drive. The path to the fast local drive can be found from the
$LOCAL_SCRATCHenvironment variable. The path to the scratch drive will vary depending on your project name, so you will have to edit the script to set the correct path for your case. - Finally, it runs the actual Python script with the path to where the data is
stored given in the
--data_pathargument. Note that the data now resides on the fast local drive.
Note
You don't need to use the fast local NVMe drive like we do in this example, but it is a good practice to do so as reading a large number of files from the shared file system (such as scratch and projappl) can cause a poor performance, and in extreme cases degrade the performance for all users. Read more about efficient file system usage in our Machine learning guide.
Step 8: Run your first test job
To run the script, that is pass it to the Slurm queue, run the command (from the code directory):
If submission was successful it should report something like:
If you're instead seeing some error message, take a look at our page of common batch job errors. If you cannot find a solution there, don't hesitate to contact our service desk.
You can check your running job, either from the terminal:
or via the Jobs → Active Jobs menu in the Puhti web interface.
Step 9: Check the output of the job
Once the job has finished, its output should appear in a file called something
like slurm-12345678.out, with the number being the batch job ID of your jobs
(printed at submission time). You can view this file by clicking on it in the
Files browser or using for example less in the command line (press 'q' to quit
less).
Once you're satisfied that the job runs as it should, you can run in the real
gpu partition that allows for jobs longer than 15 minutes. Just edit the
run-cifar10.sh file to change the partition to gpu and submit the job again.
Note that you can submit many jobs at the same time, for example with different parameters. But please don't submit hundreds of jobs at the same time.
Step 10: Further reading and getting help
Now, that you've gotten started, you might be interested in checking out the rest of our documentation. For example:
- Running jobs with Slurm
- Applications on Puhti and Mahti, in particular PyTorch and TensorFlow.
- CSC's Machine learning guide
In case you have any questions about this guide or any other problems getting started with using machine learning on CSC's services, don't hesitate to contact our service desk.