Table of contents of user guide
How to use folder as your shared workspace with SD Connect
Use case
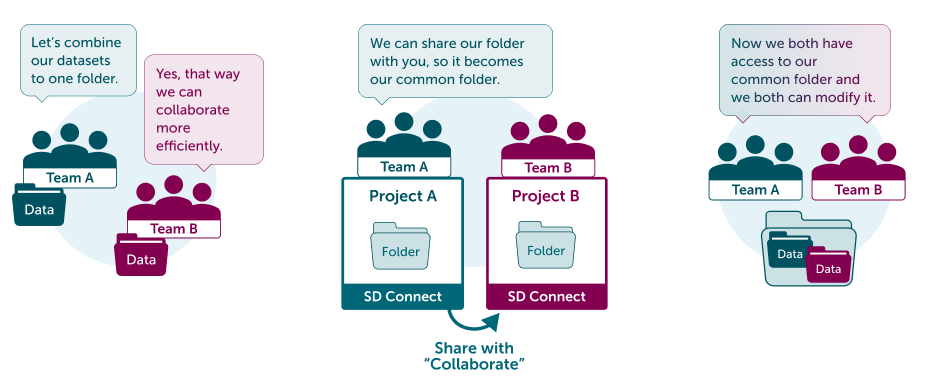
You (Team A) and other team (Team B) are actively collaborating. You both want to upload data to the same workspace and be able to modify content.
Solution
In this case you can share your bucket to Team B with Collaborate -permission. That way both teams have equal rights to modify files inside the shared bucket.
Step by step tutorial
Both teams should have their own CSC project and SD Connect activated. If you don't have one yet, please follow instructions from Start here and return to this tutorial after you have set up the CSC project.
-
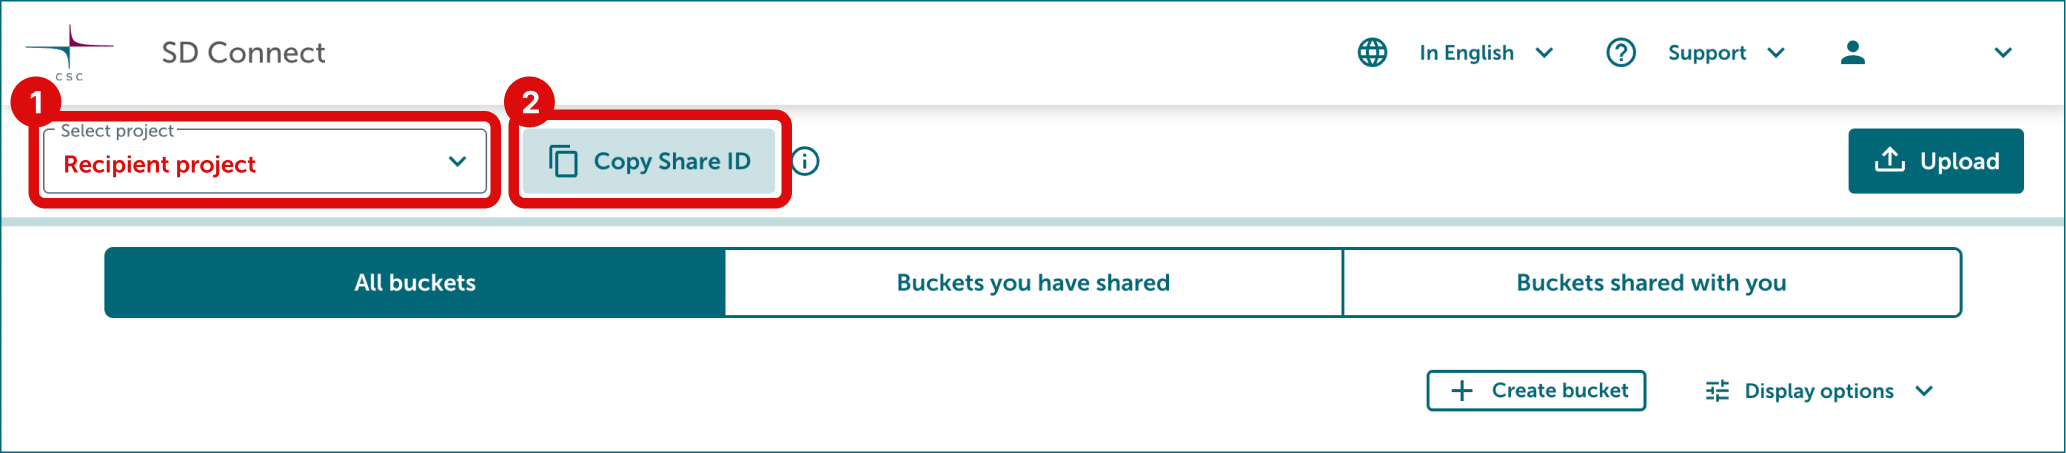
Ask from recipient (Team B in this use case) for their project's Share ID. They can find it in the SD Connect user interface by selecting the correct CSC project from the top-left corner and clicking Copy Share ID button next to the project number. Ask them to send the Share ID to you by email.
-
Log in to SD Connect.
-
Upload your data to a bucket or create an empty bucket: See upload instructions.
-
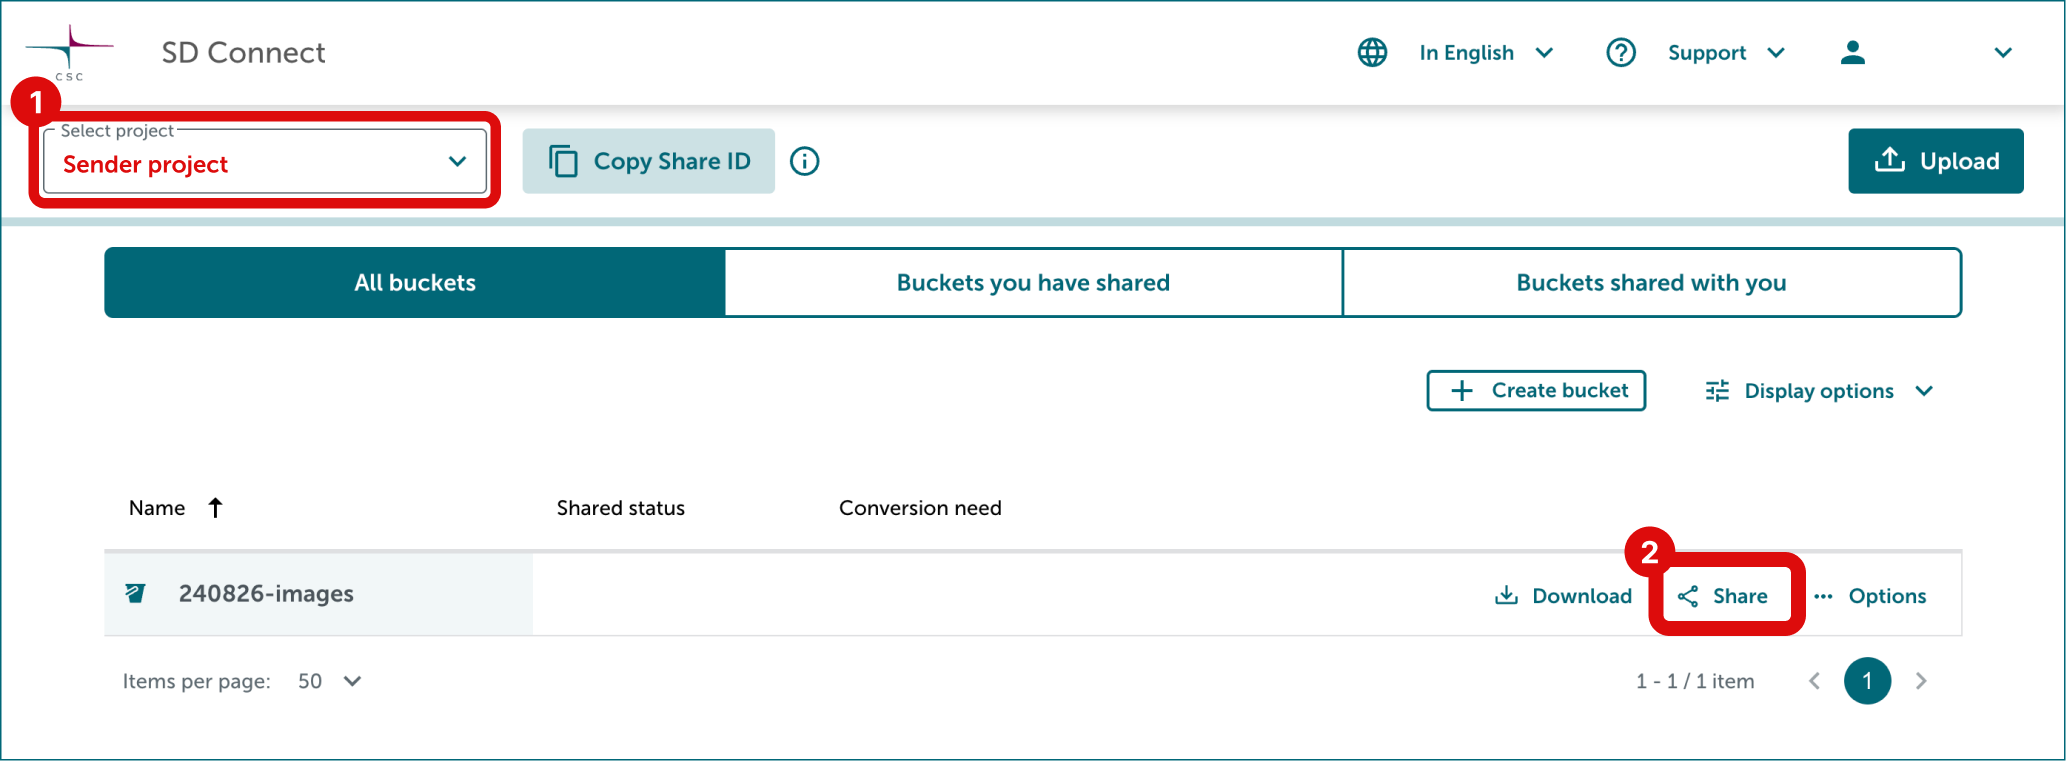
Click Share button on the right side of the bucket you want to share.
-
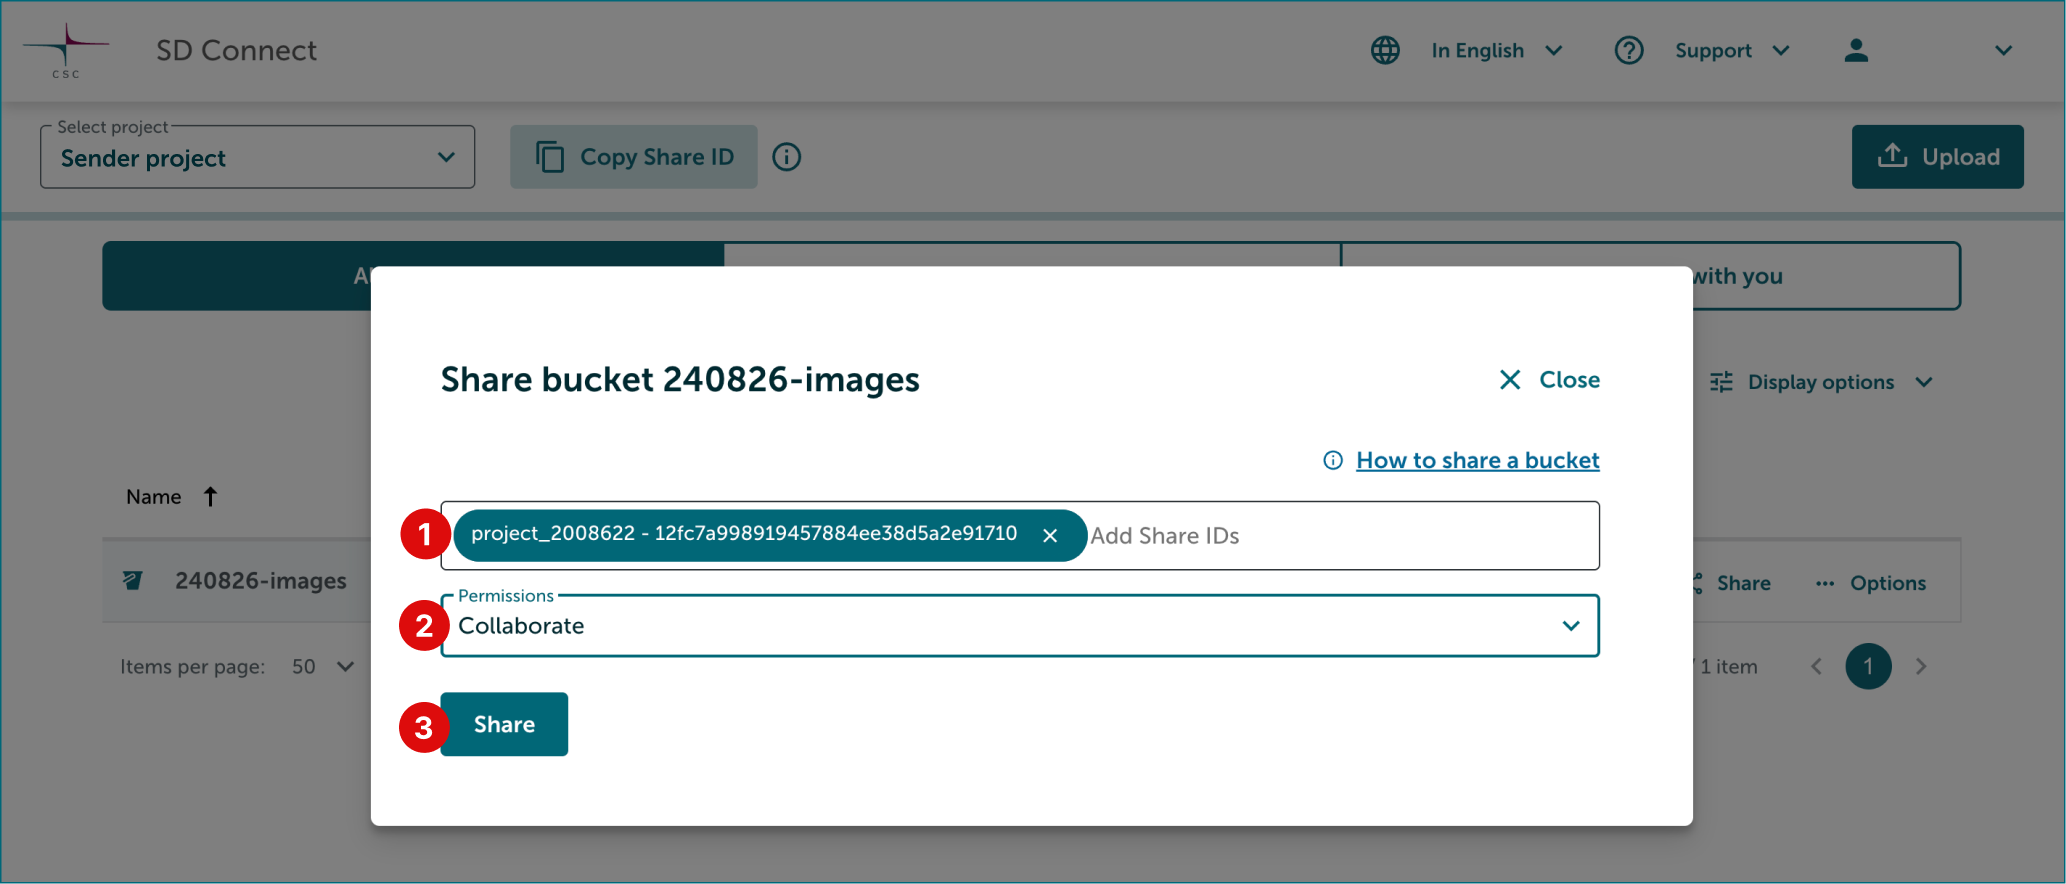
Add the Project B’s Share ID to the field. Select sharing permission Collaborate. Finally click Share.
Now all the content of the bucket is accessible for both projects (Project A and Project B). Members in both projects can modify the content of the bucket via SD Connect; everyone can upload, download, copy and delete the content. They can also access data via SD Desktop for analysis.