Why can't I connect to my virtual machine in Pouta?
There are several reasons that can cause problems when connecting to a VM. We will go through all the steps one by one.
Network
Floating IP
Before connecting to a cPouta VM, it is necessary to add a Floating IP. This step is not necessary in ePouta, indeed ePouta does not provide Virtual IPs, one must connect directly to the Private IP.
In order to add a virtual ip, follow the Post creation step guide.
port 22: Connection timed out
If you are not able to connect to your VM, the most common reason for these problems are Firewalls and Security Groups (Openstack's firewall) that are too restrictive. Newly launched virtual machines will by default block all traffic. You need to create a new security group. The security group must open the SSH port 22 to the ingress traffic.
Please follow the Firewalls and security groups article. If the problem persists you may check the firewall setup of your local institution.
Permission denied
Incorrectly configured Security Groups, can lead to permissions denied errors due to the fact that the VM needs to fetch the public SSH keys on its first start. If the network is not configured properly, the public key may not be added and no access will be configured.
For this reason, you need to make sure that the default security group is configured in the VM at creation.
REMOTE HOST IDENTIFICATION HAS CHANGED
Sometimes Floating IPs are reused with different Virtual Machines at different times. By default your SSH client will have stricthostkeychecking=yes configured, and will show you the error message:
$ ssh cloud-user@86.50.xxx.xxx
@@@@@@@@@@@@@@@@@@@@@@@@@@@@@@@@@@@@@@@@@@@@@@@@@@@@@@@@@@@
@    WARNING: REMOTE HOST IDENTIFICATION HAS CHANGED!     @
@@@@@@@@@@@@@@@@@@@@@@@@@@@@@@@@@@@@@@@@@@@@@@@@@@@@@@@@@@@
IT IS POSSIBLE THAT SOMEONE IS DOING SOMETHING NASTY!
Someone could be eavesdropping on you right now (man-in-the-middle attack)!
It is also possible that a host key has just been changed.
The fingerprint for the ECDSA key sent by the remote host is
SHA256:JURkzITHXHGavwz6fAahou5g4ii1q9CVuzLyImH5+tI.
Please contact your system administrator.
Add correct host key in /home/yyyy/.ssh/known_hosts to get rid of this message.
Offending ECDSA key in /home/yyyy/.ssh/known_hosts:28
  remove with:
  ssh-keygen -f "/home/yyyy/.ssh/known_hosts" -R "86.50.xxx.xxx"
ECDSA host key for 86.50.xxx.xxx has changed and you have requested strict checking.
Host key verification failed.
You can safely do as it suggests and remove the entry. But only if you are sure that it is the first time you connect to said IP since it has been assigned to a new instance, or since the instance has been reinstalled. The example shows the output of the ssh command, different tools and versions might have a slightly different output, but the principle is the same.
Authentication - Permission denied (too many authentication failures)
If the authentication is not configured properly, you may see an error similar to the one above. This error can come from different root causes.
Are you using the correct user?
Different distributions are configured with different defaults users. See here the up to date list of images and their corresponding default users. For example if you are using "Ubuntu 24.04", the correct user is "ubuntu", but if you are using "AlmaLinux-9" the correct one is "almalinux".
It is a common practise for Pouta images, when you try to login as root, to get a message back telling you which username to use instead:
Which key pair is configured in the Instance? And do you have the matching Private Key?
In order to see which "Key Pair" is configured on that VM. Go to https://pouta.csc.fi/dashboard/project/instances/ and see the key pair name.
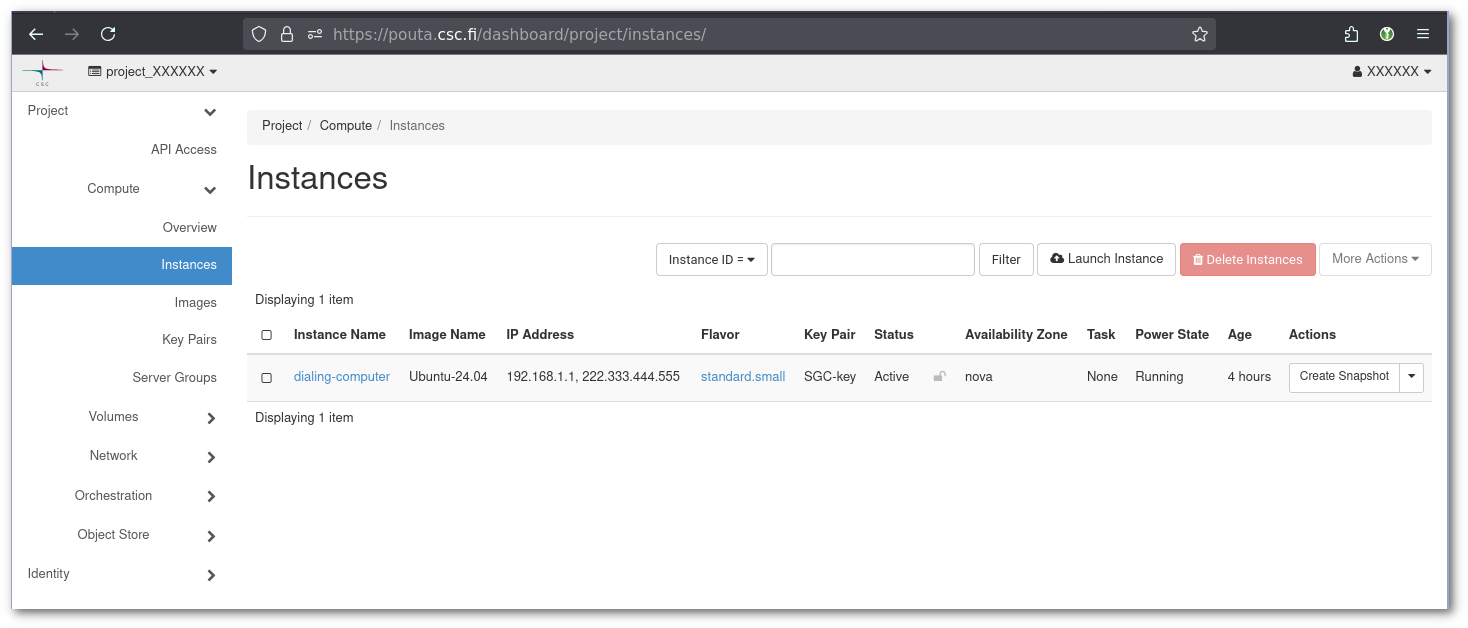
Then go to https://pouta.csc.fi/dashboard/project/key_pairs where all your keys are configured. The page will give you the list of public keys. In the screenshots above, the "Key Pair" is SGC-key.
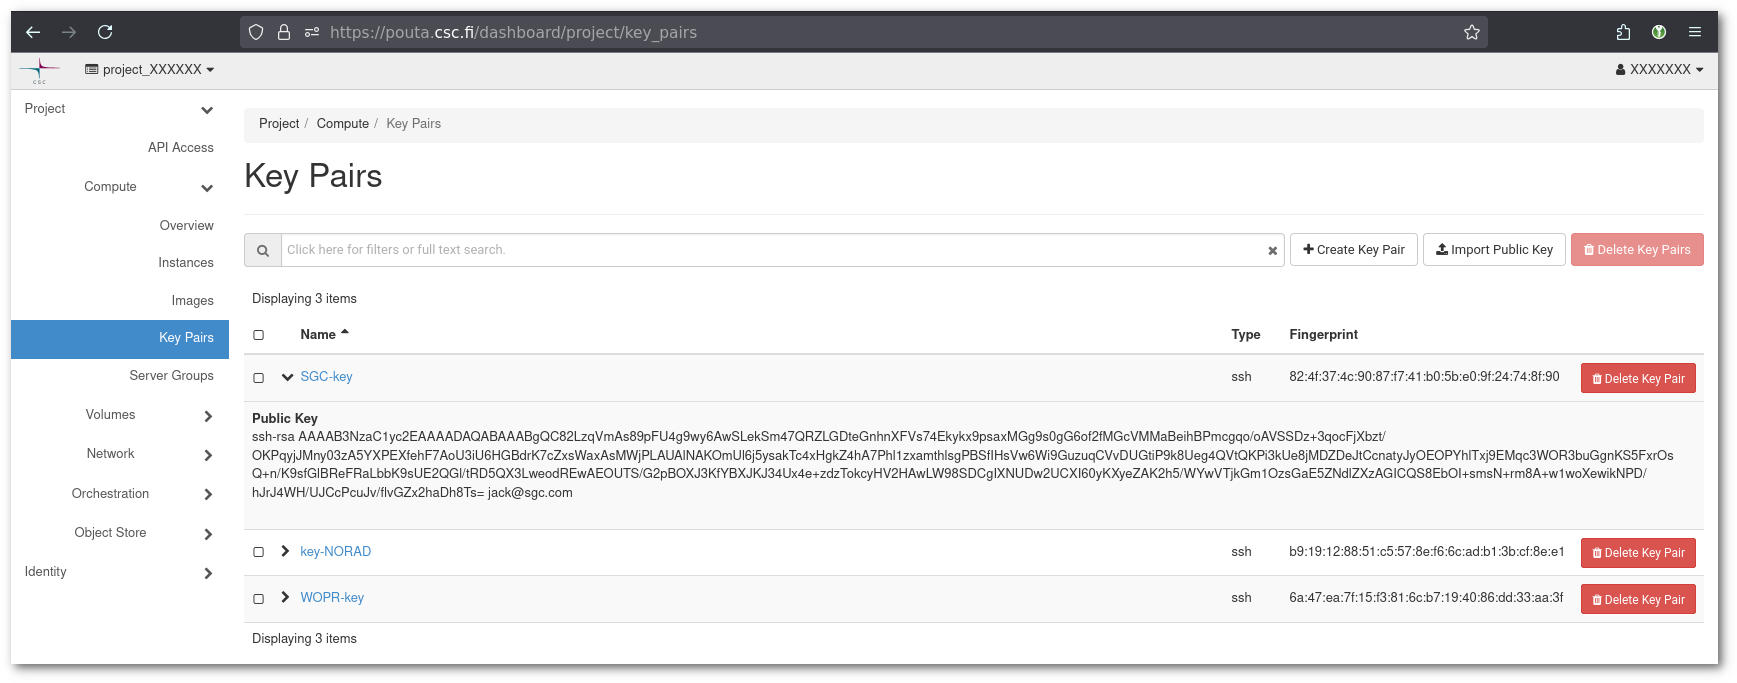
Copy the Public key content (ssh-rsa AAA.... jack@sgc.com) into a file called SGC-key.pub. You can then calculate the Public key fingerprint by:
$ ssh-keygen -lf SGC-key.pub
2048 SHA256:FjN0zrymP3mMZzTJ/UJrypmVVcH8Wgok9+JBiBhcvFc no comment (RSA)
The example above uses the SHA256 algorithm by default. You can force it to use MD5 by doing:
$ ssh-keygen -lf .ssh/SGC-key.pub -E md5
2048 MD5:eb:b3:eb:ff:65:2f:cb:a5:fa:ab:f4:84:04:a2:d3:9a no comment (RSA)
No Key Pair listed
It is possible that the VM was created without a "keypair(the corresponding field is empty-`), in this case you need to re-create the VM, this time with a keypair configured.

Then it is necessary to find the corresponding Private key. In Linux and MacOS, private key are normally stored in the .ssh folder. You can use the same command as above to generate the fingerprint of the private key:
$ ssh-keygen -lf .ssh/SGC-key
2048 SHA256:FjN0zrymP3mMZzTJ/UJrypmVVcH8Wgok9+JBiBhcvFc no comment (RSA)
The fingerprints must match.
Instance log
You can also see the finger print of the key from the Instance log. Go to instance page and click in the name of the instance. Then click in the Log tab. You will need to find the lines that begin with ci-info. This is the output of the cloud init script.
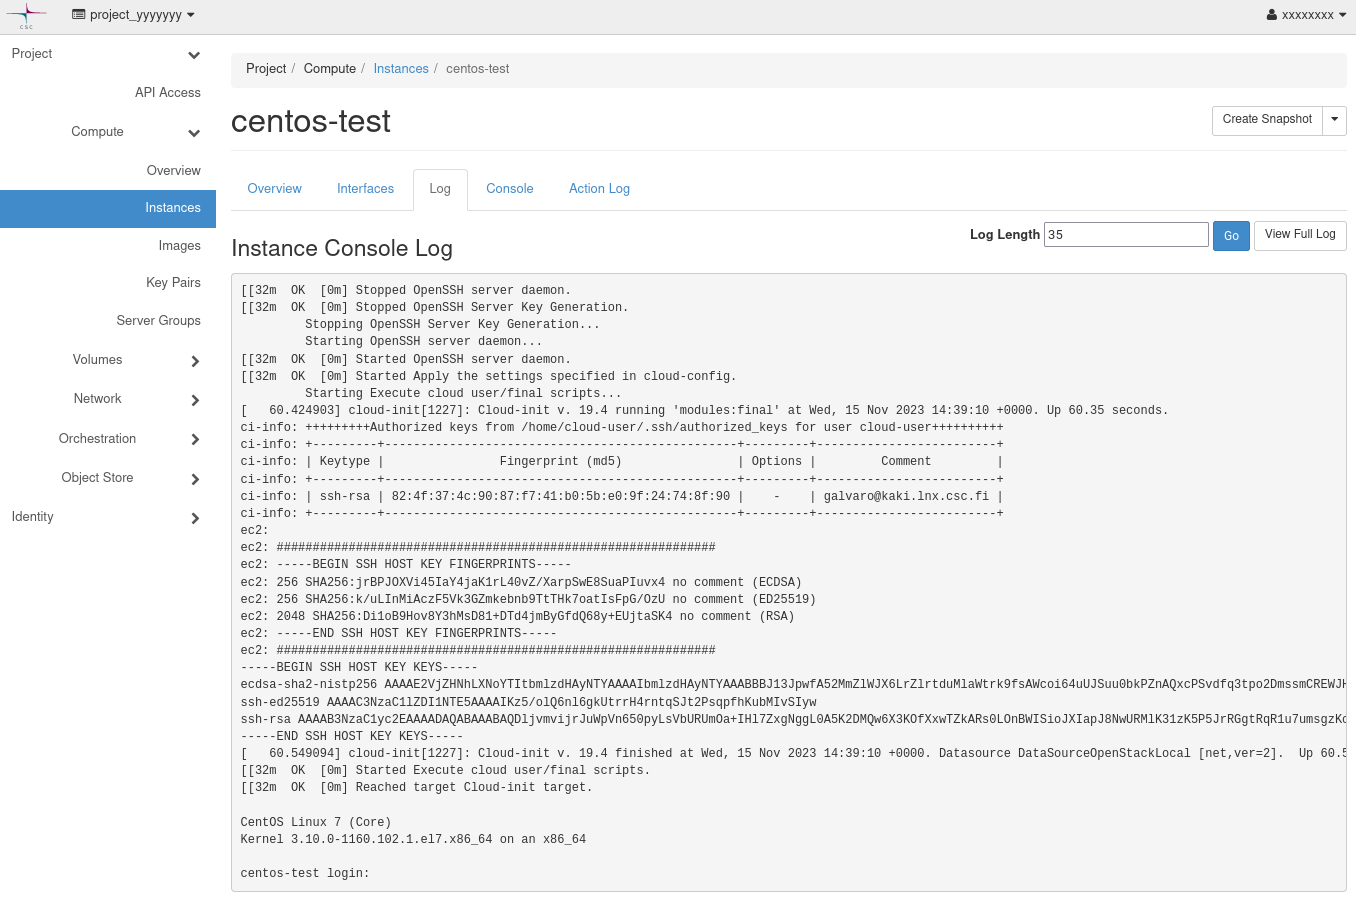
You will be able to see the username, the file where the keys are configured and the list of finger prints of the configured keys. In the example above the output shows the MD5 algorithm.
If you do not find the corresponding private key, you will need to either re-create the VM) with a ssh key pair that you own and control, or use our How to rescue instances? guide to be able to access the VM's disk and change the public key installed in the authorized_keys file. This last option is complex and it is only needed if you already have data and/or software in the VM's local disk. If you need to follow this second option, but are confused on how, please create a ticket with us at servicedesk@csc.fi, we will help you step by step.
Are you offering the correct private key?
The ssh client by default only offers the ssh keys that have a standard name and are in the ~standard folder_ (.ssh in $HOME). If you happen to have a non standard file name or a non standard file location, you can use the -i <private_key_file> option to make sure that the key is being offered, and -v to increase the log output, to see when the client offers it. The command will be like:
$ ssh -v -i .ssh/SGC-key ubuntu@193.166.200.200 2>&1 | grep SGC-key
debug1: identity file /home/galvaro/.ssh/SGC-key type 0
debug1: identity file /home/galvaro/.ssh/SGC-key-cert type -1
debug1: Will attempt key: /home/galvaro/.ssh/SGC-key RSA SHA256:FjN0zrymP3mMZzTJ/UJrypmVVcH8Wgok9+JBiBhcvFc explicit agent
debug1: Offering public key: /home/galvaro/.ssh/SGC-key RSA SHA256:FjN0zrymP3mMZzTJ/UJrypmVVcH8Wgok9+JBiBhcvFc explicit agent
If none of this works, please contact us at servicedesk@csc.fi.