Adding RStudio and R libraries to SD Desktop
Using R and RStudio in SD Desktop virtual machines is based on an Apptainer/Singularity container that contains R and RStudio installations and over 1000 commonly used R libraries. However, as there are nearly 20 000 libraries in the CRAN repository and over 2000 libraries in the Bioconductor repository, it is quite common that some library that you would like to use is not included in the default selection.
This document describes the usage of help tools that you can use to add RStudio 4.4.2 and missing R libraries to your SD Desktop environment.
Requirements
In order to get access to the installation tool, you need to send a request to CSC Service desk. In the request, indicate that you wish that the SD Desktop software installation help tools would be made available for your project. You must also include to the message the Project identifier string of your project.
You can check this random string for example in the SD Connect front page after login. Copy the identifier with the Copy Share ID button next to your CSC project number.
Installing RStudio 4.4.2
Log in to your SD Desktop and open Data Gateway. If the software installation help tools are enabled for your project, then you should have folder:
tools-for-sd-desktop included in the directory that Data Gateway created (in Projects/SD Connect/your-project-name).
Open tools-for-sd-desktop folder and from there, drag/copy file sd-installer.desktop to your desktop.
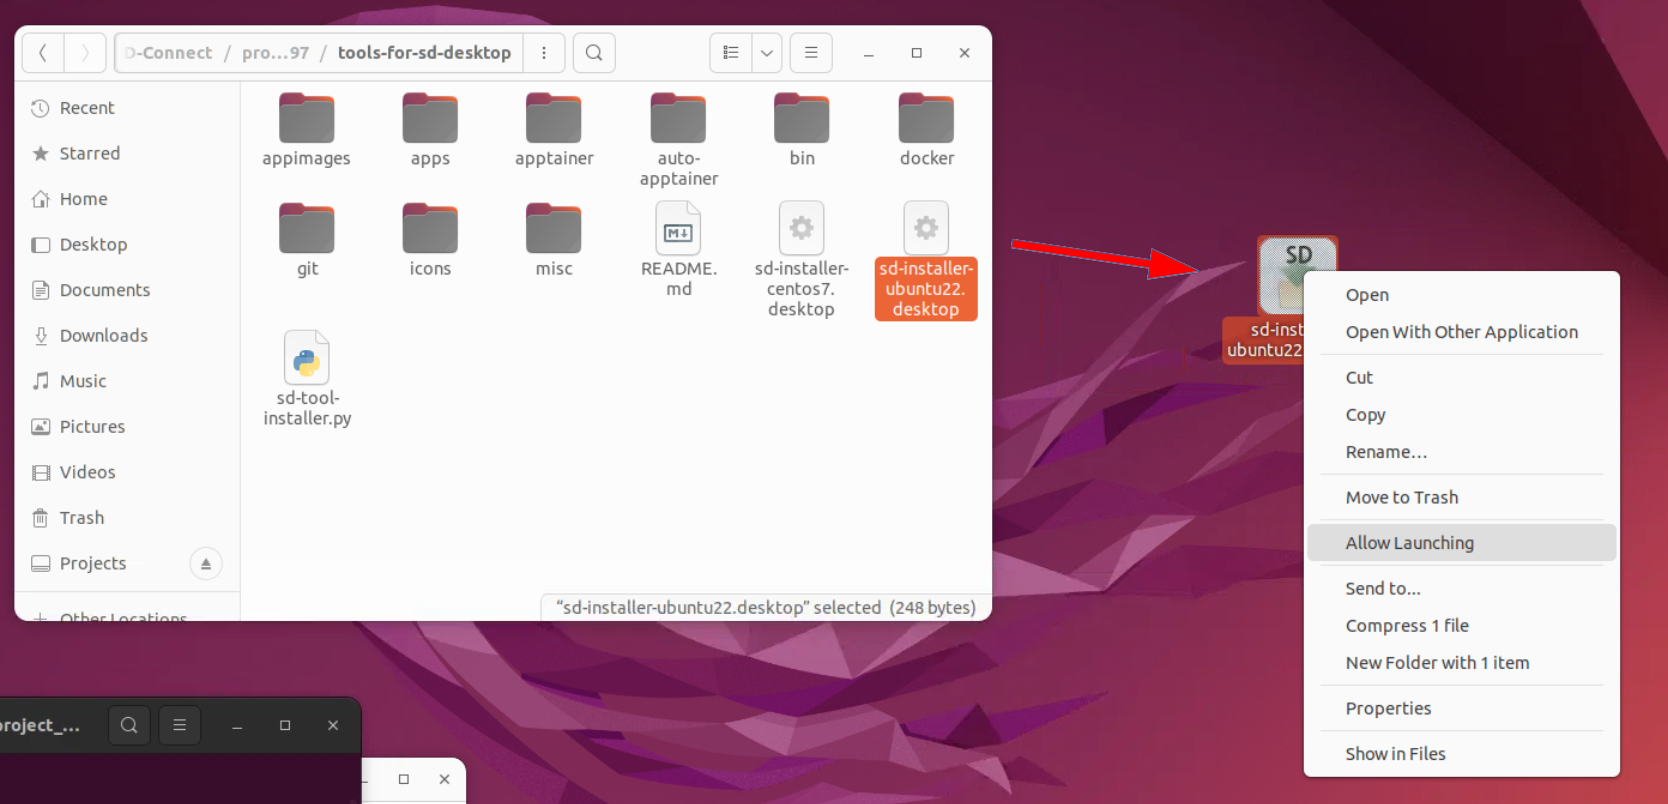
Figure 1. Copying sd-installer.desktop file to SD desktop.
Double click the copy of sd-installer.desktop to start the software installation tool. Use this tool to install RStudio 4.4.2
to your SD Desktop virtual machine if you have not yet done so. The installation takes several minutes.
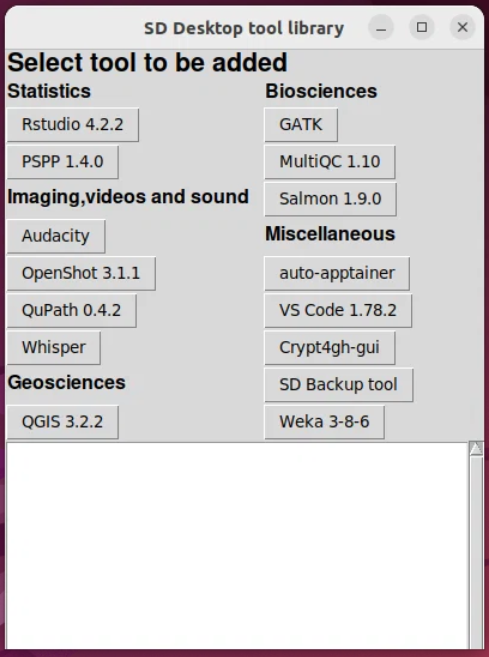
Figure 2. SD software installation tool.
Once the installation is done you can start RStudio by clicking the RStudio icon in the desktop or by executing command:
Adding missing R libraries
Once the RStudio environment is installed, new libraries can be added by opening a terminal and executing command:
The command asks for a search term and shows the available R libraries that match the search string. If several libraries are found, you will be provided an enumerated list from which you can select the library that should be installed.
This tool does not check for internal library dependencies, and quite often the first installation attempt fails. In these cases you should check the names of the missing libraries and install them first.
For example, search term fusion finds 7 libraries. In this case we want to install DNAfusion (DNAfusion_1.10.0.tar.gz),
that is listed as the first in the list, so the installation is started by pressing 1 and then Enter.
The new libraries are installed to location /shared-directory/sd-toold/apps/R/lib where they are available for
all the users of the virtual machine. This is not a default location of R libraries so you must define the location in your
R code with command:
After that you can take the library in use. e.g.