Table of contents of user guide
How to give access to bucket content only in SD Desktop
Use case
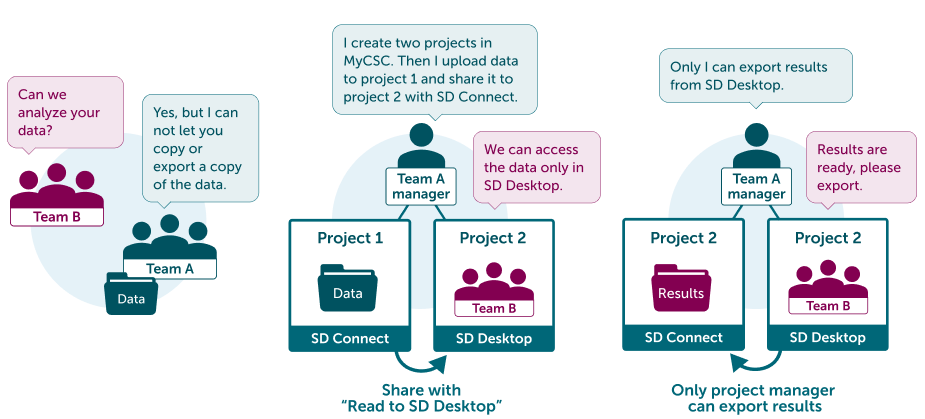
You (Team A) have data that other team (Team B) needs access to. They wish to view and analyze your data, but you want to prevent them from downloading a copy of it.
Solution
To prevent Team B from downloading the original data, create two separate projects in MyCSC:
- A recipient project for Team B, where you are the project manager and Team B members are assigned as project members.
- A sender project, where you are the project manager and no additional project members are added.
Share the data from the data sender project the recipient project using Read to SD Desktop permission. This allows Team B only to view and analyse the data in SD Desktop. As you are the project manager of both projects, only you can export data from SD Desktop.
Warning
Note that you have to be the project manager of the both projects. Please contact CSC Service Desk (subject: Sensitive data) to discuss this share option before proceeding.
Step by step tutorial
You need a CSC account to complete this guide. If you don't have one yet, please follow instructions from Start here and return to this tutorial after setting up your account.
-
Log in to MyCSC.
-
Create two new projects: Project 1 (Sender project) and Project 2 (Recipient project).
-
Manage Project 1 (Sender project) in MyCSC: enable service access for SD Connect. Do not add any project members. See instructions
-
Manage Project 2 (Recipient project) in MyCSC: enable service access for SD Connect and SD Desktop. Add Team B to be the project members. See instructions
-
Log in to SD Connect.
-
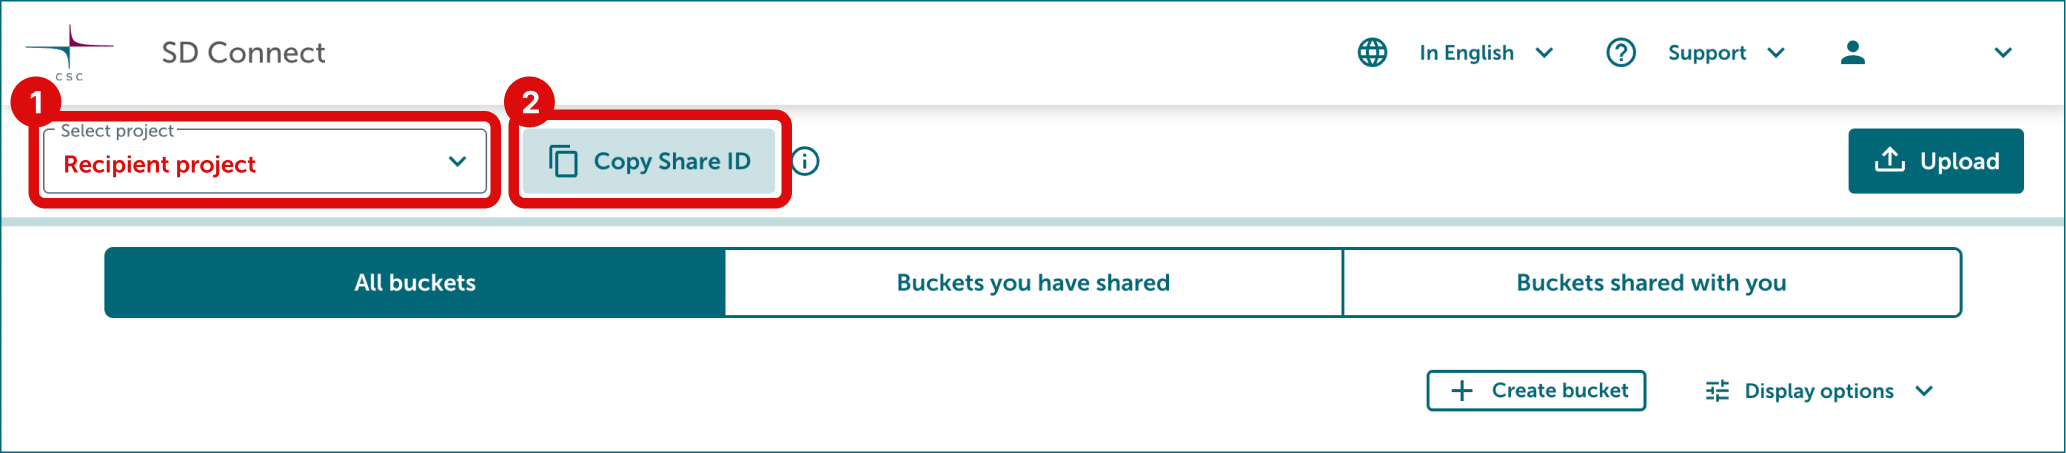
Select Project 2 (Recipient project) and copy the Share ID.
-
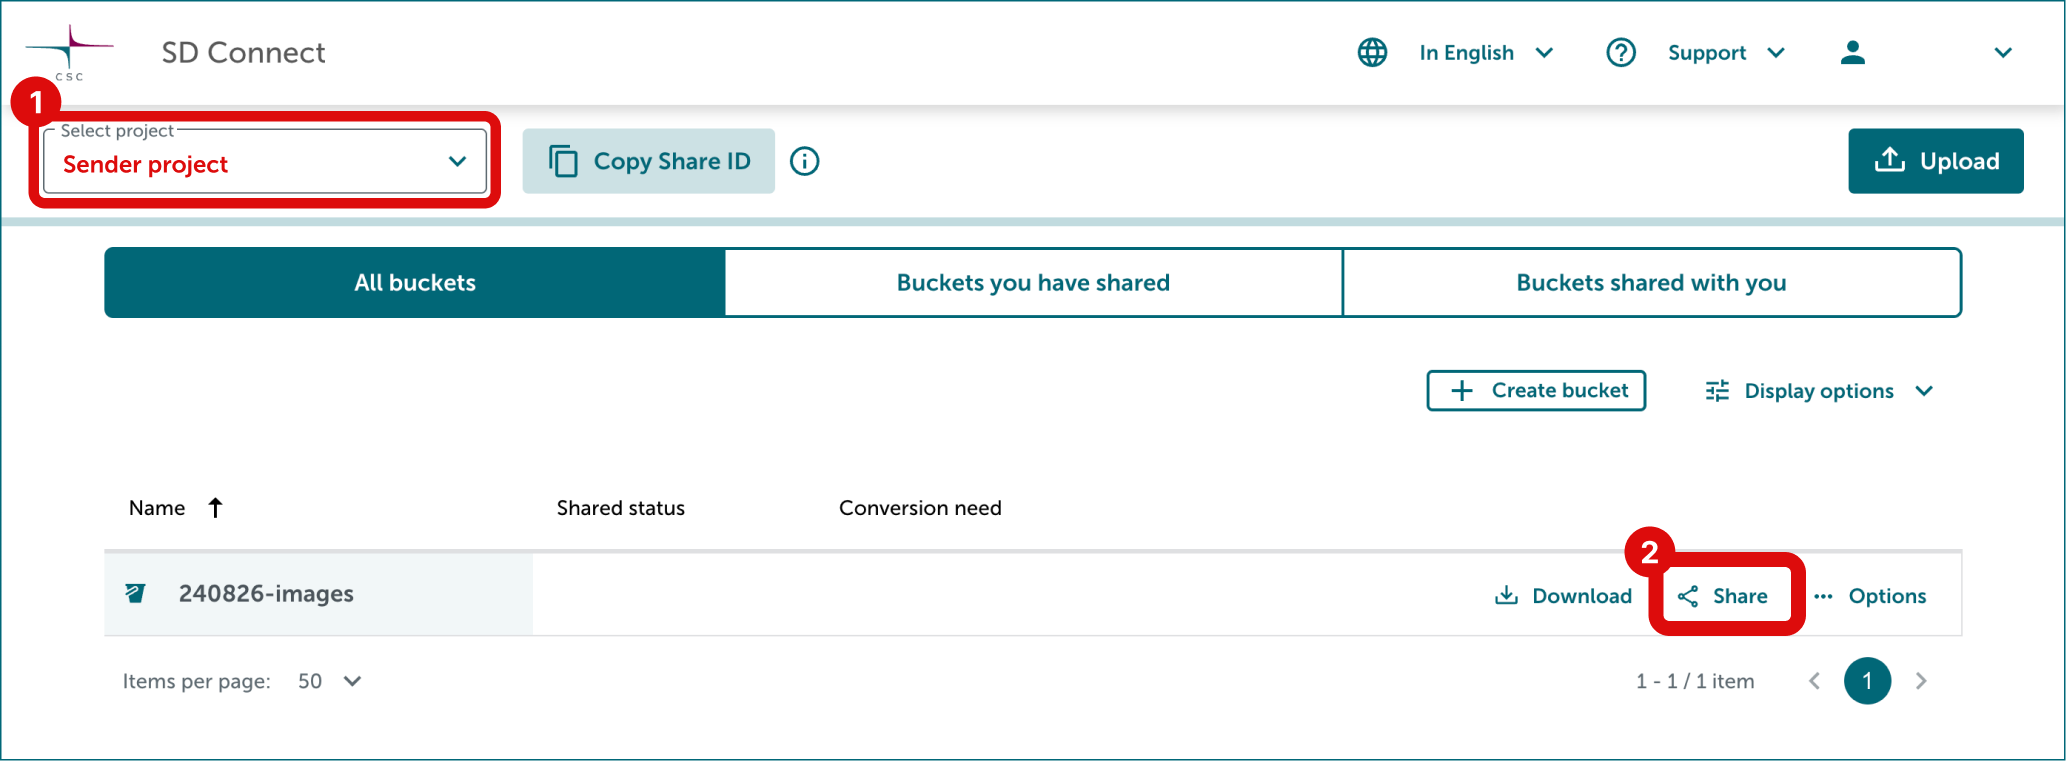
Then select Project 1 (Sender project) and upload your data to a bucket: See upload instructions.
-
Click Share button on the right side of the bucket you want to share.
-
Add Project 2's (Recipient project) Share ID to the field. Select sharing permission Read to SD Desktop. Finally click Share.
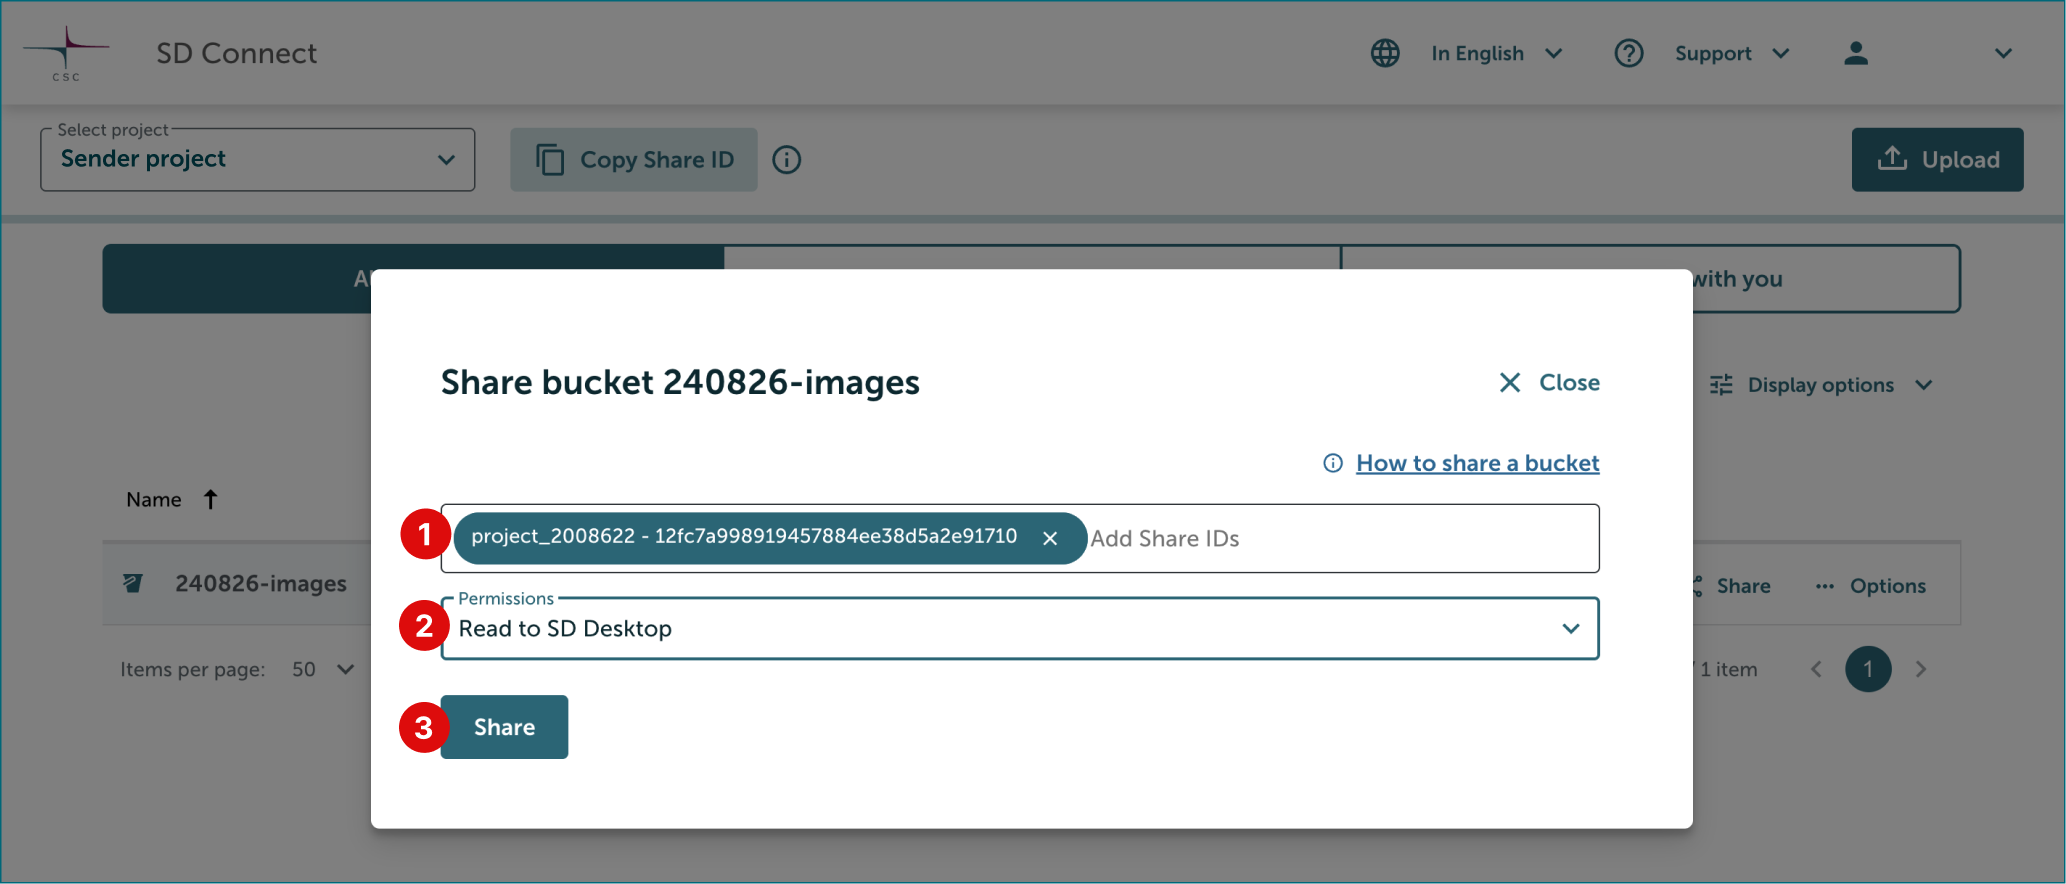
Now Project 2 members can access and analyse the shared bucket content via SD Desktop. However, they cannot export or download files, as the project manager manages data exports - and you are the project manager of both projects.