SSH Key Pair
The SSH key pair is very useful in many situations and is not limited to use in the OpenStack environment.
This tutorial covers the creation of an SSH key pair and a practical use case with OpenStack.
SSH keys are text files and, as the name of this tutorial suggests, they come in pairs: a private key and a public key.

After this tutorial, you will know how to use SSH keys instead of password authentication.
Creating an SSH key pair on a computer
An SSH key pair can be created with a command ssh-keygen in all three major operating systems.
By default the command stores the key pair in right location - under user's home directory, in a directory called .ssh - and asks to add a password into it.
$ ssh-keygen
Generating public/private rsa key pair.
Enter file in which to save the key (~/.ssh/id_rsa):
Enter passphrase (empty for no passphrase):
Enter same passphrase again:
Your identification has been saved in ~/.ssh/id_rsa
Your public key has been saved in ~/.ssh/id_rsa.pub
The key fingerprint is:
SHA256:Z/IxPJHY5fO7k28819BXw4jRZeQaNGdSq1GGPneuZ+8 username@usercomputer
The key's randomart image is:
+---[RSA 3072]----+
|            o+=X |
|         o =.oX .|
|        . + *ooo |
|         . o *=+o|
|        S B  o+o+|
|         = +  ..+|
|          .   .=o|
|              +oB|
|              .BE|
+----[SHA256]-----+
$ ls -l .ssh | grep rsa
-rw-------  1 username  staff   2655 Nov 18 08:24 id_rsa
-rw-r--r--  1 username  staff    577 Nov 18 08:24 id_rsa.pub
$
After the command exits, two files may be found from the .ssh directory.
Key pair created
By default the ssh-keygen command creates a private key named id_rsa and a public key named id_rsa.pub.
Below is an example execution of the command in Windows 11 PowerShell.

Adding an existing key pair to OpenStack
If you have an existing key pair or have created one on your computer, it can be added to OpenStack environment.
To do this, you need to be signed in to one of the Pouta services.
- Go to the Compute > Key Pairs section, and select Import Public Key.
- Give the key pair a name.
- Either use Choose File button and select id_rsa.pub file or copy + paste the content of it to the Public Key text area.
- Click Import Public Key button.

Tip
To ensure compatibility with OpenStack and to distinguish between multiple keys, it is recommended to use the command in the following form: ssh-keygen -t rsa -f keyname.key.
Creating an SSH key in OpenStack
This chapter will walk you through creating an SSH key pair in the OpenStack web interface. You must be signed in to one of the Pouta services.
-
Go to the Compute > Key Pairs section, and select Create Key Pair.

Figure The Access & Security subpage in the cPouta web interface
-
Give your key a name and click in Create Key Pair. You will get a "keyname.pem" to save. Save it in your home directory. This will be the last time you will be able to download this private key, Pouta does not keep a copy in its servers.
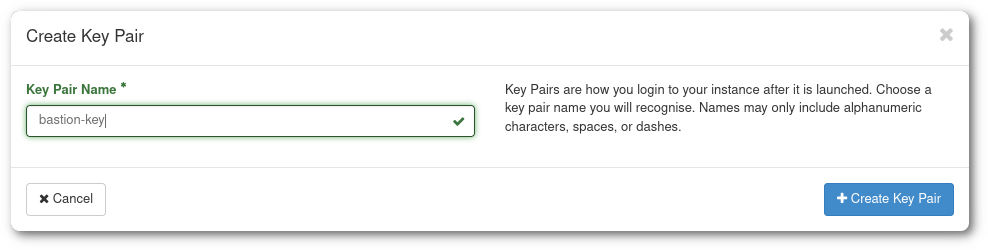
Figure The Create Key Pair dialog
Linux and Mac
In order to install the key you downloaded in the previous step (keyname.pem or keyname.cer), you must run this commmands:
For macOS
If you are using Chrome browser in macOS Monterey, you will get keyname.cer instead of keyname.pem. The following procedure will remain same.
mkdir -p ~/.ssh
chmod 700 .ssh
mv keyname.pem ~/.ssh
chmod 400 ~/.ssh/keyname.pem
400 = Only owner can read
When a file in Unix has 400 permissions, it translates to:
r-- --- ---
which means, only the owner can read the file. This is the recommended value for SSH, but in case you need to overwrite the file, you will need to give also write permissions: chmod 600 ~/.ssh/keyname.pem.
Before using the newly created key, you should protect it with a passphrase:
chmod 600 ~/.ssh/keyname.pem
ssh-keygen -p -f .ssh/keyname.pem
chmod 400 ~/.ssh/keyname.pem
Windows (PowerShell)
In Windows environments it is recommended to use PowerShell. The process is very similar
mkdir ~/.ssh
mv yourkey.pem ~/.ssh/
Before using the newly created key, you should protect it with a passphrase:
ssh-keygen.exe -p -f yourkey.pem
Then, still from PowerShell, you can use the ssh command to connect to your machine, in the same way it is done from Linux or Mac.
Windows (Putty)
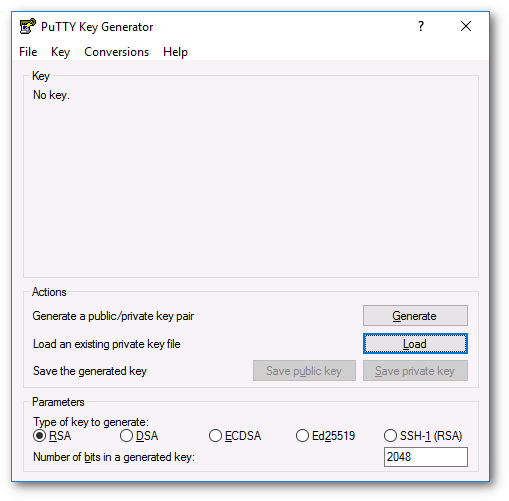
If your copy of Windows does not have the ssh command installed, it is also possible to use Putty.
This is done by using the puttygen tool to load your private key (.pem) and save it in the (password protected) .ppk format which Putty can use.
-
Download Putty and puttygen, which are available at https://www.chiark.greenend.org.uk/~sgtatham/putty/latest.html.
-
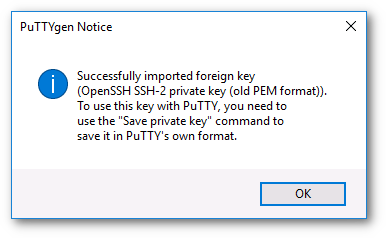
Run puttygen and load the key you downloaded (it should be in the Downloads page).
-
Set a password to the key. This is not compulsory, but advised.
-
Save the key in ppk format, this is the default Putty format for keys.
Now we can use this new in Putty to connect to a Virtual Machine.
-
Run putty and load the ssh key. Go to Connection > SSH > Auth and under Private key file for authentication, use the Browse... button to select the proper .ppk file.

-
Once the key is loaded, you will save the session. Go to the Session section and under Saved Sessions write the name of the new session and click save.