Table of contents of user guide
Sharing buckets
On this page:
- 1. Sharing buckets to another CSC project: overview
- 2. Share buckets to another CSC project: step-by-step
- 3. Change sharing permission
- 4. Delete sharing permission
1. Sharing buckets to another CSC project: overview
With SD Connect, you can share a bucket and all its contents with other CSC projects. A bucket can be shared with multiple projects, and you can assign a different permission level to each project. To share a bucket, the sender project uses the recipient project's Share ID, a unique 32-digit identifier assigned to each CSC project, and selects the appropriate permission level based on how the data should be accessed and used.
SD Connect provides three permission levels for shared buckets. Before sharing, review the available options and choose the permission level that best matches the intended use of the data.
-
Share for data transfer: Share one or more buckets with another CSC project so its members can copy and download the data. Use this option when you want to transfer data to another project, research group, or organization. Read more about the use case
-
Share for collaboration and shared workspace: Share a bucket with another CSC project so both projects can work with the same data. Members of both projects can upload, download, copy and delete files in the shared bucket. Use this option when multiple teams need to collaborate on a dataset. Read more about the use case
-
Share for Read-only access: Allow another CSC project to access data via SD Desktop only. Members of the another project can only access data in a secure and isolated computing environment for analysis. Use this when you need maximum certainty that your files are not distributed further. Note that you also have to be the project manager of the recipient project. Read more about the use case
Assigning the wrong sharing option may grant unintended access to your data. If you are new to SD services, contact contact CSC Service Desk to discuss different sharing options before proceeding.
2. Share buckets to another CSC project: step-by-step
-
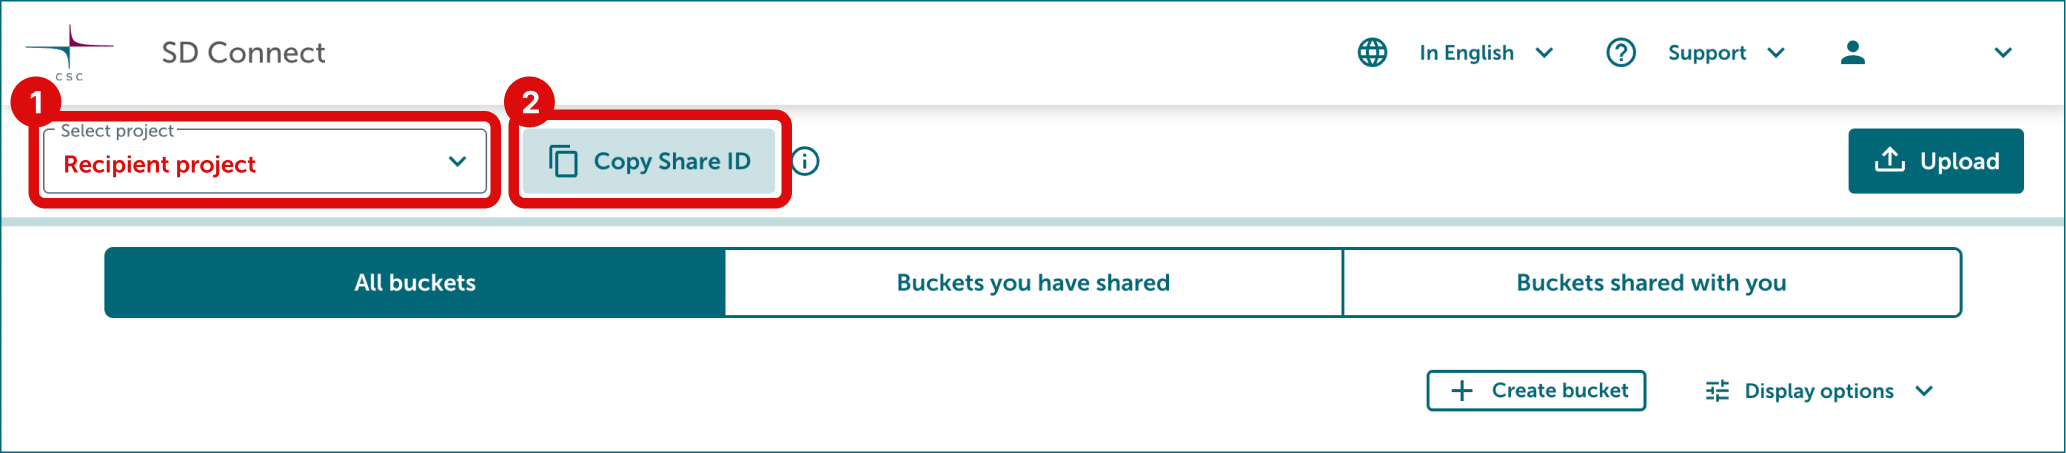
Ask from recipient for their project Share ID. The recipient can find it by selecting the correct CSC project in the top-left corner of SD Connect and clicking Copy Share ID next to the project number. A Share ID is a 32-character identifier, for example: 12fc7a798919457884ee38d5a2e91710. Do not use this example. Ask the recipient to send you the Share ID of their project by email.
-
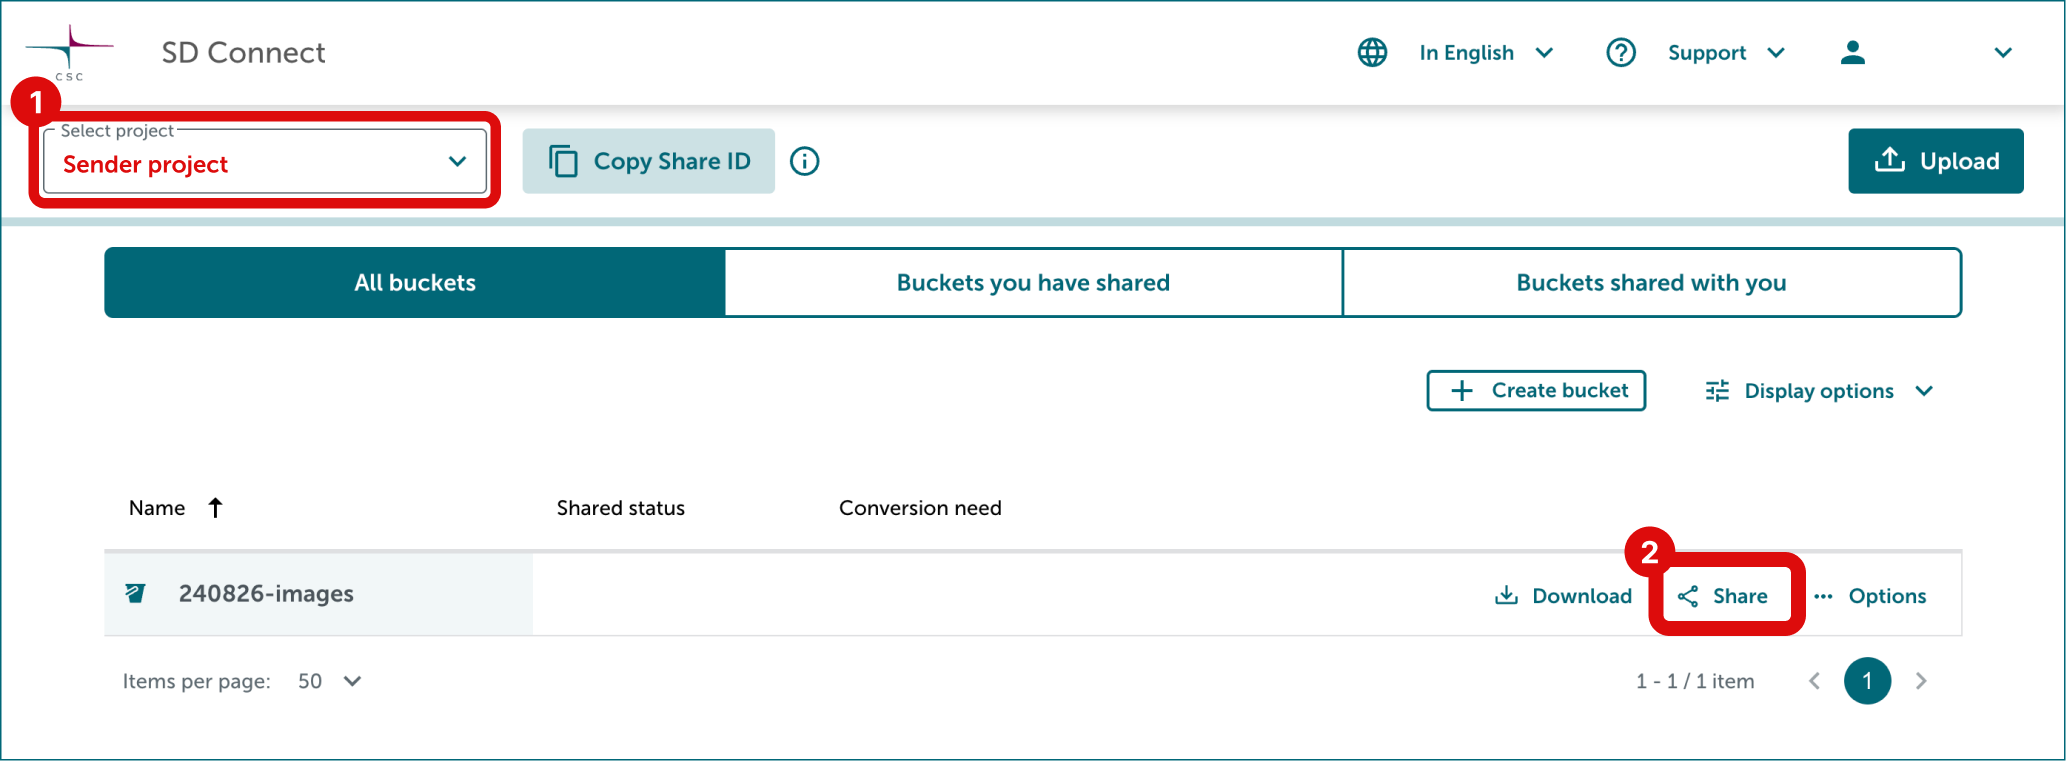
In your own project (Sender project) click Share button on the right side of the bucket you want to share.
-
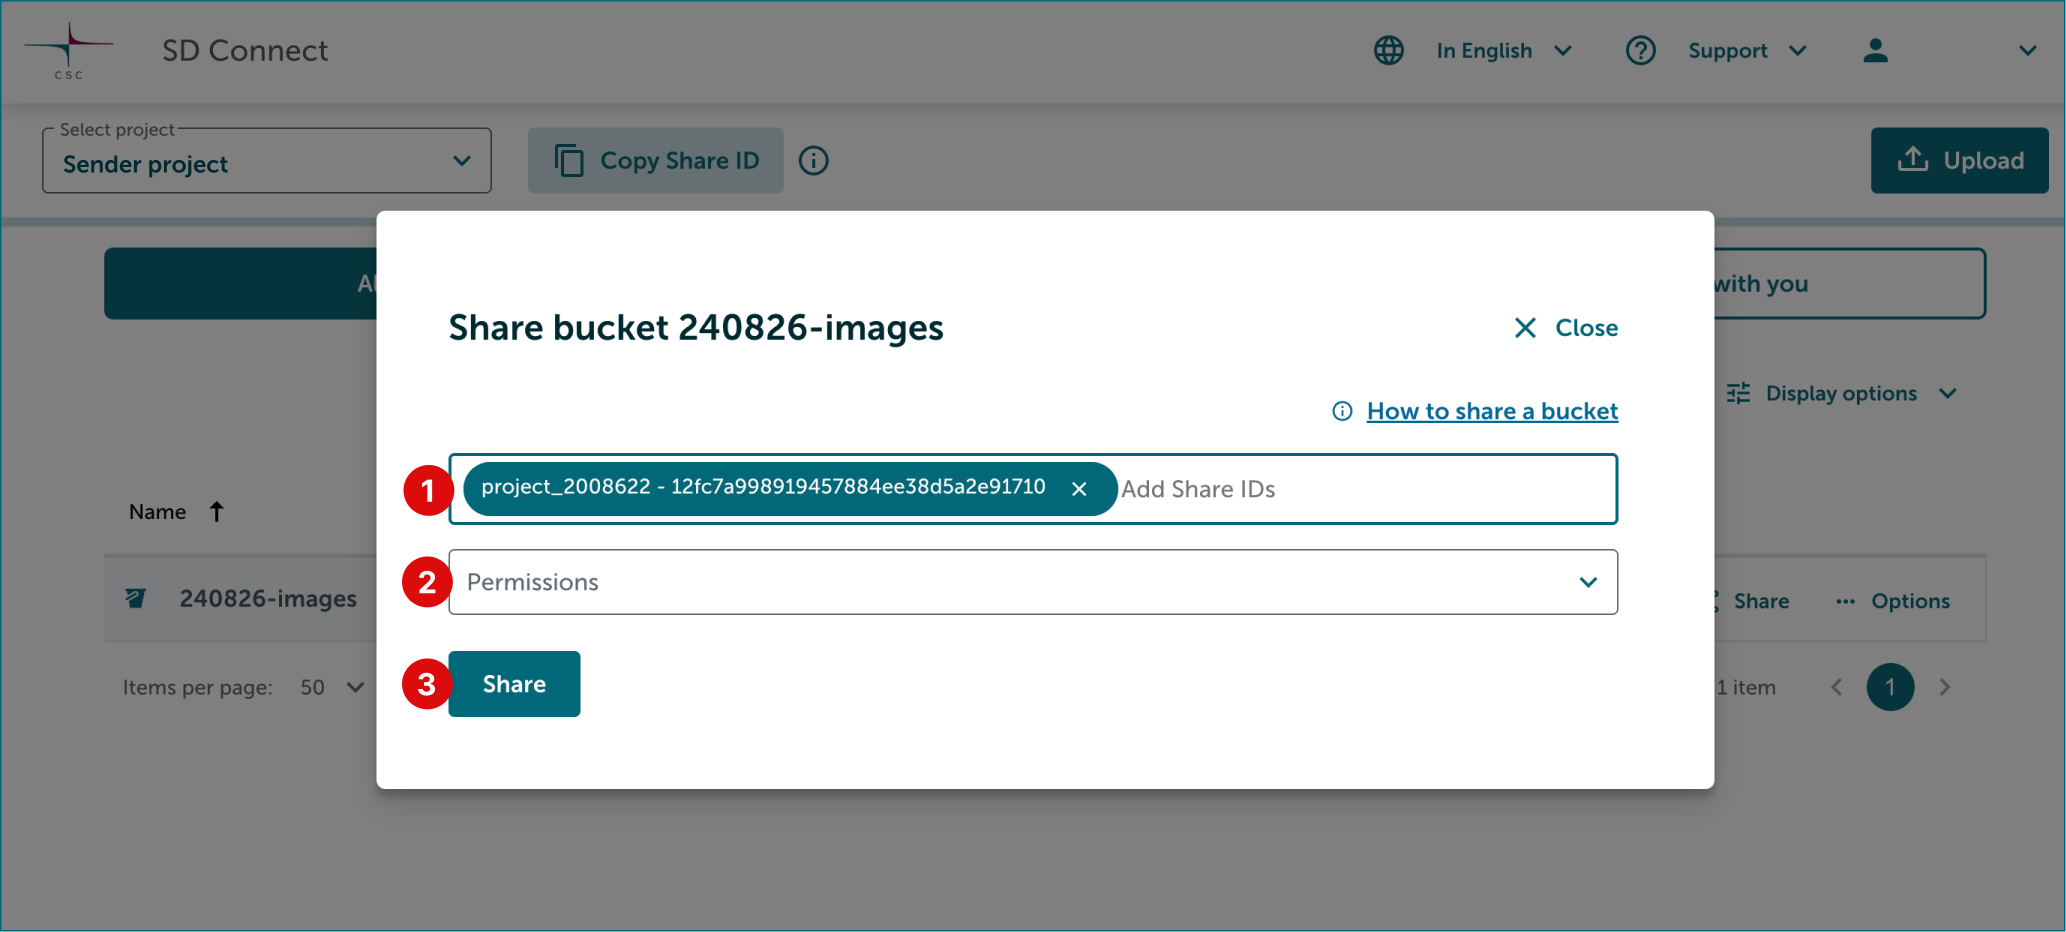
Paste the recipient project's Share ID to the field, then select suitable sharing permission: transfer, collaborate or read only via SD Desktop. A detailed explanation of each option is available on the previous paragraph.
-
Finally click Share.
3. Change sharing permission
-
Select correct project from the top-left corner. Click Share button on the right side of the bucket.
-
In the Share window scroll down to This project is shared to title. Change permission from Permissions dropdown on the right side of the project.
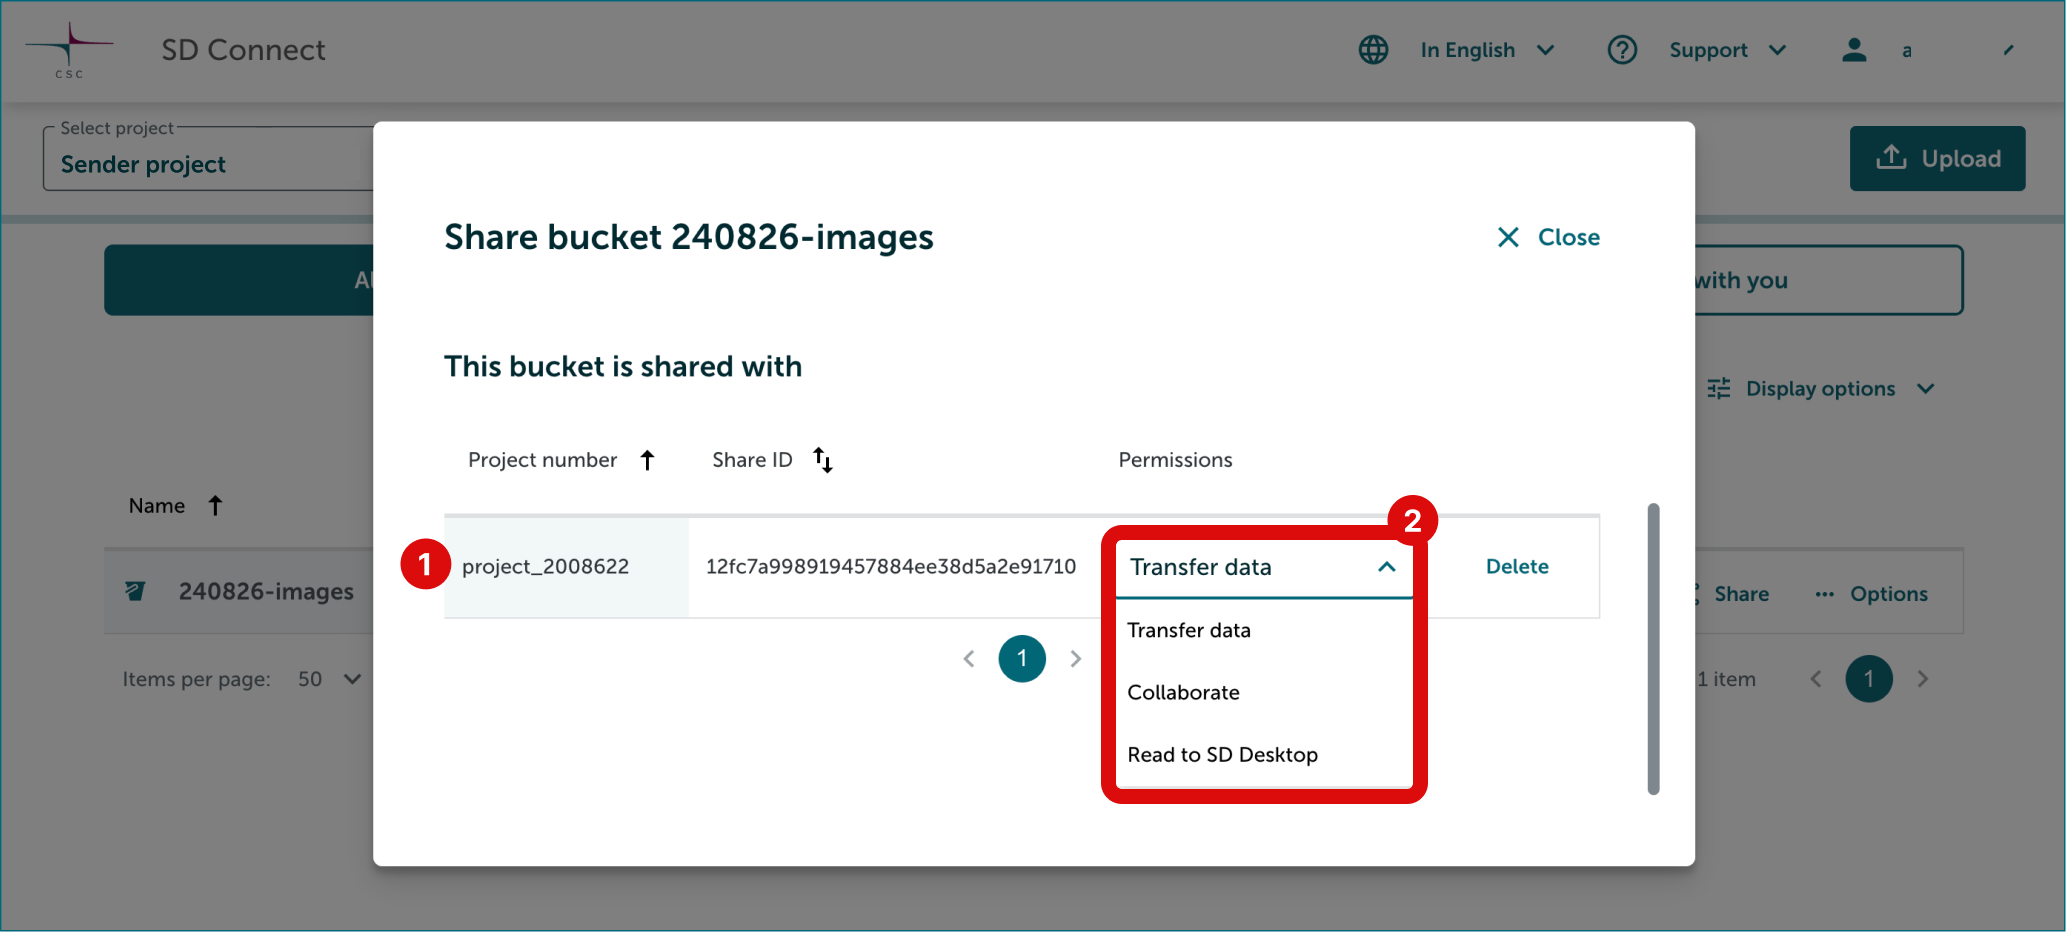
-
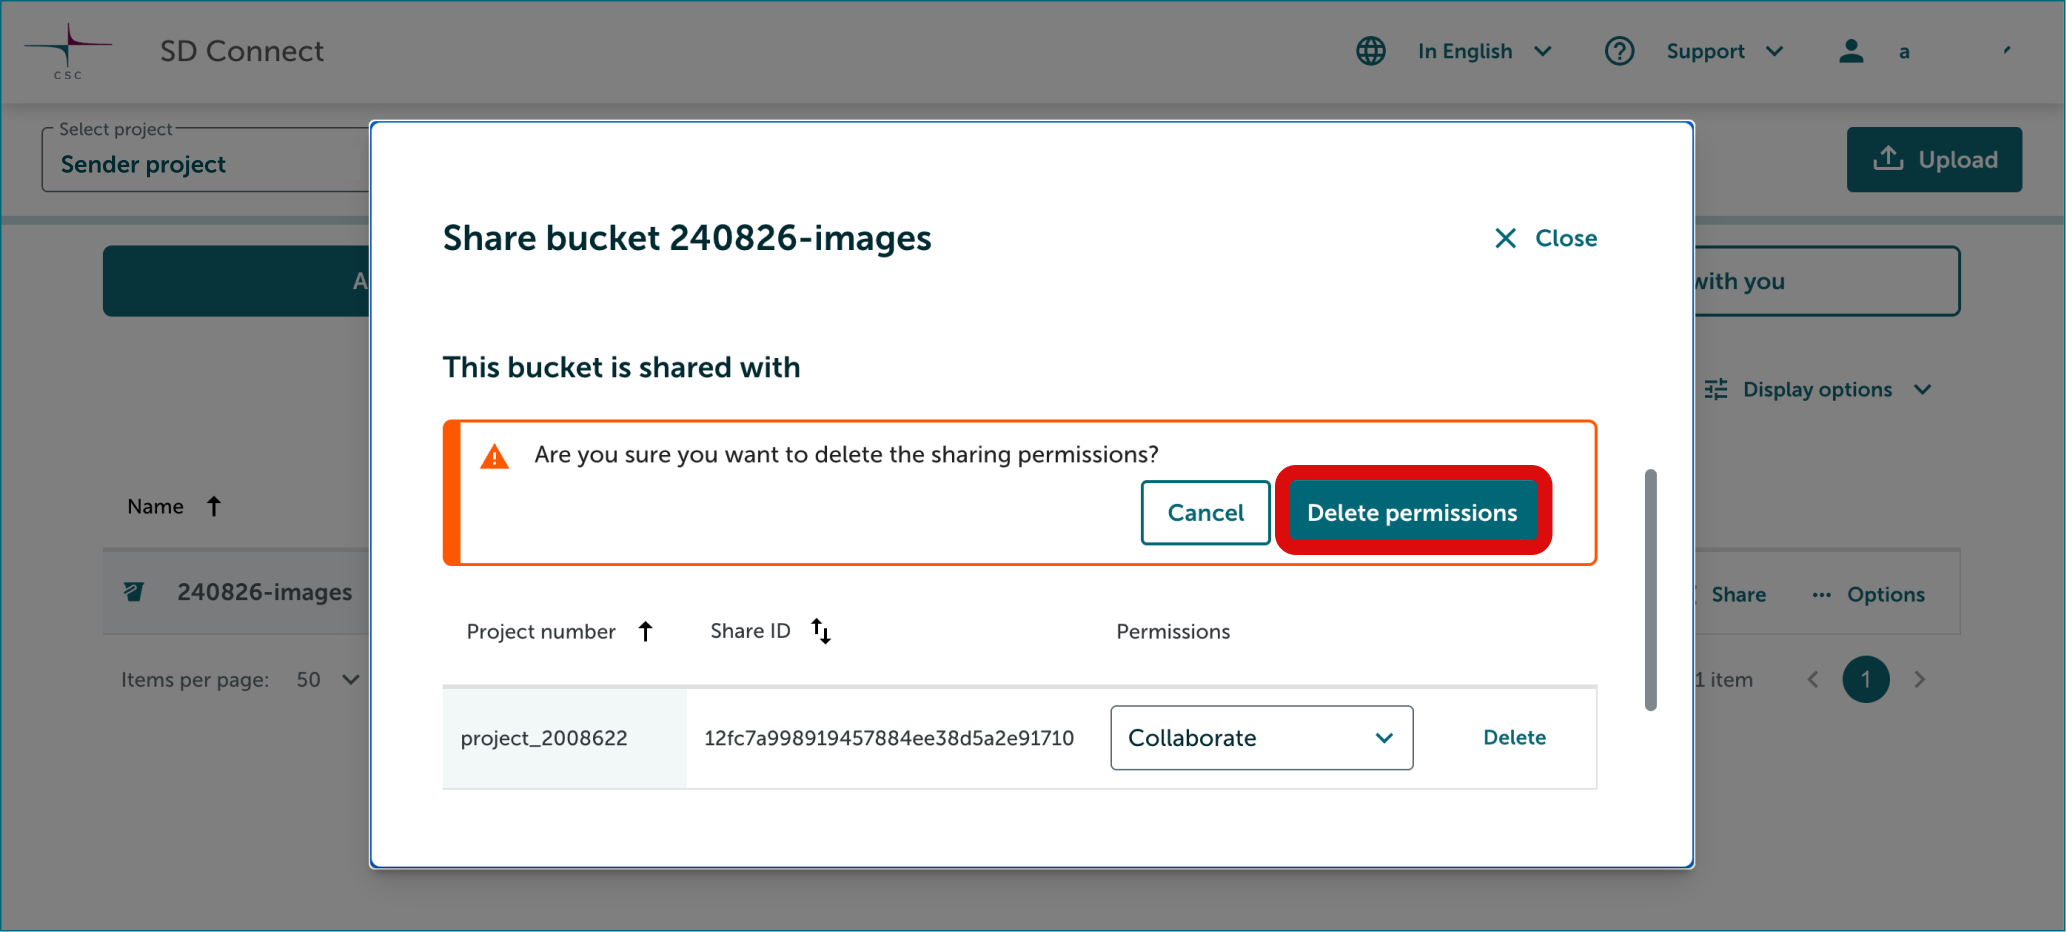
A notification will open above the project list. You may have to scroll up to see it. Confirm your choise by clicking Change Permissions button.
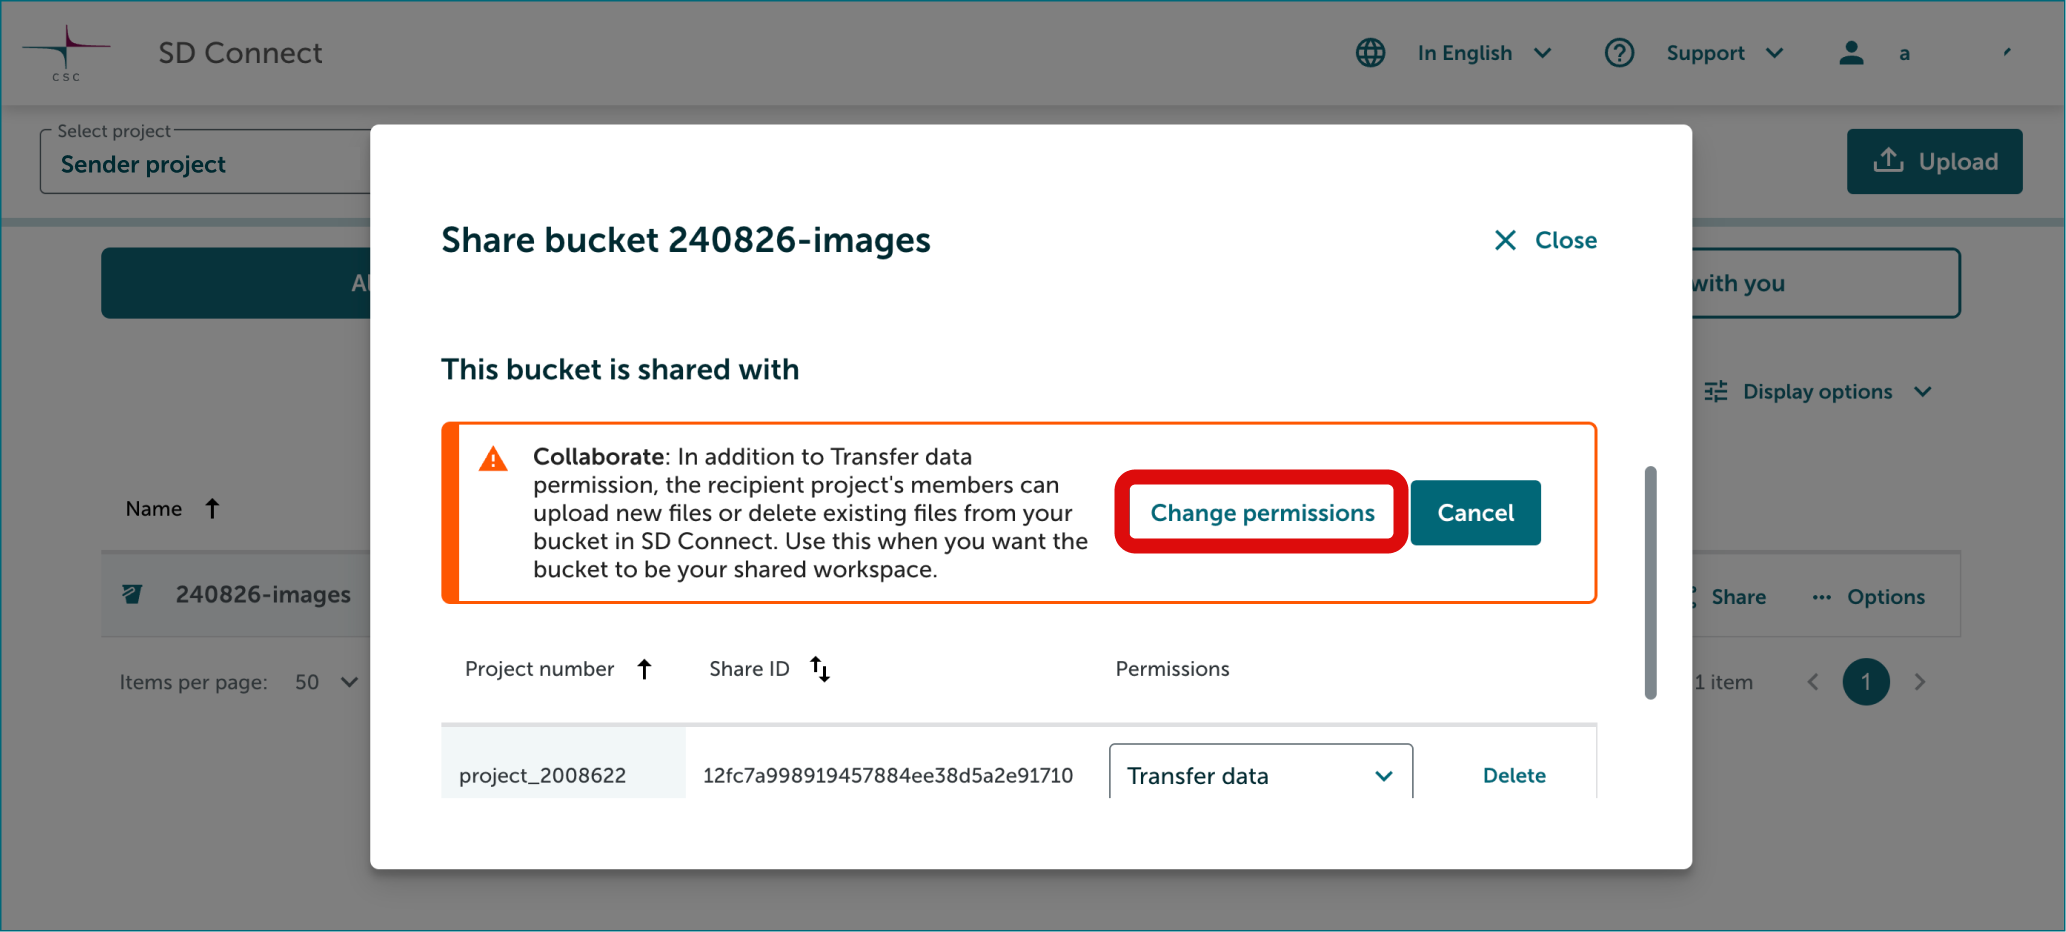
4. Delete sharing permission
-
Select correct project from the top-left corner. Click Share button on the right side of the bucket.
-
In the Share window scroll down to This project is shared to title. Delete permission by clicking Delete button on the right side of the project.
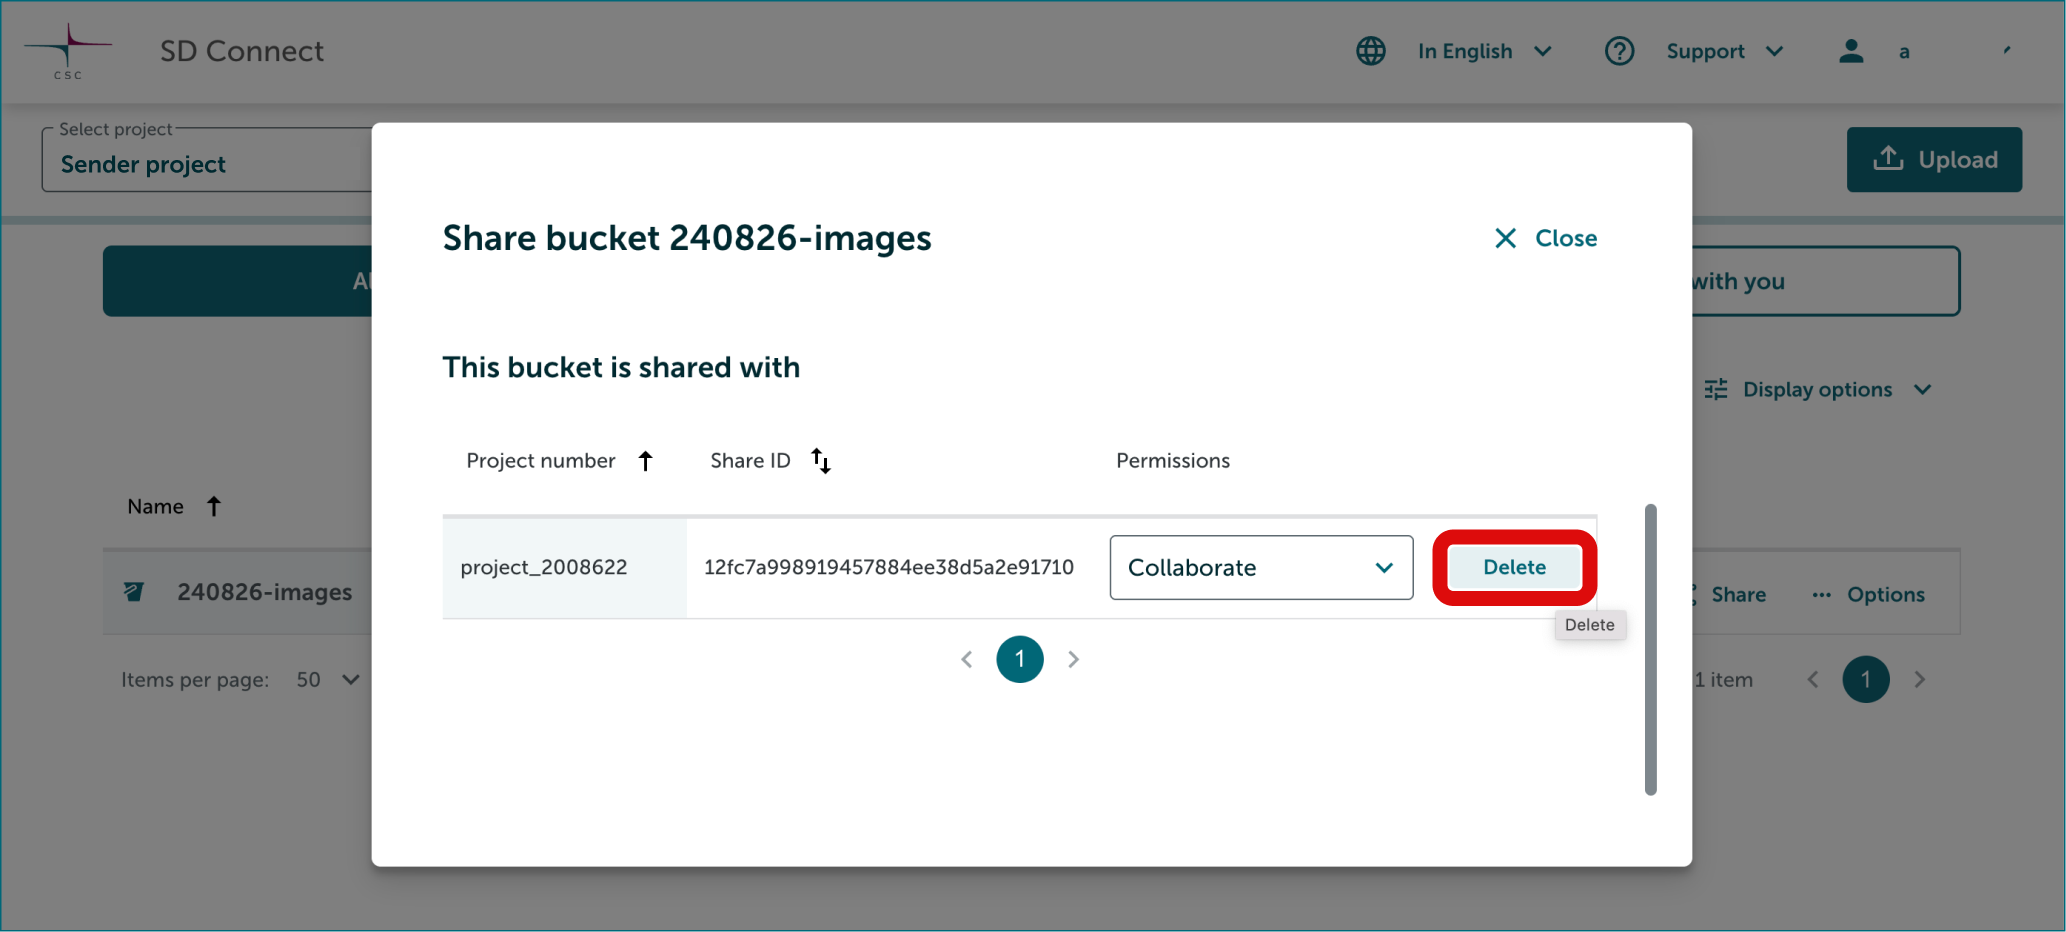
-
A notification will open above the project list. You may have to scroll up to see it. Confirm your choise by clicking Delete Permissions button.