SD Connect Conversion tool
-
Page is under construction
This page and content is under construction and development.
SD Connect has been upgraded to a new version. This Conversion tool allows you to easily convert buckets created with previous versions of the service.
-
If your project has more than 1 TB of data
If your project has more than 1 TB of data, contact servicedesk@csc.fi with topic "Sensitive Data". We plan conversion process together with you.
1. Review buckets in SD Connect
Review your project's buckets together with your (possible) team. We recommend deleting unneeded files and buckets from SD Connect before starting conversion as this shortens conversion time. It also saves resources for other research projects. Team should agree together on the schedule of the conversion.
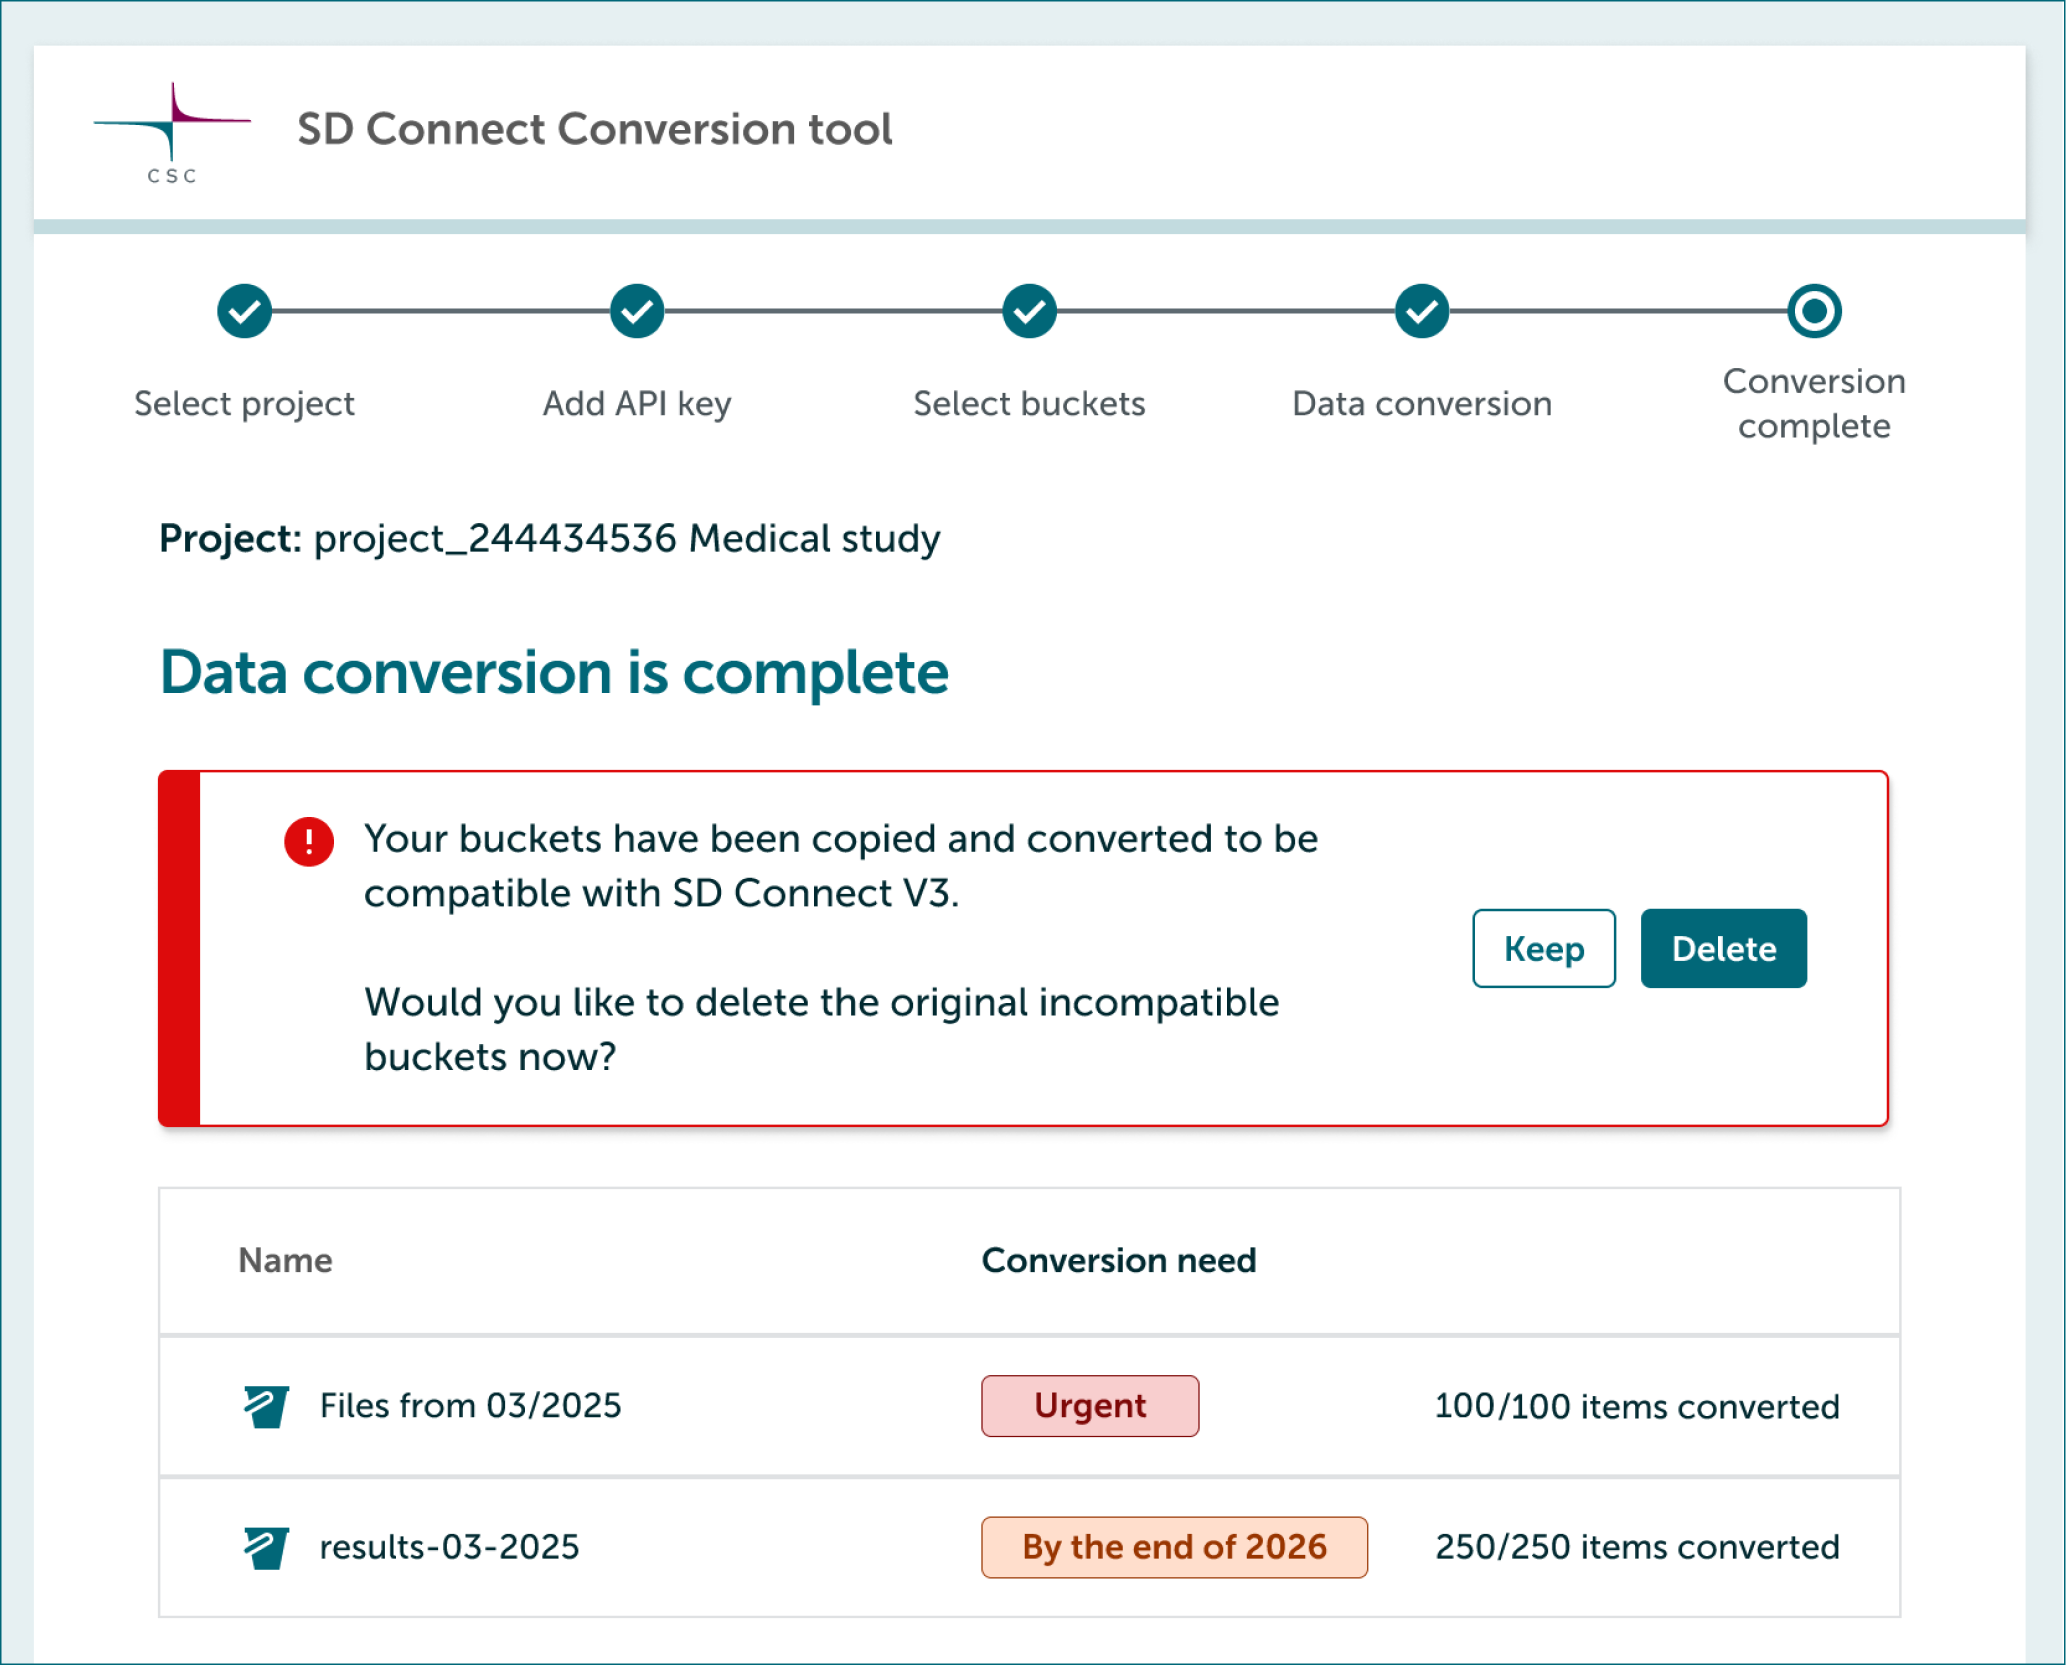
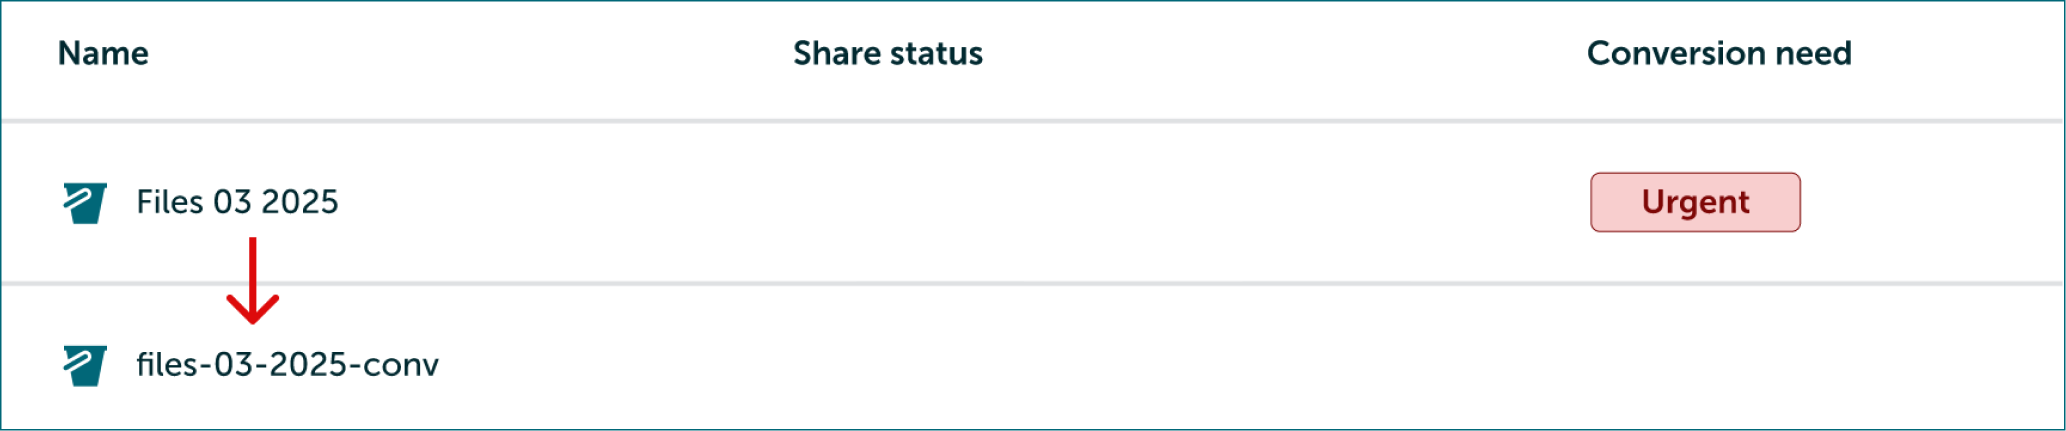
Buckets with incompatible names (Label: Urgent)
In SD Connect UI you will see buckets marked with Urgent label. These buckets seem empty because bucket names are incombatible with new version of SD Connect and they must be converted to regain access to the files. We recommend that you don’t upload files to this bucket to ensure smooth conversion process.
After conversion these buckets will have new compatible names with a suffix "-conv" at the end of the bucket name.
Buckets with files uploaded with previous versions of SD Connect (Label: By the end of 2026)
Buckets marked with label By the end of 2026 contain files uploaded with a previous version of SD Connect. SD Connect v3 shows size of those files as zero. Please convert these buckets or create a new bucket before uploading new files.
Bucket names stay the same after the conversion.

2. Download and install SD Connect Conversion tool
- Links
- Installation guide
3. Using SD Connect Converter tool
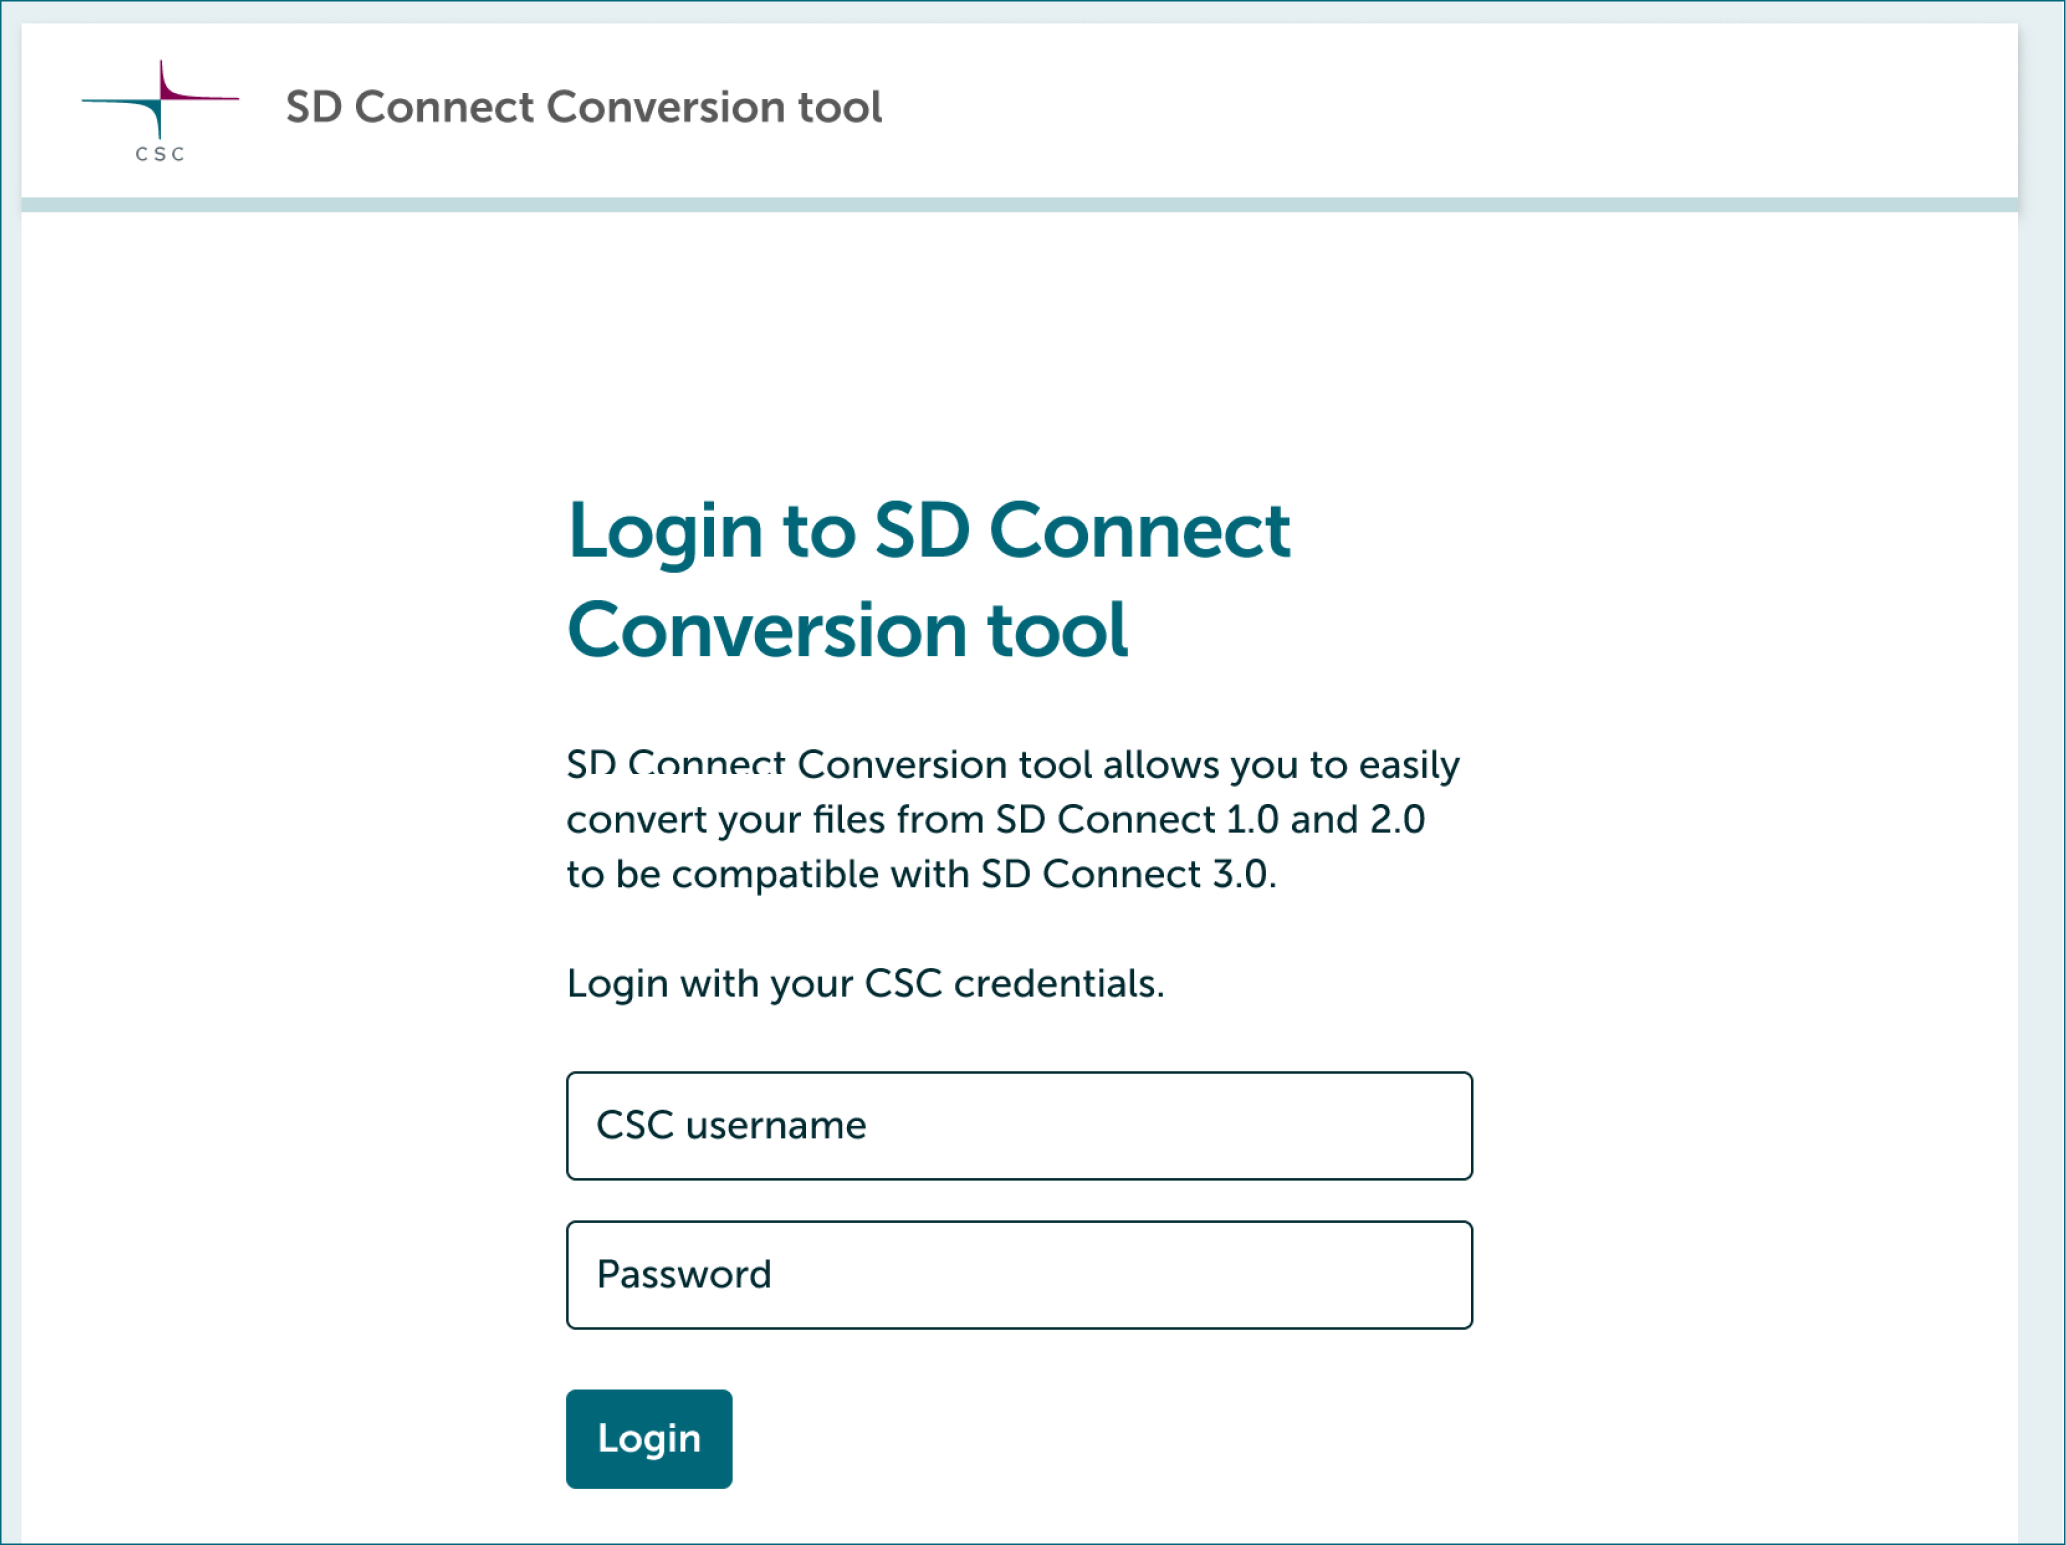
3.1 Login to Converter tool
- Launch SD Connect Conversion tool and login with your CSC credentials.
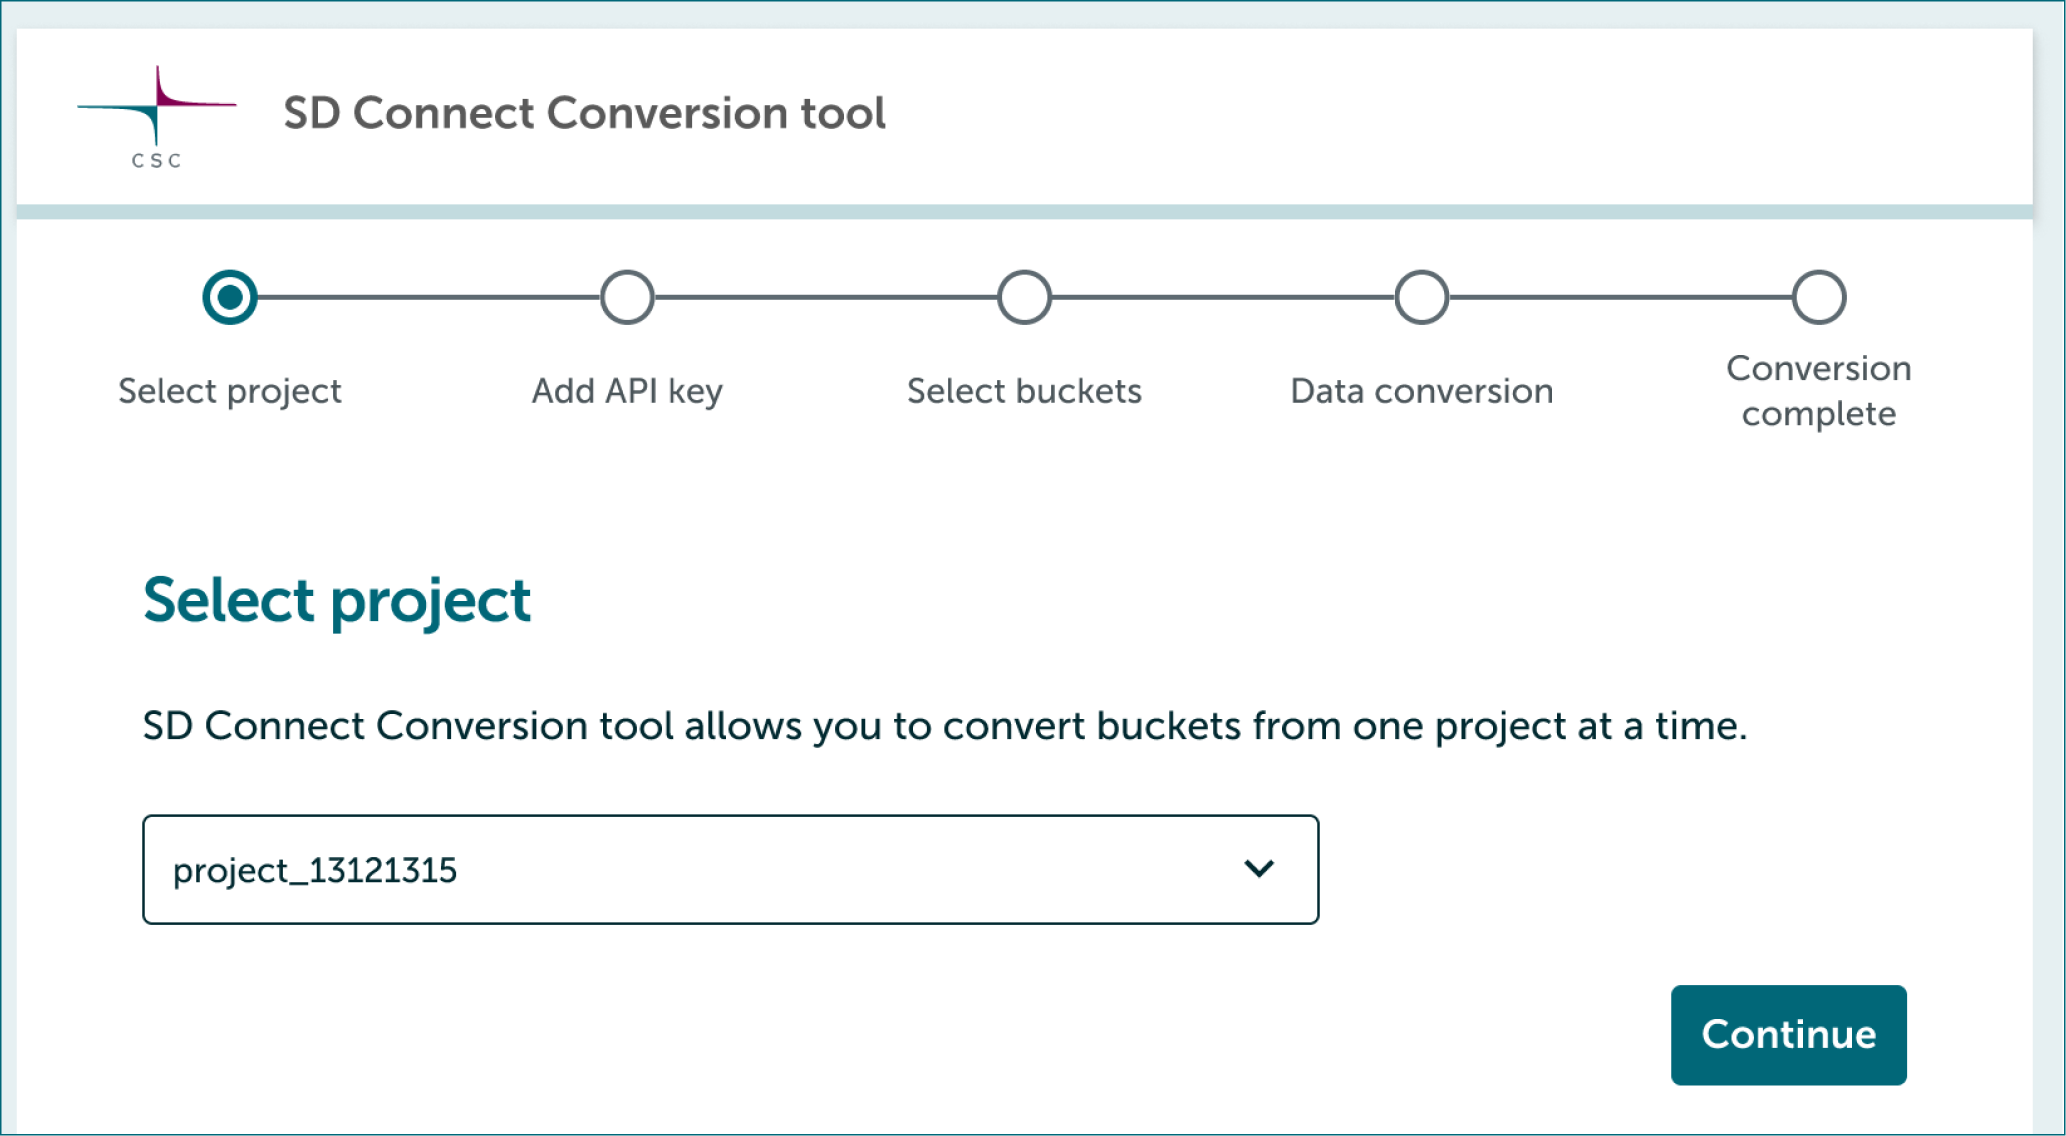
3.2 Select project
- Conversion tool allows you to convert buckets from one project at a time.
- Select first project you will convert and click Continue.
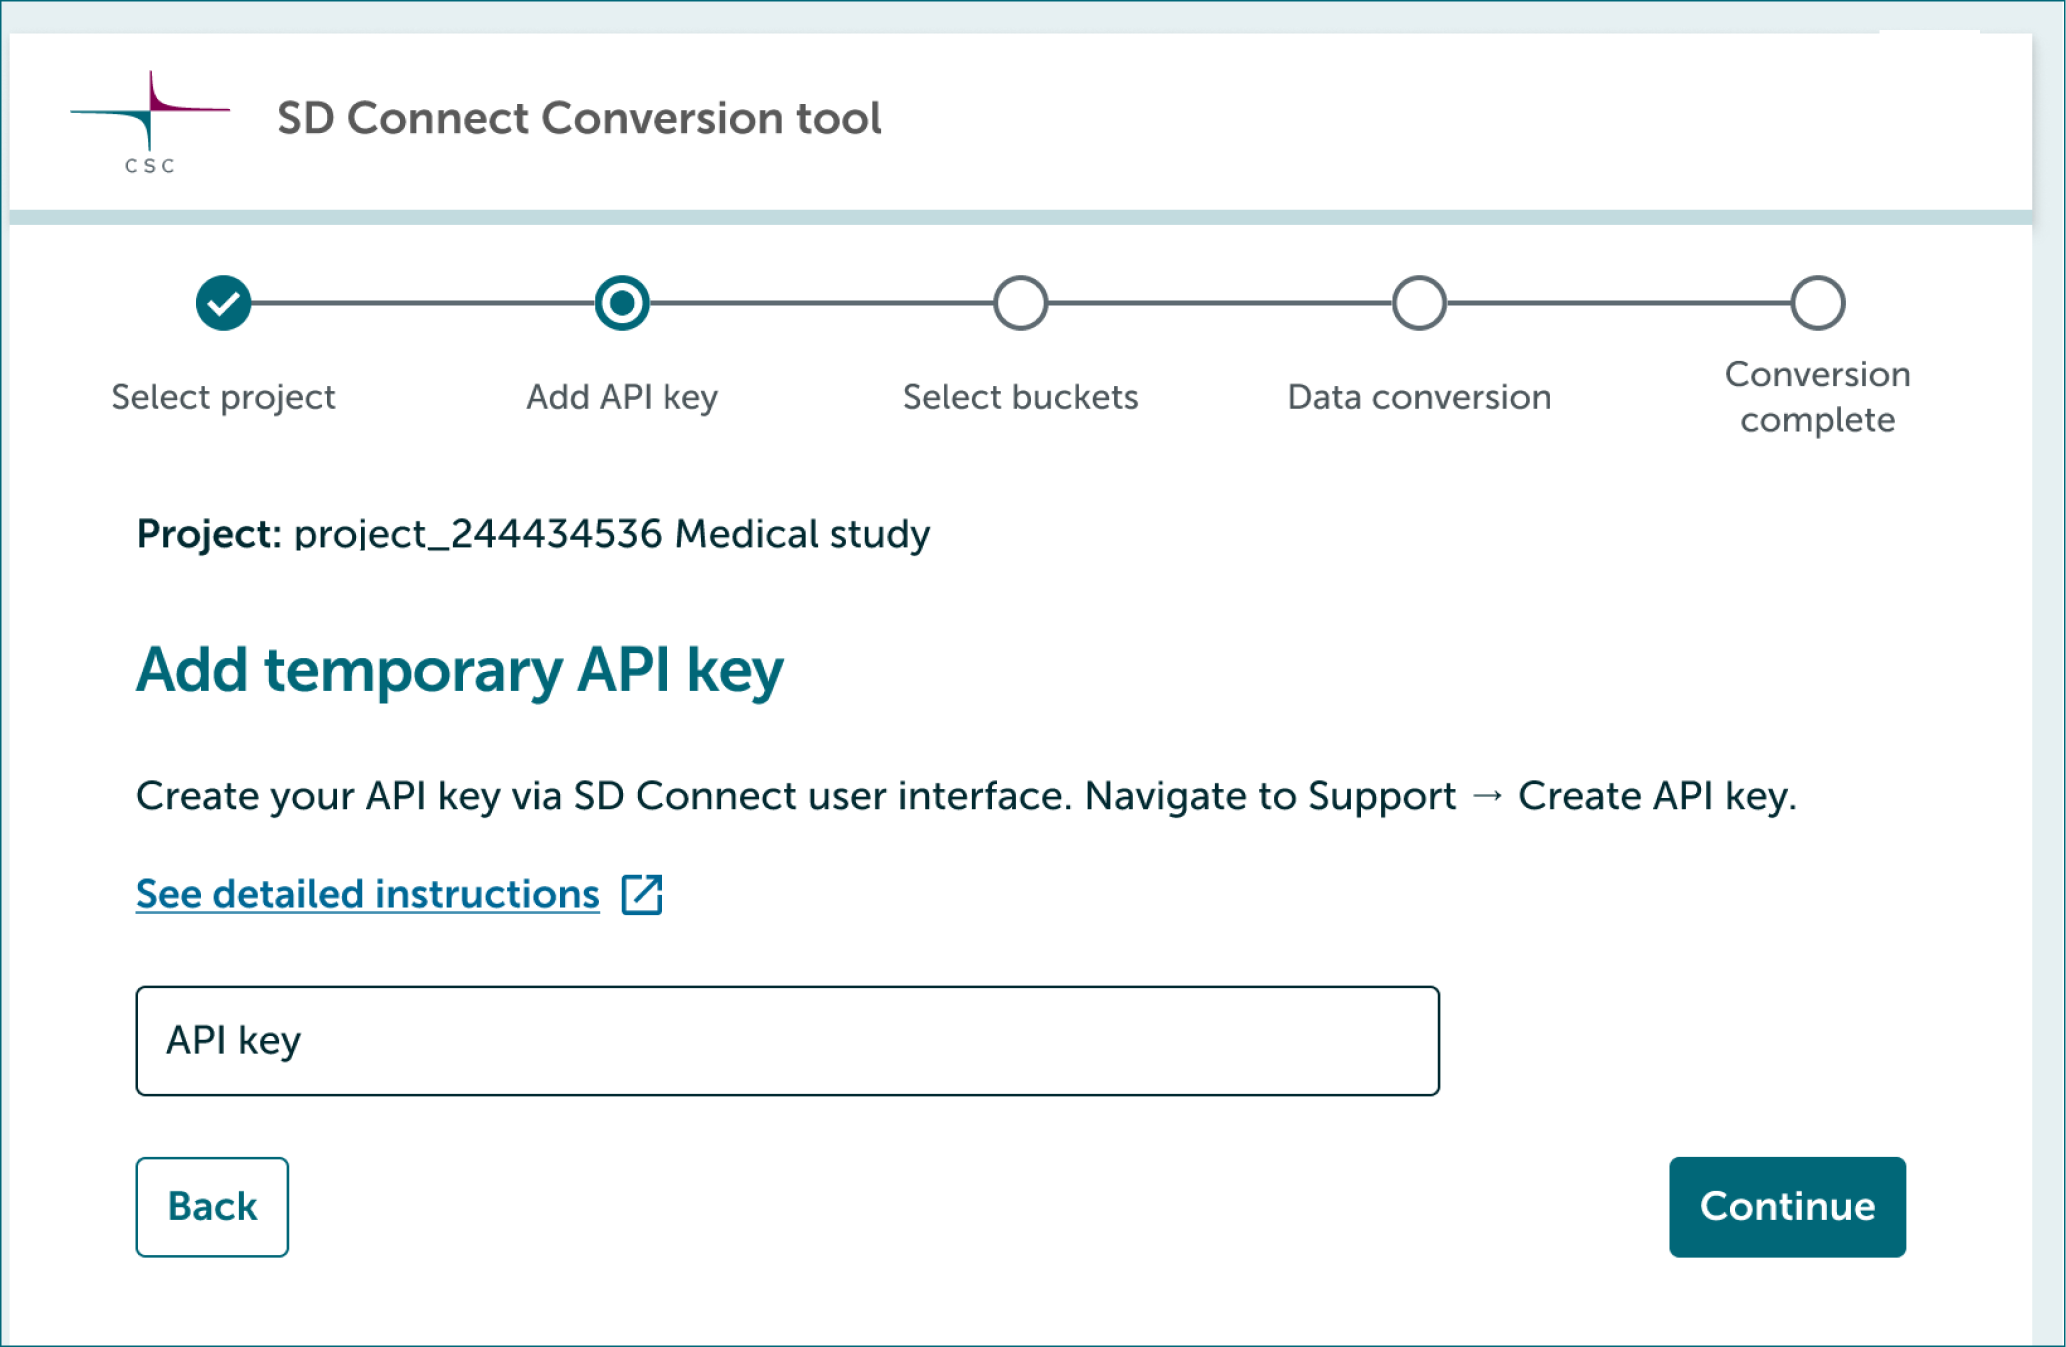
3.3 Add project's temporary API key
- Next Converter tool will ask to add project's temporary API key. Follow instructions below.
How to retrieve to API key
- Log in to SD Connect.
- Select project you want to convert from dropdown.
-
In the top right corner of the web interface, click on Support, then select Create API Token from the dropdown menu.

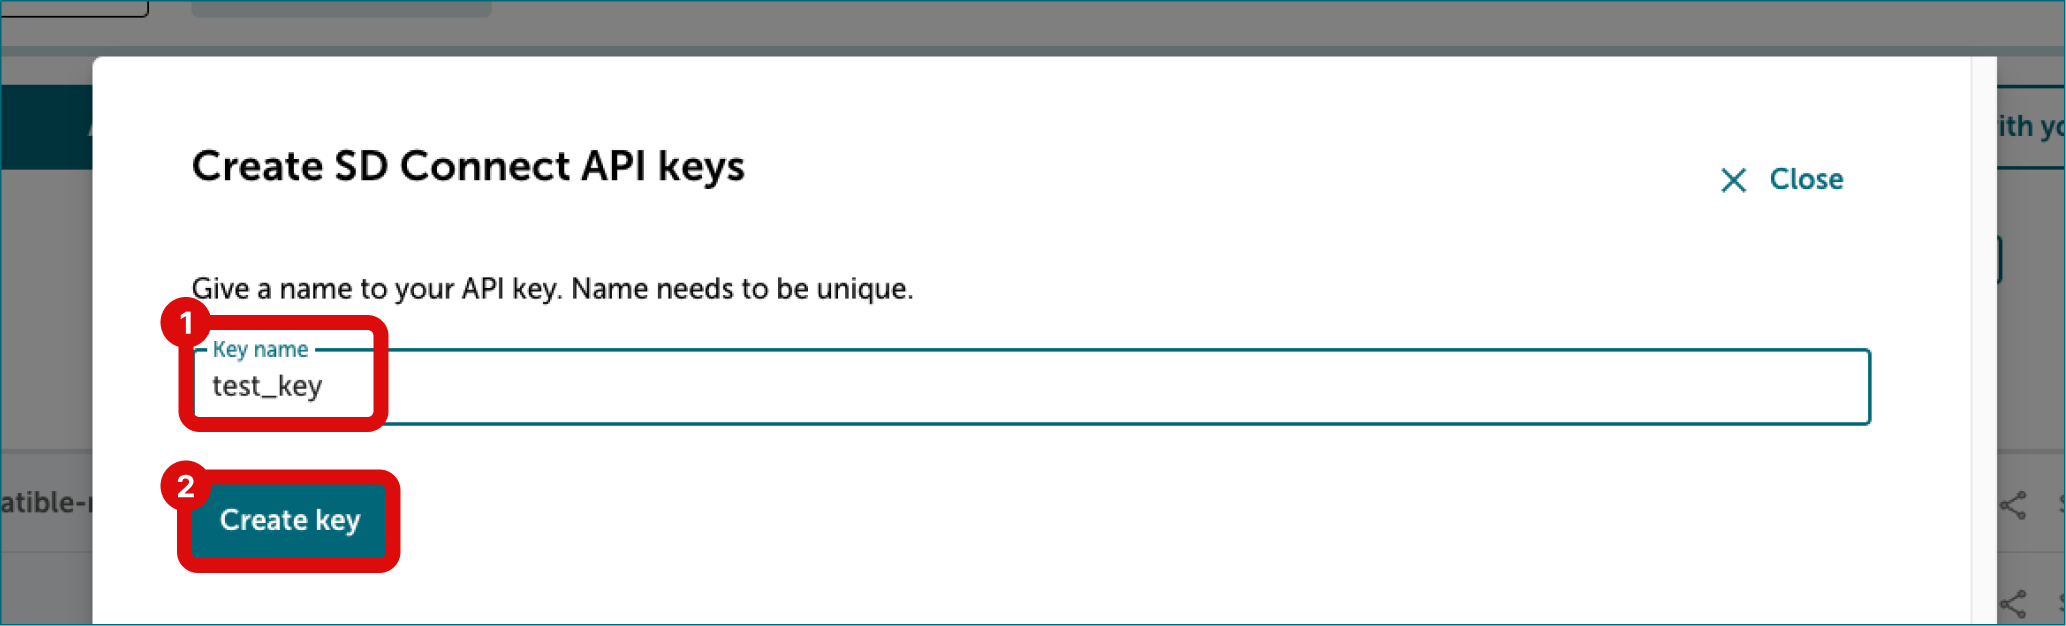
-
In the new dialog, enter a name for your API key. Avoid using special characters in the name. Click Create key.
-
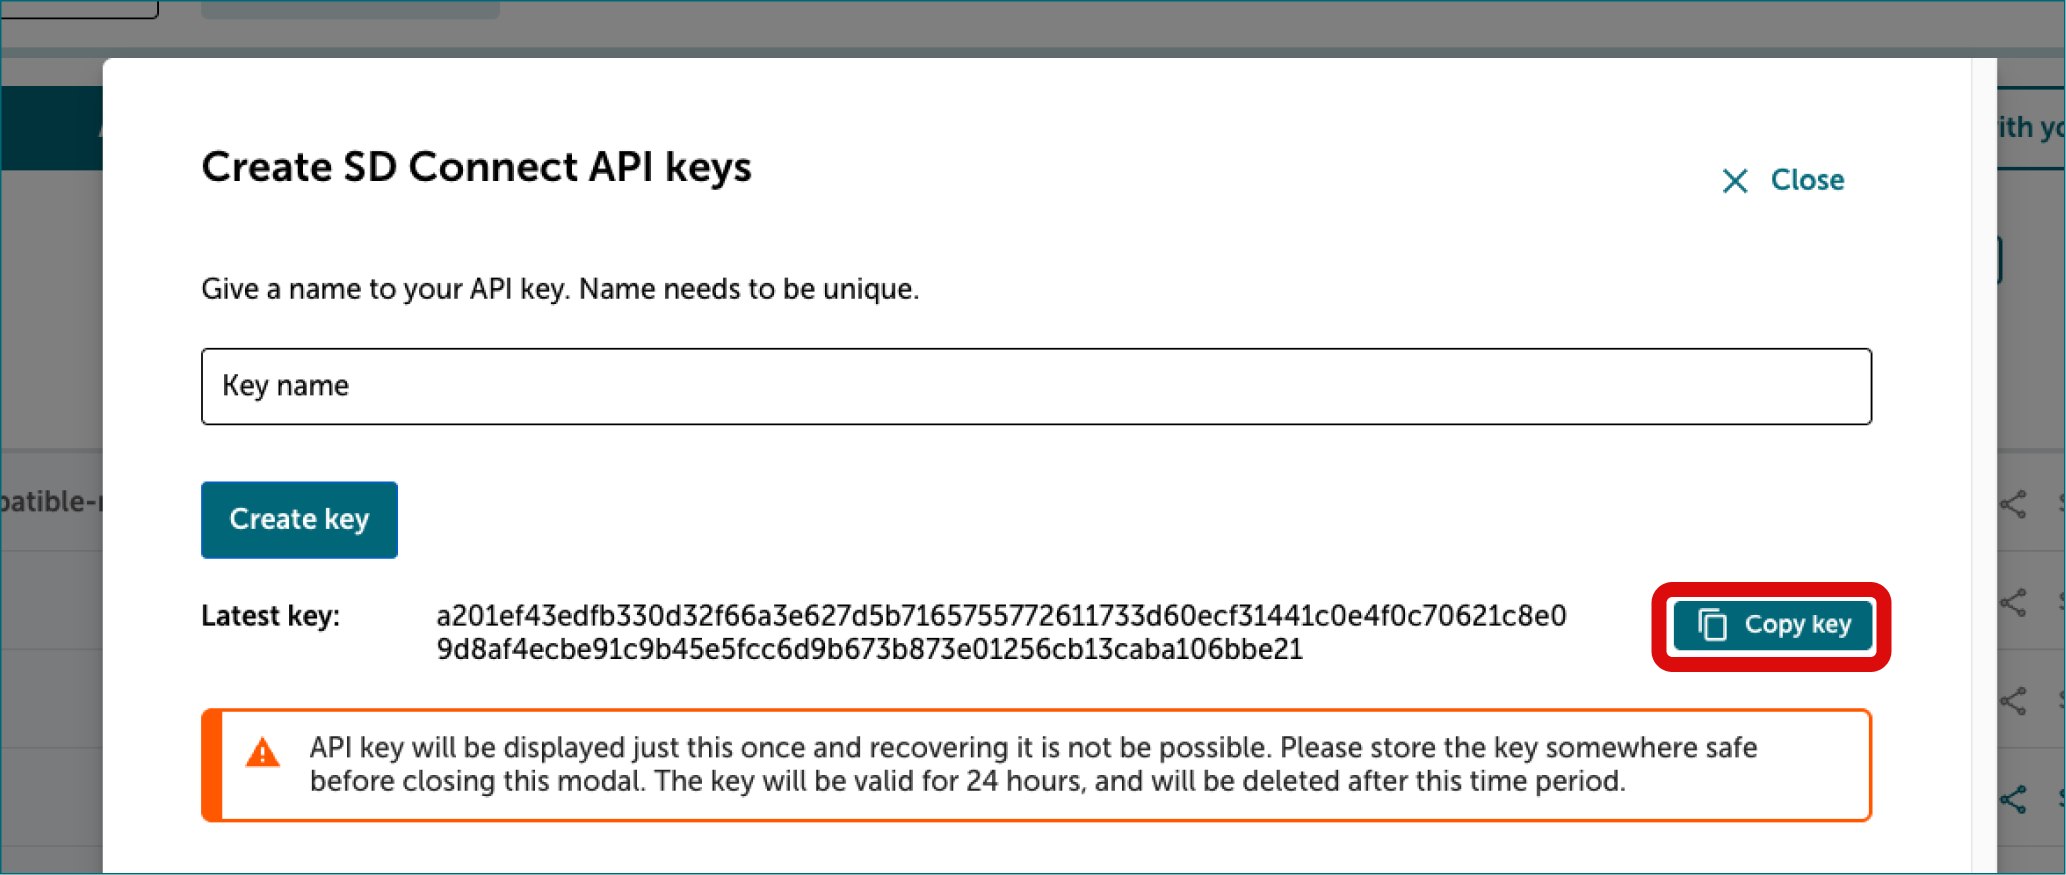
The API key will be displayed only once. Once you see the key, copy it by clicking button on the right side of the key.
-
Paste API key to the field in Conversion tool. The token will be valid for 7 days and will be automatically deleted after this period. If your conversion takes longer than 7 days you need to create a new API key.
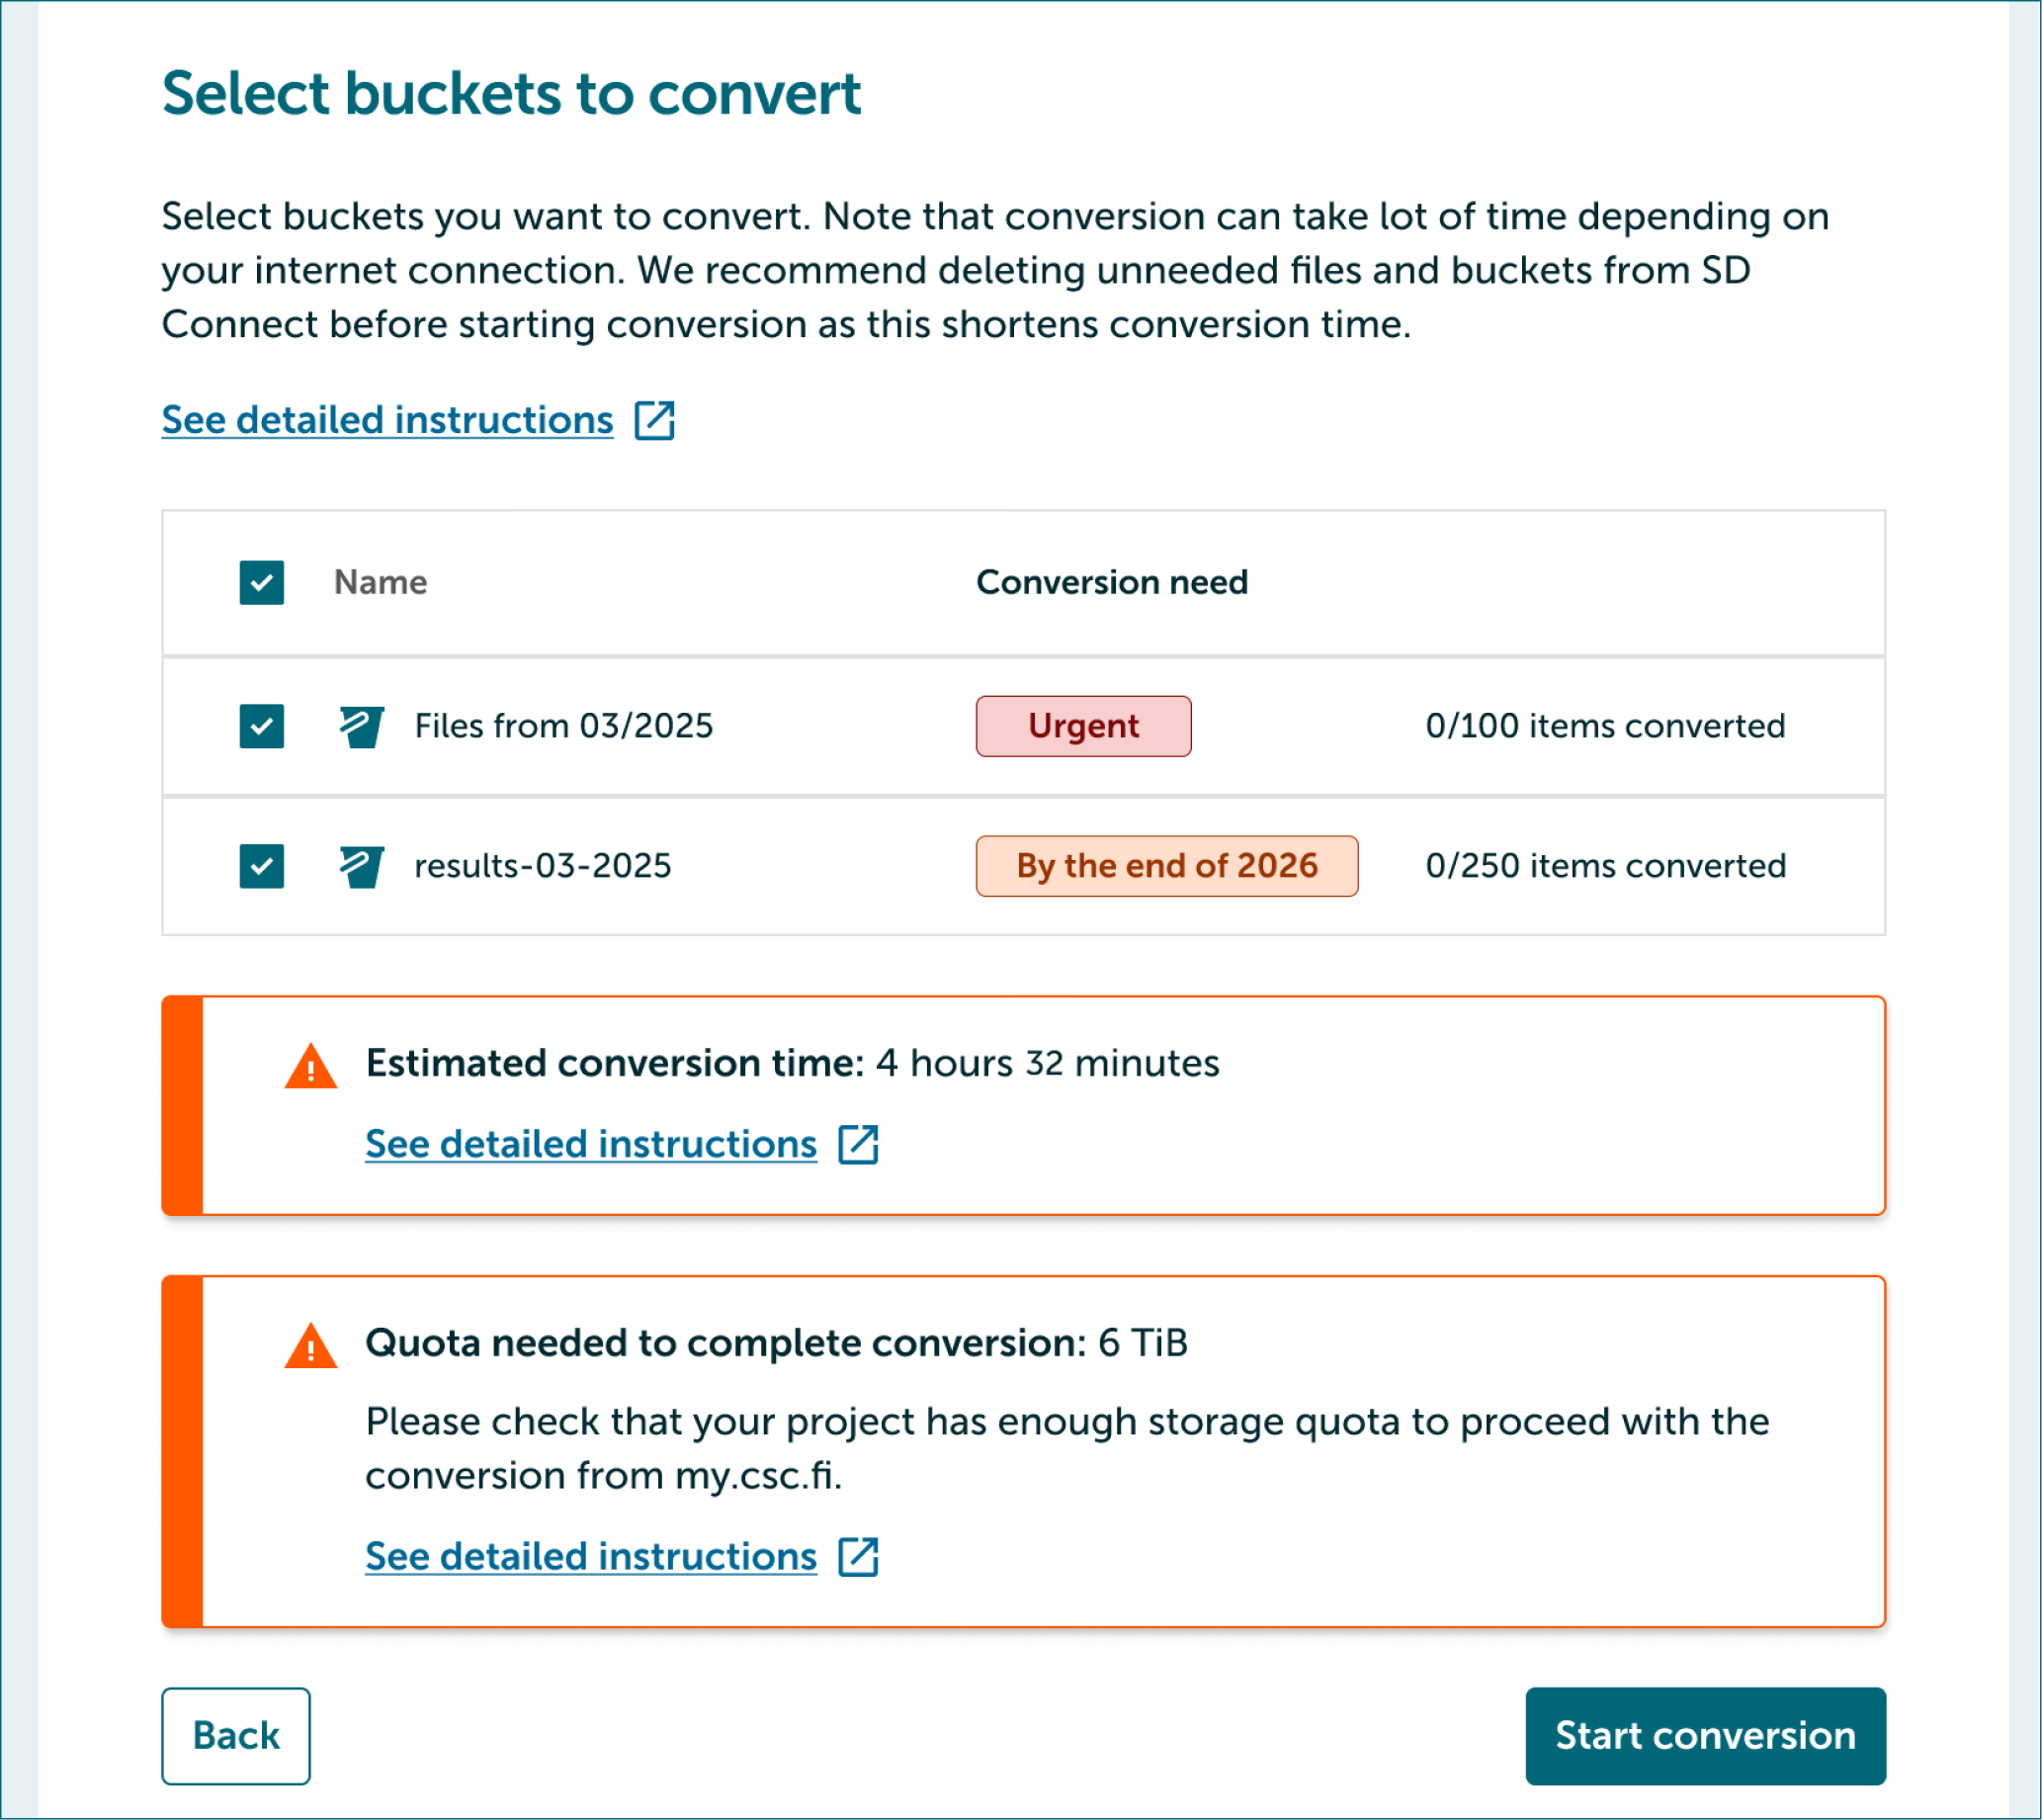
3.4 Select buckets to convert
- Next select buckets you want to convert by clicking checkboxes on the left side of bucket names.
- If the estimated conversion time is very long we recommend using Pouta VM and CLI version of the conversion tool. Link to instructions
- Converter tool tells you the amount of quota that is needed to complete the conversion. Please check the amount you have available from MyCSC and apply for more if needed. Follow instructions below.
How to check quota from my.csc.fi
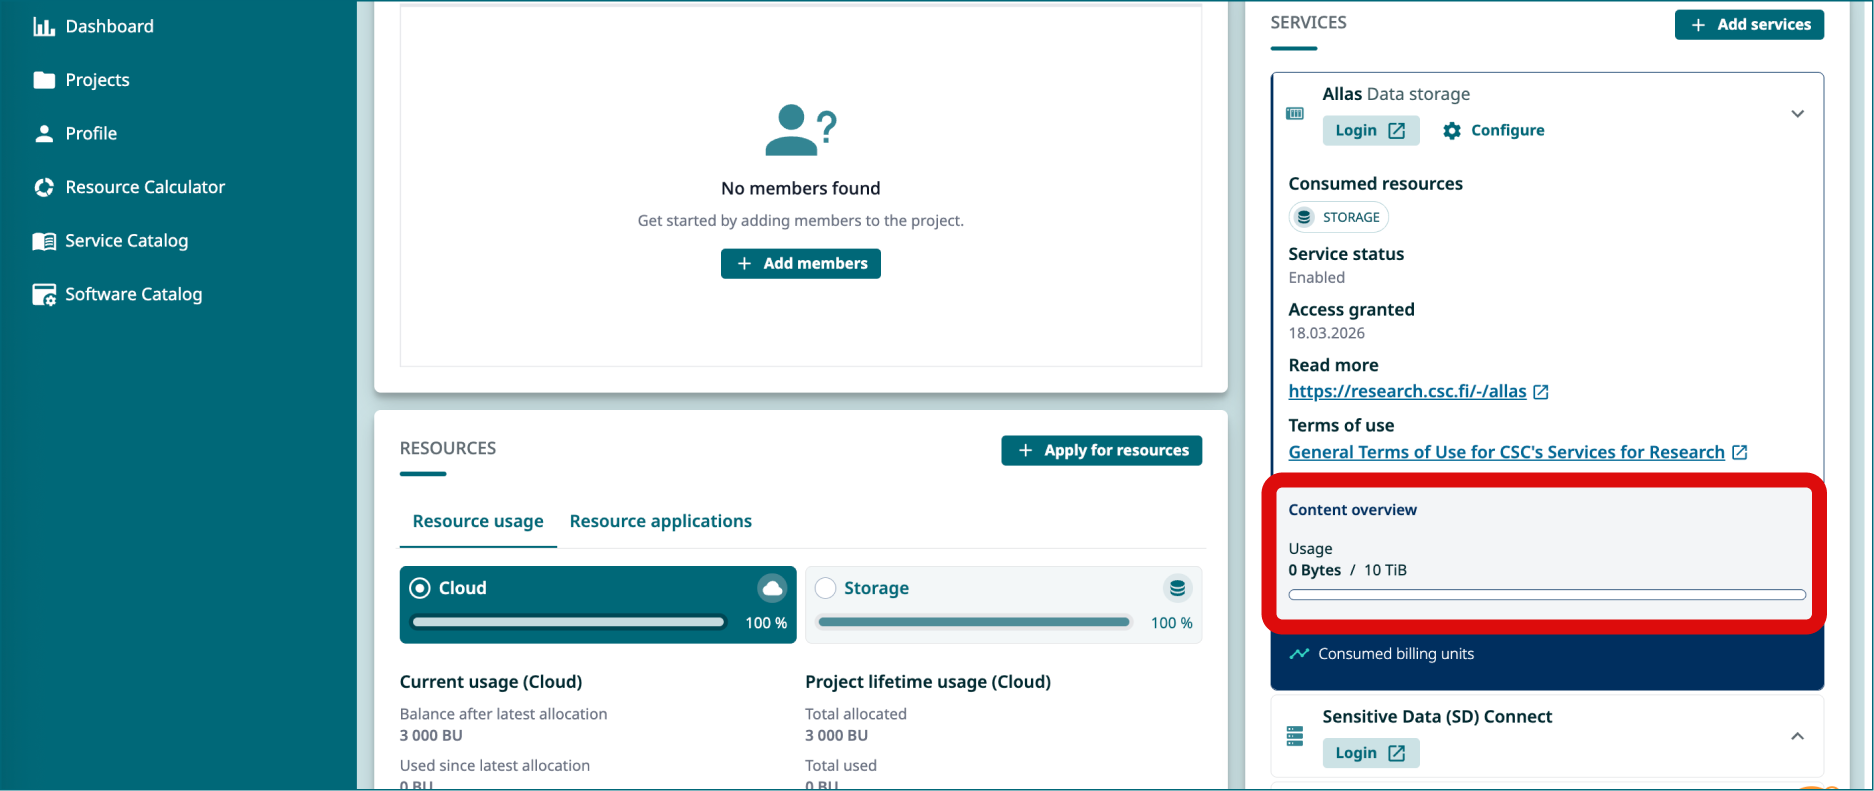
- Log in to MyCSC.
- Go to Projects page (menu on the left or hamburger icon) and navigate to your project's view.
- Scroll down to Services window.
- Click Allas. You can see storage quota usage under Usage at the bottom of the window (for example 6 TB/10 TB would mean your project has 4 TB of quota available).
- If you have less quota available than is needed, apply for more:
- Send email to Service Desk (subject line: Increase Allas quota). It takes few days to process your application.
- You will receive email when your quota is available.
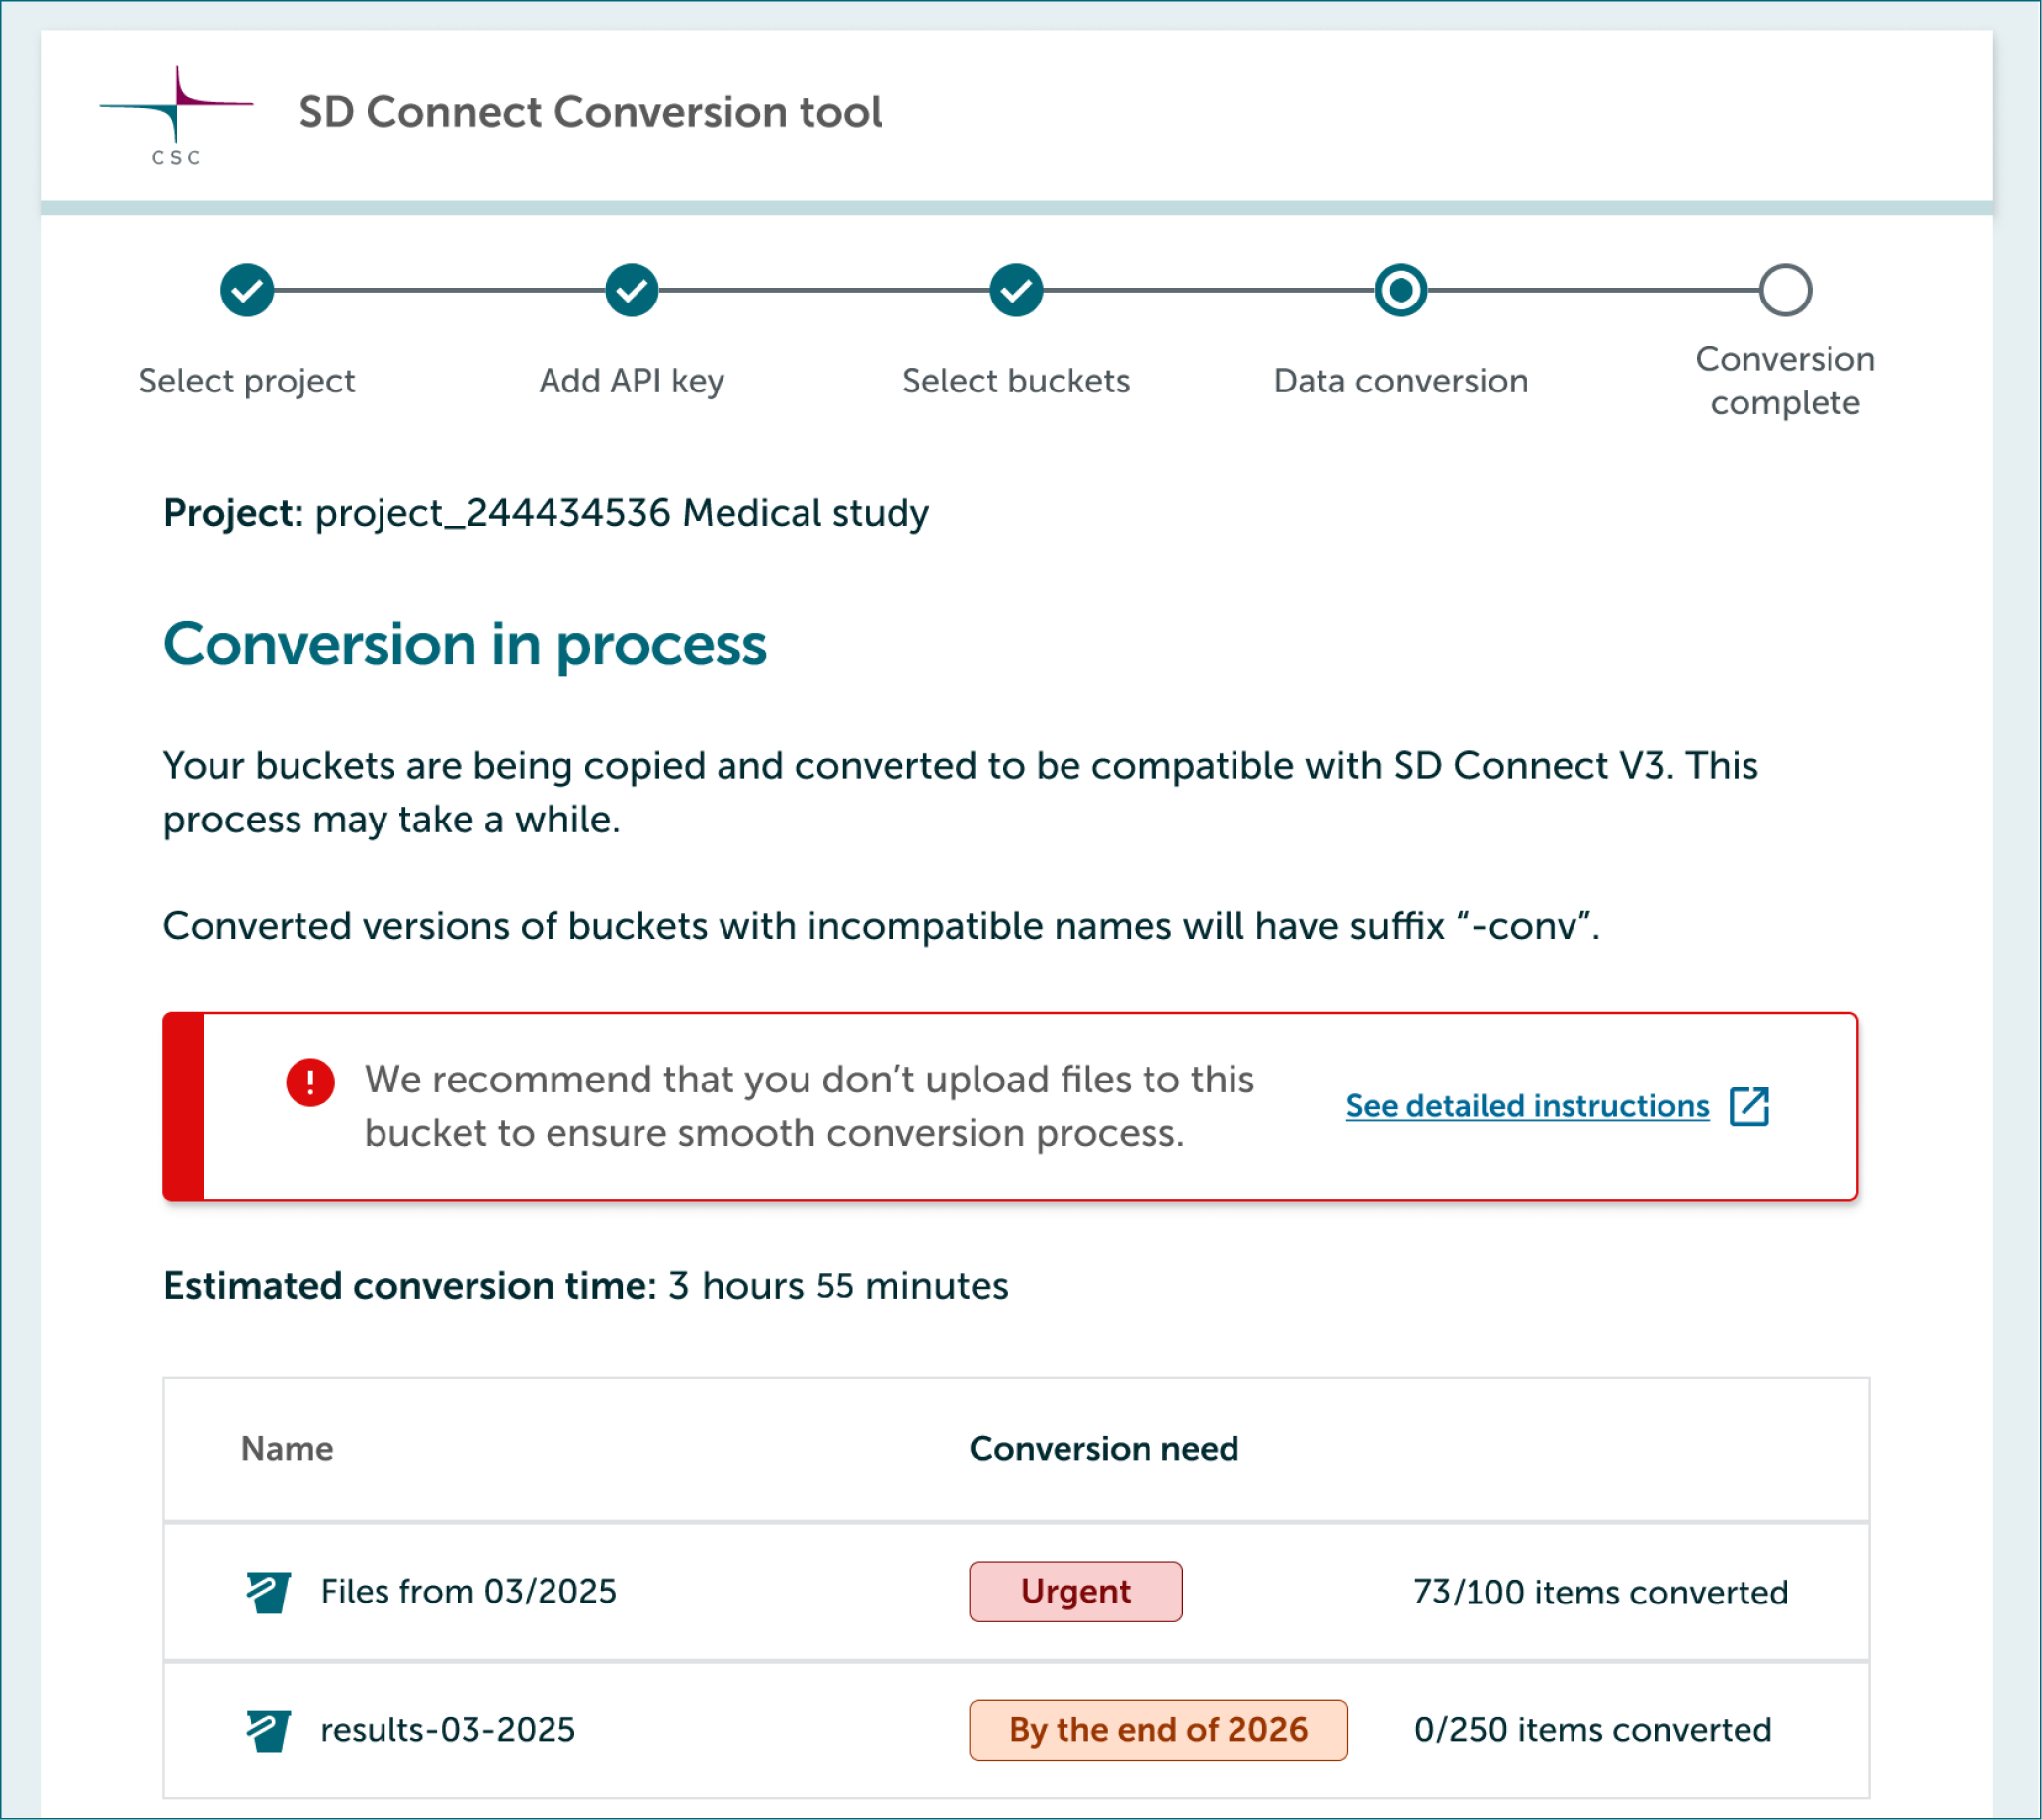
3.5 During conversion
- After selecting buckets you can start process by clicking Start conversion.
- We recommend that you don't upload files to buckets being converted during conversion.
- You can follow the progress from Conversion tool.
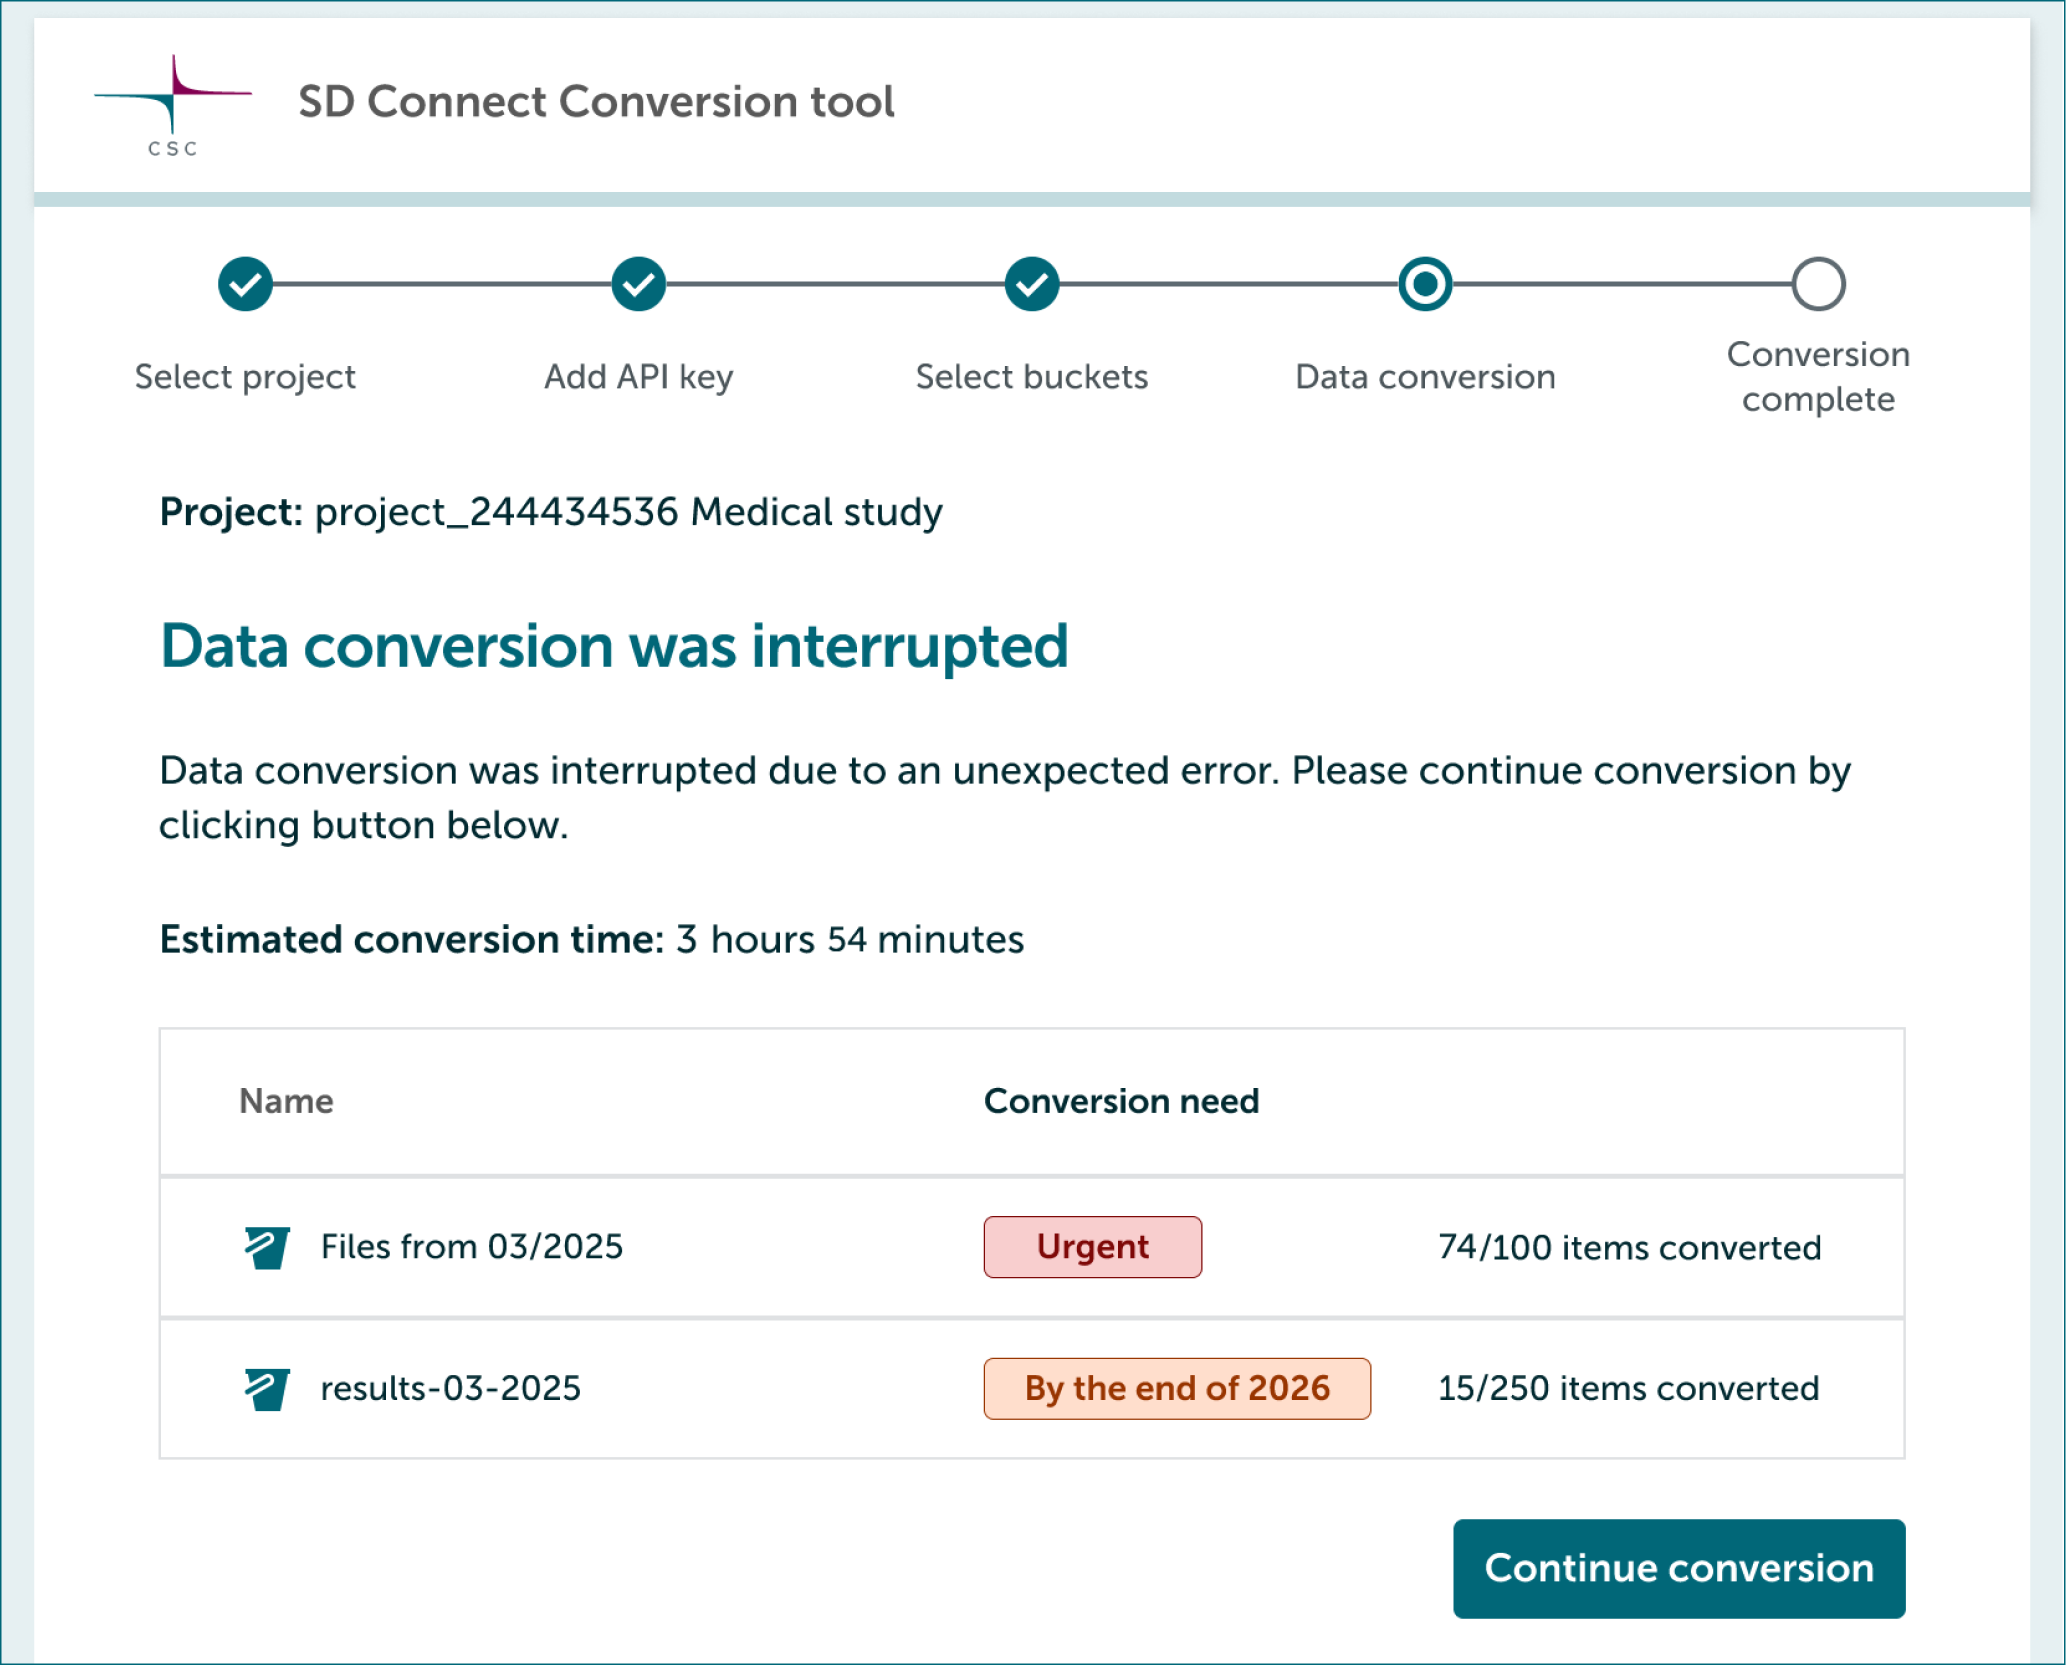
3.6 If conversion is interrupted
Conversion pauses if your laptop runs out of power or loses internet connection. You can continue conversion easily.
- Launch SD Connect Conversion tool and login with your CSC credentials.
- Converter tool will show you that conversion has been interrupted.
- If a new API key is needed, it will be shown in the tool. Follow these instructions.
- Continue by clicking Continue conversion.
3.7 Finish conversion
After conversion is complete Conversion tool will ask you if you want delete original incompatible buckets.